Showing posts with label cacti. Show all posts

Sunday, May 21, 2017

G'Day Mate Card

Good Morning Crafty Friends!!
I'm back to share with you all another adorable little card!
I have gone absolutely bonkers over the little critters in the stamp set! 


How stinkin' cute is the little platypus?? When I first saw him I immediately knew this set was going to be a favorite. And check out the cute little cactus and Kiwi bird... that was it, I'm dead... this set just killed me with cuteness!!

Pink & Main Supplies Used
Koalaty Friend (Pink and Main)
Koalaty Friend Dies (Pink and Main)
Be Brave 6"x6" Paper Pad (Pink and Main)

Others SuppliesUsed
Blueprints 29  (MFT)
Wonky Stitched Rectangle STAX (MFT)
Tim Holtz Distress Markers (Ranger)
Versafine Onyx Black Ink (Tsukineko/ Imagine Crafts)
Mega Runner (Xyron)
Natural Corrugate Stack (DCWV)
140 lb Mixed Media Paper (Strathmore)


To make this card, I first stamped my images from Pink and Main's Koalaty Friend set with VersaFine Onyx Black Ink onto Strathmore Mixed Media Paper.

I like to color more images than I need as a just in case. You know, just in case I mess up or have an accident, or little hands carry them off. LOL

Then I colored these cute little critters with Tim Holtz Distress Markers. 

For the platypus, I used Stormy Sky and Vintage Photo. 
]The cacti were colored Mowed Lawn and Worn Lipstick. 
And the little Kiwi bird was colored in Vintage Photo.

Once I the coloring was done, I die cut the images using Pink and Main's matching Koalaty Friend Dies.


For my card base, I used these awesome patterned papers from Pink and Main's new Be Brave 6"x6" Paper Pad. I framed and layered them onto a standard A2 (4.25"x5.5") corrugated cardstock card base.

The bigger rectangle mat measures 4"x 5.25" and the smaller rectangle measures 3"x 4.25". 
I also used MFT's Wonky Stitched rectangles to layer over the large rectangle mat and Blueprints 29 to layer over the smaller rectangle.

I stamped my little sentiment on the little flag, also from the Blueprints 29 set.

I used foam adhesive to pop up my images and adhered them to the front of my card.

Then finally added a twine bow topped with an orange button.

And here is my finished card...
I cannot get enough of this little platypus!! And the kiwi bird is the perfect little sidekick to any of the cute animals from this set.

Hope you enjoyed this quick and easy card today.

Until next time...
Happy Crafting!!
~Mitsy

**Disclaimer**
This site contains affiliate links. Making a purchase through these links helps support this blog at no extra cost to you.

Saturday, February 11, 2017

No Prob Llama


Hello Crafty Friends! 
I'm back with my good friends at DCWV today! I am absolutely giddy about all their new paper lines that have been filling the shelves of Joann Craft store across the U.S! They have really out done themselves with this release! And I am head over heals in love and tickled over their new NO PROB LLAMA STACK!!!

This stack is full with bold color and tons of foil!
And...
Lots & lots of cacti and lla-a-a-a-a-a-a-a-mas!!!!
I am so in love with this stack that I immediately had to create something with it! So I decided to make a easel style card.

Supplies Used
No Prob Llama Stack (DCWV)
Stephanie Barnard's Circle Stand-Ups Card (Sizzix)
Border Die- Stephanie Barnard's Elegant Stand-Ups (Sizzix)
Stephanie Barnard's Succulents & SucculentsTWO Dies (Stamps of Life)
Mega Runner (Xyron)
Distress Inks- Weathered Wood, Antiqued Linen, & Seedless Preserves (Tim Holtz/ Ranger)
3D Dots (Ek Success)

 
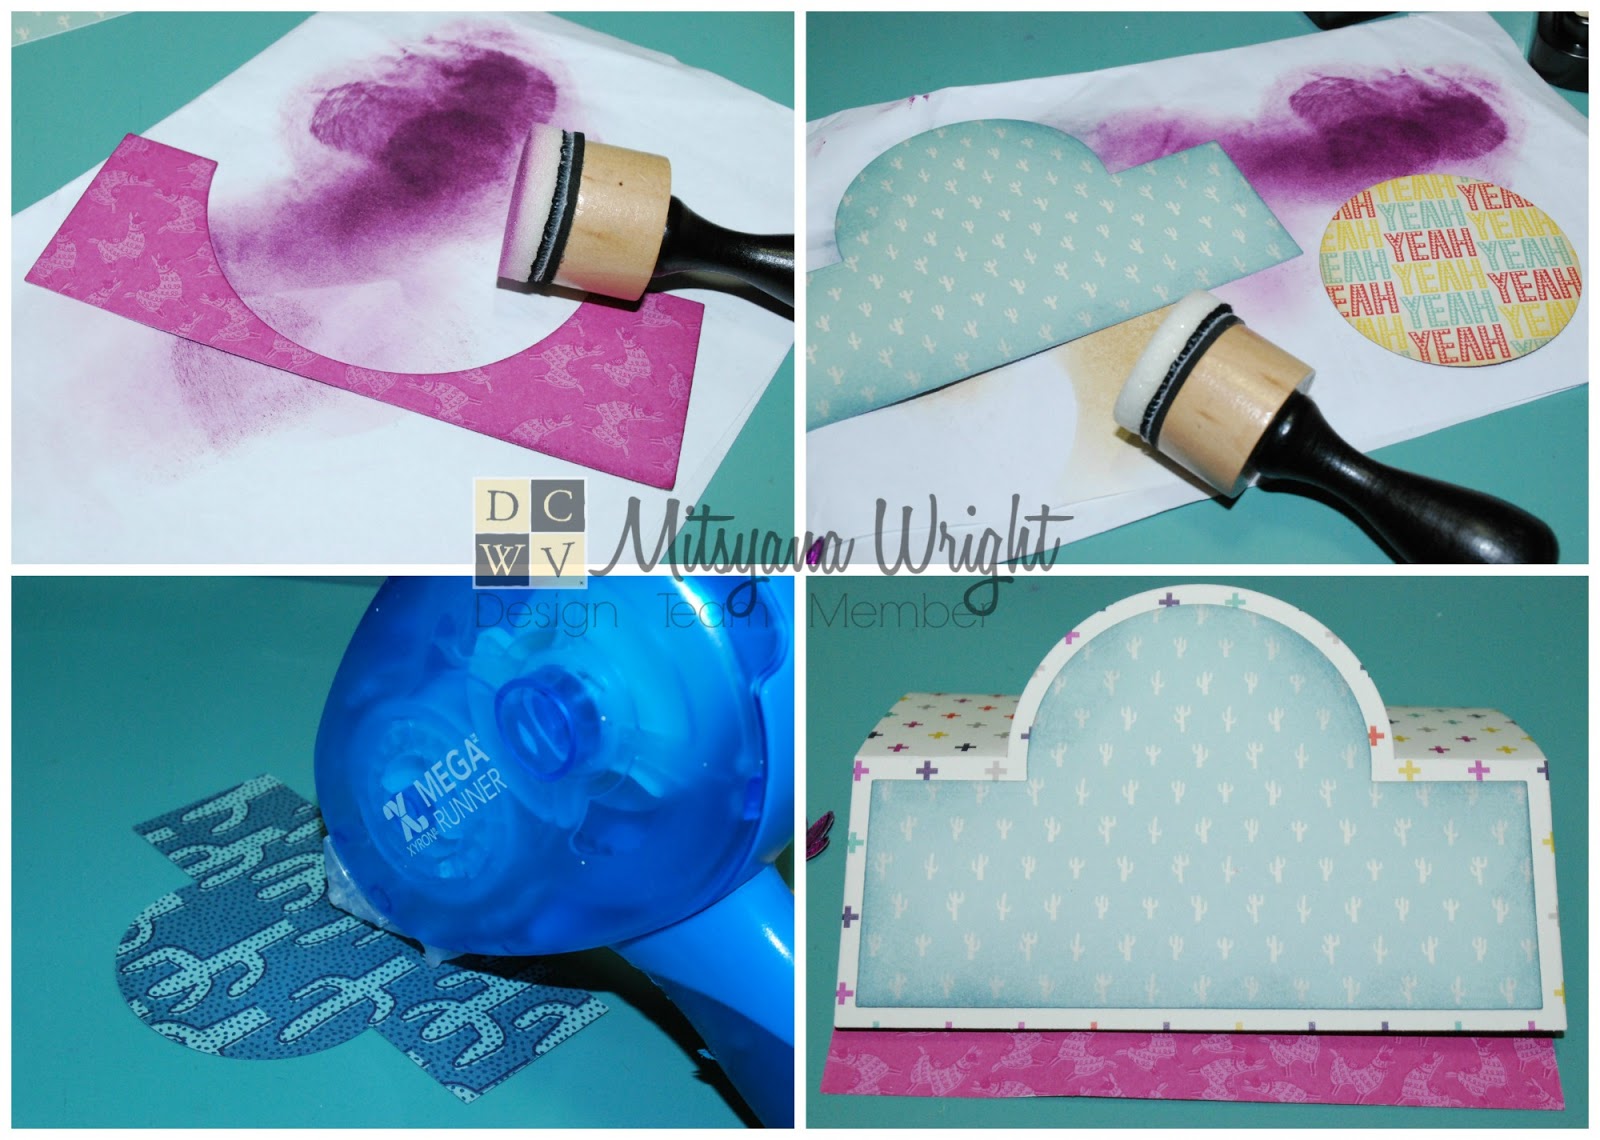
First, I cut my paper down to 6"x 12" pieces so that it can fit into my die-cut machine. Then I die-cut the card base and mat pieces from coordinating patterned paper.

I used my mini blending tool and inked the edges of my die-cut pieces.

I used my Xyron Mega Runner to adhere my panels onto my card base.

Then, folded my my card base on the score lines.

I added foam adhesive to the back of my circle die-cut and set it to the side.

I die cut cacti from green striped paper using the prickly cacti from my succulents and succulentsTWO die sets.

I found a sheet of cut-outs from the No Prob Llamas Stack and filled with different lamas, cacti, journaling tags, and sentiments. I found a tag with this cute lama and sentiment. I cut it out and separated the sentiment.

I kept the foiled cacti attached to the llamas, added tiny glitter enamel dots to my sentiment, then added foam adhesive to the back of both.

I attached all my element to my card front. Placed the circle in the center, layered the ferns on top that, then the llama in front of those. Added a cactus to each side and my sentiment in the bottom center. It created the most adorable desert landscape!

I finished the bottom flap with a simple border from the Elegant Stand-Ups die set.

Final here is my finished card...

This card is full of dimension!! I pulled some of the ferns forward so they stem and leaves are growing from behind the llama, as if he was standing under a shrub.

All the dimension and the foiled accents really makes the card pop!!

This was such a fun card and I can definitely see myself making tons and tons of llama themed everythings!!

I hope you all enjoyed my project for the day!

Until next time...
HAPPY CRAFTING!!
~Mitsy


Monday, January 30, 2017

Happy Everything!

Hello Crafty Friends!!
It's been a long month and I'm finally getting back to my normal crafting routine. So I decided to perk things up with a bright and cheerful card with lots of warm colors. We've had nasty weather off and on here in Texas and I wanted to make something "HAPPY"!!


For today's project, I decided to use a paper stack that always puts a smile on my face...

It is full with lots of bright colors, florals (not much flowers blooming around here lately), and lots of fun and whimsical patterns!

Other Supplies Used
Autumn Leaves Mini Stack (DCWV)
Stephanie Barnard's Drop-Ins Card Front Dies (Sizzix)
Die- Succulents (Stamps of Life)
Die- Succulents TWO (Stamps of Life)
Mega Runner (Xyron)
Color Pencils - 057, 059, & 101 (Spectrum Noir)
Odorless Mineral Spirits
Blending Stumps
3D Dots (EK Success)
Hemp Twine
Glossy Accents
2way Glue Pen

I started of by die cutting these adorable cacti out of green striped paper from DCWV's Autumn Leaves Mini Stack. I used the same striped paper for all three types of cacti. I die cut one each of the prickly cacti and two of the leafy.

Instead of inking my edges I used color pencils and a blending solution to add depth to my die-cuts. These papers are very high quality and didn't smudge, run, or warp while I did this technique.


I also shaded the die cut pots as well. outlining first with color pencil then going over and blending with the blending solution (aka- odorless mineral spirits). 

I added foam adhesive dots to make the lips of the pots pop. Then added foam adhesive to the back of the cacti as well to make them three dimensional.

Next, I worked on the card base.

I started with these premade A7 Black Cards.

Then I matted it using this colorful honeycomb paper from the Hello Darlin Stack. It was one of the sheets from this stack that immediately grabbed my attention. It is so bright and playful! If that doesn't just scream HAPPY I don't know what does!! In this same stack I also found this sunny yellow paper and a fresh green paper that went together beautifully!

I cut each piece at the following measurements...

Honeycomb: at 4-3/4" x 6-3/4"
Black mat: 4" x 6"
Yellow: 3-3/4"x 5-3/4"
Green: 1-1/2"x 5-3/4"

I shade the edges of the yellow and green papers. Then used my Xyron Mega Runner to layer the all together.

I thought this "Happy Everything" sentiment drop-ins die went perfectly with the HAPPY feel of my card. So I cut out two copies of this die cut, one in black and one in white. Then used a glue pen and attached them together, shifting it slightly to make the black look like a shadow. 

I attached all my die cuts to my card front and pulled my little leafy plant stem forward for added dimension.

Lastly, I attached little bows of twine to the front of each pot.


And here is my finished card...


Here is a close-up...


I really love how this card turned out! And it really does make me HAPPY just looking at it.

We need more BRIGHT and CHEERFUL in our everyday lives...
And this was an awesome start to what I know is going to be an awesome week!

Hope you all find your HAPPY. 
Mine was in my craft room!!