Showing posts with label Stand-ups. Show all posts

Saturday, February 11, 2017

No Prob Llama


Hello Crafty Friends! 
I'm back with my good friends at DCWV today! I am absolutely giddy about all their new paper lines that have been filling the shelves of Joann Craft store across the U.S! They have really out done themselves with this release! And I am head over heals in love and tickled over their new NO PROB LLAMA STACK!!!

This stack is full with bold color and tons of foil!
And...
Lots & lots of cacti and lla-a-a-a-a-a-a-a-mas!!!!
I am so in love with this stack that I immediately had to create something with it! So I decided to make a easel style card.

Supplies Used
No Prob Llama Stack (DCWV)
Stephanie Barnard's Circle Stand-Ups Card (Sizzix)
Border Die- Stephanie Barnard's Elegant Stand-Ups (Sizzix)
Stephanie Barnard's Succulents & SucculentsTWO Dies (Stamps of Life)
Mega Runner (Xyron)
Distress Inks- Weathered Wood, Antiqued Linen, & Seedless Preserves (Tim Holtz/ Ranger)
3D Dots (Ek Success)

 
First, I cut my paper down to 6"x 12" pieces so that it can fit into my die-cut machine. Then I die-cut the card base and mat pieces from coordinating patterned paper.
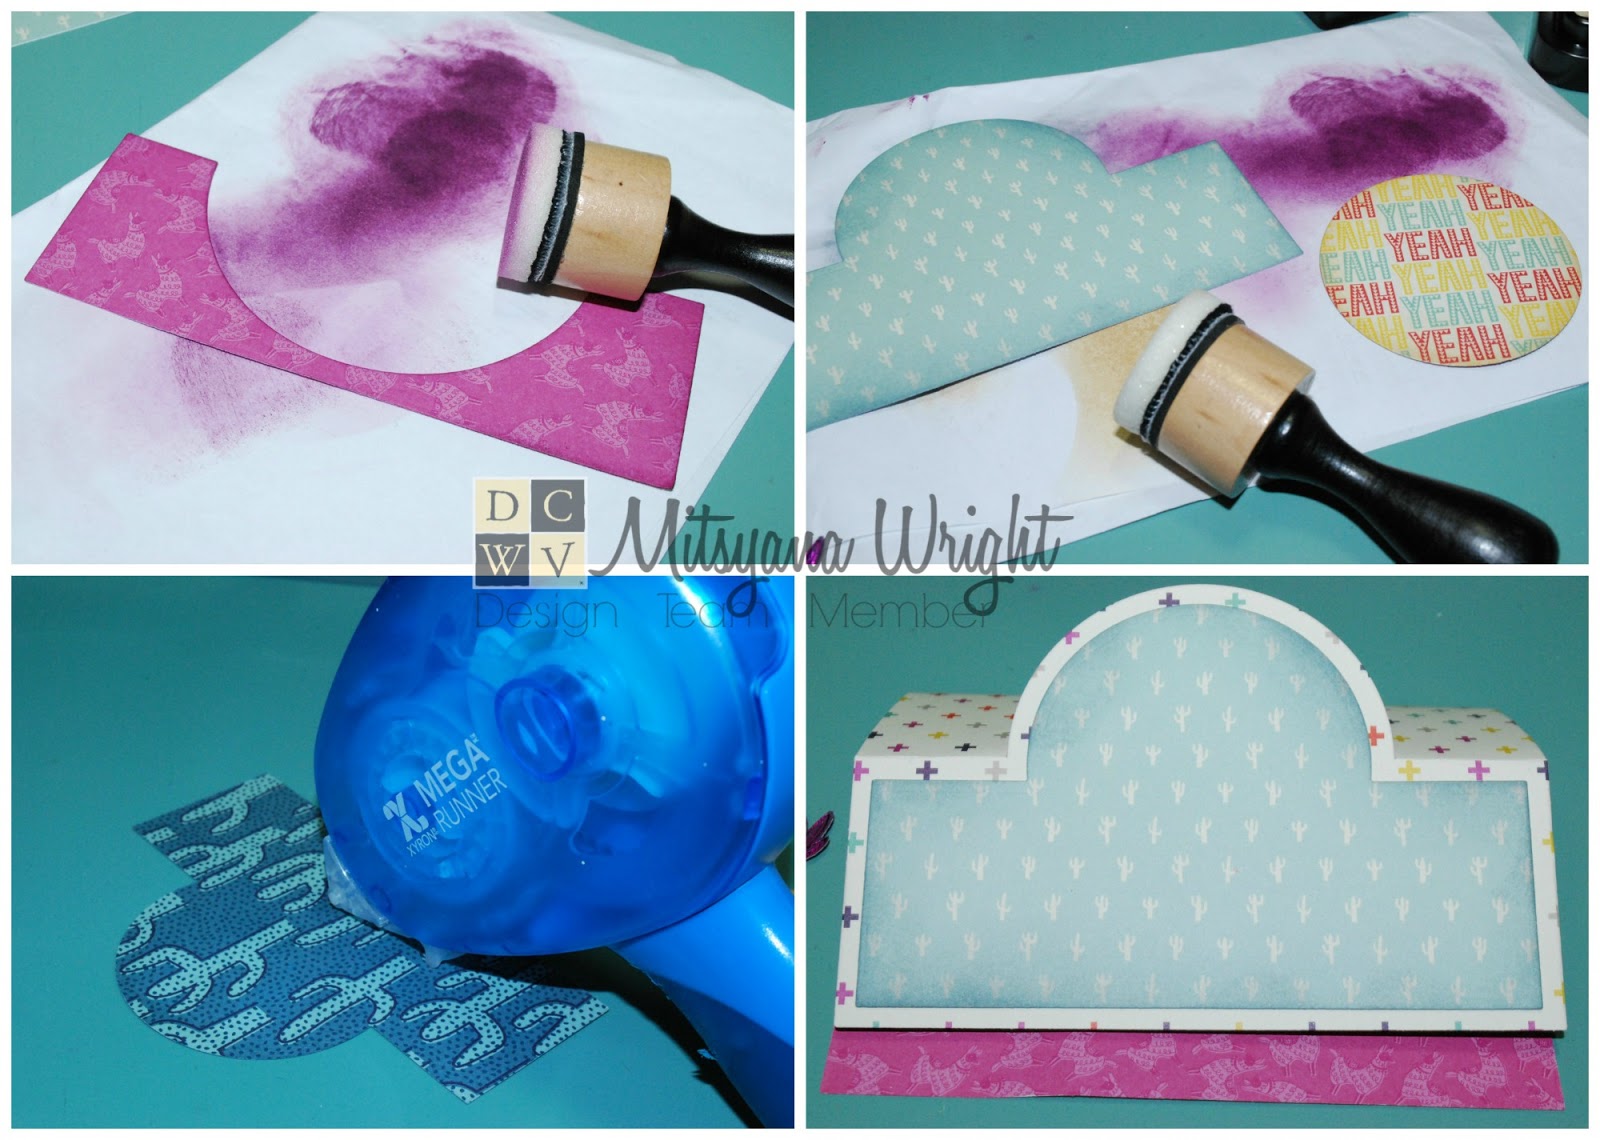
I used my mini blending tool and inked the edges of my die-cut pieces.

I used my Xyron Mega Runner to adhere my panels onto my card base.

Then, folded my my card base on the score lines.

I added foam adhesive to the back of my circle die-cut and set it to the side.

I die cut cacti from green striped paper using the prickly cacti from my succulents and succulentsTWO die sets.

I found a sheet of cut-outs from the No Prob Llamas Stack and filled with different lamas, cacti, journaling tags, and sentiments. I found a tag with this cute lama and sentiment. I cut it out and separated the sentiment.

I kept the foiled cacti attached to the llamas, added tiny glitter enamel dots to my sentiment, then added foam adhesive to the back of both.

I attached all my element to my card front. Placed the circle in the center, layered the ferns on top that, then the llama in front of those. Added a cactus to each side and my sentiment in the bottom center. It created the most adorable desert landscape!

I finished the bottom flap with a simple border from the Elegant Stand-Ups die set.

Final here is my finished card...

This card is full of dimension!! I pulled some of the ferns forward so they stem and leaves are growing from behind the llama, as if he was standing under a shrub.

All the dimension and the foiled accents really makes the card pop!!

This was such a fun card and I can definitely see myself making tons and tons of llama themed everythings!!

I hope you all enjoyed my project for the day!

Until next time...
HAPPY CRAFTING!!
~Mitsy


Tuesday, May 31, 2016

Sweet Dreams Unicorn


Supplies Used
Stephanie Barnard's Royal Stand-Ups Card Die (Sizzix)
Magical Unicorns (Pink and Main)
Sweet Dies (Pink and Main)
Sweet Dreams Baby (Pink and Main)
Sweet Dreams Baby Dies (Pink and Main)
Cardstock- DIY Project Stack Flowers, DIY Projects Stack Stencils, Jewel Toned Textured (DCWV)
White Cardstock (Bazzill Basics)
Mega Runner (Xyron)
Momento Tuxedo Black Ink (Imagine Crafts/ Tsukineko)
VersaMagic Night Sky (Imagine Crafts/ Tsukineko)
Striped Grosgrain Ribbon (Paper Mart)
Markers- JG2, LG5 and Colored Pencils- Nature-053, 057; Primaries- 034, 068 (Spectrum Noir)
White Gel Pen , Glitter Gel Pen (Sakura)
3D Dots (EK Success)
Chalklets (EK Success)
Ordorless Mineral Spirits
Blending Stumps
3D Lacquer
Blue Matte Button

I cut my base using Stephanie Barnard's Royal Stand-Ups Card die out of green striped cardstock from DCWV's DIY Projects Stack- Flowers. Then die-cut the coordinating panels from polka-dot cardstock from the DIY Project Stack Stencils. The ornate shape in the center was also included with the card die and was cut out from bright blue cardstock from DCWV's Jewel Toned Textured Stack. I added stitch lines and stars to the background using a  white gel pen.


I used Pink and Main's Magical Unicorn set for the unicorn.


The unicorn was stamped on white cardstock using Momento Tuxedo Black ink. Then colored with Spectrum Noir alcohol marker in LG5 (body) and marker JG2 (mane). Then for extra detail and depth I shaded with colored pencils 057 (body) and 053 (mane). I also colored the inner ear with 034 color pencil. For the cheeks I shaded with hot pink dry chalk and added highlights with a white gel pen. 

For the border strip at the bottom of the card, I cut a strip of bright blue jewel toned cardstock measuring 1.25" x 5.5" and layered a strip of polka-dot cardstock measuring 1"x 5.5". I used my Mega Runner to attach the two strip together as well as attach the ribbon down the center.

I topped with a basic bow and attached both the bow and the button center with 3D lacquer. Then hand drew stitch lines with a white gel pen.


I cut the word "Sweet" twice. Once ,from a light green cardstock, and again from the same striped green cardstock I used to cut the card base. Then I used a glue pen to layer the two die-cut words, offsetting them just a bit , creating a shadow. Again, adding highlight with a white gel pen.


I die-cut several clouds from the Sweet Dreams Baby Dies for my unicorn to stand on and shaded them by outlining them first with a blue (Spectrum Noir color pencil 068) and then blending the color out using odorless mineral spirits and a blending stump. I die cut an additional cloud to stamp the word "dreams", and positioned under the word "Sweet" to read out "Sweet dreams".


And, here is my finished easel card...


This set has to be hands down my all time favorite to date!! I just can't get enough of these UNICORNS!!!

#UnicornLover #UnicornAddict # IBelieveInMagic #80sKid

Hope you all enjoyed today's project!!
Until next time...
HAPPY CRAFTING!!
~Mitsy