Showing posts with label strawberries. Show all posts

Thursday, April 27, 2017

Very Berry Strawberry Journal

Hello Crafty Friends!!
I had such great feedback from my Berry Train case and card set that I thought that the paper would make for a gorgeous journal too! Since I had one last sheet of my precious strawberry paper left, I went for it! And I am sure glad I did... It turned out beautifully!!


Supplies Used
Eileen Hull HeARTfelt Journal Die (Sizzix)
Chipboard
Strawberry Die Set (Stamps of Life)
Stitched Circle Dies (Pink and Main)
Tim Holtz Distress Stain- Bundles Sage (Ranger)
Tim Holtz Distress Paint-Candied Apple (Ranger)
Tim Holtz Distress Ink- Walnut Stain (Ranger)
White Gel Pen (Sakura)
Jumbo Metal Bookplate
Metal Embellishment (Momenta)
Metal Leaves - Mechanicals (Prima Marketing)
Flower Lace- Trim - Magnolia (Prima Marketing)
Paper Flowers- Flower Clippings- Love Clippings (Prima Marketing)
E6000
Self-adhesive Rhinestones
Twine

I love that these journals are so incredibly easy to make! Once you got the basic concept of how the come together assembly is a breeze and you can decorate as you please. GO WILD!! Your only limited by your imagination!!
 When making my journals I always cut my material down to size so they can easily be die cut. For the Eileen Hull Journal dies I start by cutting to pieces of chipboard and 4 pieces of patterned paper down to 6" x 10". 

I run my patterned paper (patterned paper side UP) into my Xyron Creative Station Lite to apply adhesive to the back. I do this for the back and front of my chipboard so that one side is covered in those pretty strawberries and the other with the black with white polka dots. Do this step for both chipboard pieces.

Once, the pieces are covered, I place one covered chipboard onto just the book panel of the die. Whichever side you want to be on the outside of the book should be face down (towards the foam and blades) on the die. In the last picture above, the polka dots shown, will be on the inside of my book when assembled. Again, do this for both covered panels.

Because we attached the paper to the chipboard first, all the crease lines are already pre-scored. 

Apply strong liquid adhesive to last segment of the spine on one of your book panels. Over lap the last segment of the other panel and line up all three pre-cut holes.

Make sure your covers are straight so they close nicely. Then put aside and leave to dry. I like to clip my books at each end to ensure the dry properly aligned. 

I decided to die-cut some strawberries, stems, and leaves from chipboard to go with the whole strawberry theme of my paper. These will go on my cover and on my inserts inside.

I cut the strawberries out using Stephanie Barnard's Strawberry Dies. I painted the strawberries with Tim Holtz's Candy Apple Distress Paint.

I colored the strawberry leaves and stems using Bundled Sage Distress Stain.

I inked the edges of all my pieces using Walnut Stain Distress Ink.

Then glued the stems to the strawberries and drew seeds and highlights with a white gel pen.

For an focal point I die cut a circle from more patterned paper and chipboard. Then ran them through a 3" Sticker Maker and adhered them together. Then ran the piece back through the sticker maker and attached to the front cover of my book.

I used a strong liquid adhesive to attach a jumbo metal bookplate over the circle.

Then attached my strawberry leaves surrounding the bookplate and my lone strawberry over top. The rest of the strawberries were left to add to the front of each insert.

Finally, I attached beautiful Prima lace and flowers over top. Tucking in metal leaves and adding rhinestones onto the tiny flowers. Then added my metal "laughter" embellishment to the center of the bookplate.

I bound my inserts using natural hemp twine. I usually use elastic bands but I think the twine adds to the country chic charm of this book.

And here is the final project...


This projects is so bright and cheery! Who wouldn't be happy receiving this journal as a gift?

I hope you enjoyed this tutorial and it put a smile on your face!!

Till next time...
HAPPY CRAFTING!!
~Mitsy

For other inspirational ideas using Eileen Hull dies, please check out Eileen's ebook...

**Disclaimer**
This site contains affiliate links. Making a purchase through these links helps support this blog at no extra cost to you.

Friday, April 14, 2017

Berry Hello Gift Set


Hello Crafty Friends! I'm back again with Team Xyron and we are at the tail end of our fabulous week with 1Canoe2 and American Crafts. Today, I have an adorable mini train case box with a coordinating card. 

Supplies Used 
Strawberry Die Set (Stamps of Life)
Stitched Circle Dies (Pink and Main)
Hello Dies (Pink and Main)
Double Stitched Grosgrain Ribbon
Rhinestone Sliders (Dritz)
Chipboard
Liquid Adhesive
Tim Holtz Distress Stain- Bundles Sage (Ranger)
Tim holtz Distress Paint-Candied Apple (Ranger)
Tim Holtz Distress Ink- Walnut Stain (Ranger)
Magnetic Discs
Brads
White Gel Pen (Sakura)

When I saw the Forest Berry paper I fell head over heels for it! I love all things strawberry and I knew I absolutely just had to make something from it.

I started by cutting my paper & chipboard down to 6" wide, Then cutting it again to 8 inches long. These measurements are the perfect size to cover just the main box panels of the die. 

Next, I ran my patterned paper through my Xyron Creative Station Lite. I made sure to face the pattern, that I wanted to use, up. In this case I wanted the strawberries and polka dots.

Then, I peeled and attached onto my chipboard before die-cutting. When die cutting my covered chipboard piece I faced the pattern I wanted to appear on the outside of the box face down toward the blade.

I die cut two of each box panel piece. I folded all the pieces on their score lines. Then added liquid adhesive to the small tabs and adhered to the matching panel piece. To make sure it aligned properly, I used mini clothes pins to hold them in place while the glue dried.

Once the side panels were fastened securely I added liquid adhesive to the top flaps and adhered the top cover. I repeated the last step for the bottom piece as well. It's a perfect fit and aligns perfectly!

I measure out about 2 - 14" piece of double stitched grosgrain ribbon. I wrapped my ribbon around the trunk, starting from the front and working my way to the back and then up and over the top. Then secured in place with liquid adhesive.

Once those strap were dry, I added rhinestone sliders for "buckles" and magnetic discs for closures.

 To make the card, I die cut a strawberry and two leaves from chipboard.

I used distress stain to color the stem of the strawberry and both leaves. Then used a distress paint on the berry.  Chipboard unless treated is very porous and I applied a few layers so I zapped it with a heat gun to speed up the drying time.

I inked the edges using Walnut Stain distress ink and a mini blending tool. then glued the stem to the strawberry. Then added details with a white gel pen.

For the card base I used the gingham side of the "Rosewater" paper  to make a A2 (4.5"x5.5") sized card. And die cut a stitched circle from the "Sweet as Honey" paper. I ran my circle through my Xyron and attached it to the center of my card.

Then I ran my strawberry, leaves, and a few cork embellishments through my CS Lite.... and presto instant stickers! I just peeled and stuck them onto my card front.

I die cut the word "hello" and attached it inside the polka dotted circle.

And here are the finished projects...

BOX- UP CLOSE

CARD- UP CLOSE 

This set came out so "BERRY" cute and  makes an amazingly "SWEET" gift set!!

Hope you enjoyed today's project, I know I sure did!!

Until next time...
Happy Crafting!!
~Mitsy


Wednesday, February 11, 2015

My Heart Melts...

Hello Crafty Friends... I'm so HAPPY to share some exciting news... I am the newest Design Team Member over at KaDoodlebug Designs!!! Yay!!

And for my first Design Team project I chose to make a card featuring this utterly sweet ice cream sundae from the "Yummy Treats" file set!!  I thought would be perfect to make, yet again, another Vlaentines Day card. 

I ebrushed all the paper pieces before assembling them. Then I added highlights with a white gel pen. The results were simply amazing. There is just so much depth!  I paired it with a group of pennants (which were also ebrushed) and topped it with a bow.

I can't wait to play with more cutting files from KaDoodlebug! This set is retiring very soon (Feb 15th) so if I were you I would snatch it up quick because once it gone, it's gone!! While you are there check out all the other retiring files too, they are marked down up 90% off!!! And, I forgot to mention, on top of all those deep discounts they are also having a
HUGE VALENTINE'S DAY SALE!!


How AWESOME is that?!!

So hurry quick before you miss all these great deals!!

Hope you have a very crafty day!!

~ Mitsy


Saturday, January 4, 2014

Valentine's Day Card - I Love U Berry Much - Strawberry Shortcake Inspired

Well Crafty Friends I'm finally back to crafting again. That means more layouts and more cards! Yay!! And, speaking of cards...Valentines Day will be here in one month and 10 days.. yeah, I'm counting... lol... and I decided to make my bestie a super cute valentine to let her know I'm thinking of her.


This card measures 5"x7". All files used to make this card are from Designs on Cloud 9

I used Costume Kids Set 2 for Strawberry Shortcake (sorry, the eyes do not come in the file. They are from a special file I personally made). 

The strawberry came from the Berry Title

The scalloped rectangle came from a past freebie... Merry On... don't worry if you missed it, it's now available for purchase for only $0.99. 

AAAANNND for the adorable little scalloped heart I used Cupid Cuties.

I grew up in the eighties and absolutely LOVE Strawberry Shortcake!! And I LOVE LOVE LOVE how this card turned out! I only hope my BFF LOVES it too!

Thanks for stopping by & craft on my friends... craft on!!


Tuesday, September 4, 2012

Strawberry Themed Birthday Decor

I also wanted to include these cute strawberry cut-outs I made and hung them above the banner at Kyan's birthday party.


I made this cute strawberry into a cut file. :)

          
You can download this berry cute FREE svg file HERE and make them to any size you want.


I'll be posting more svg files soon. Have fun crafting!

Strawberry Invites

I am moving soooooo s-l-o-w!! I had everything for Sean's party done a month in advance but for Kyan's party it's totally the opposite. Finally getting to post what I did for Kyan's bday... :(

I love love love Paperglitter's digital printables but I still wanted to add that handmade feel to it. This is what I came up with:


I colored flat-back pearls with a yellow permanent ink marker and adhered them with glue dots and added them t the centers of the flowers


close up view


Then I used a ribbon punch and tied a bow at the bottom of the card making sure that the #5 was visible just to add a handmade feel.


Overall I think the invites came out berry cute!


Wednesday, August 1, 2012

Paper Glitter - Strawberry Kit

It's been a looooooong couple of months but I'm feeling better. Almost done with my first trimester for baby # 4 and it almost killed me! Ok, maybe I'm slightly exaggerating... but still anyone who has had morning sickness will sympathize. And now that I'm getting my strength back it's time to craft!! Just in time too. I've got just 2 weeks to plan Kyan's 5th birthday party.

We are going to do a cute strawberry theme... very cute, very girly!! I found a shop on etsy.com that has the most adorable digital printouts! Which just made my life a whole lot easier. If anyone gets a chance, check out their other collections... their shop is called paperglitter . They are awesome!!  I'll be posting pictures as I go along so everyone can see my progress.
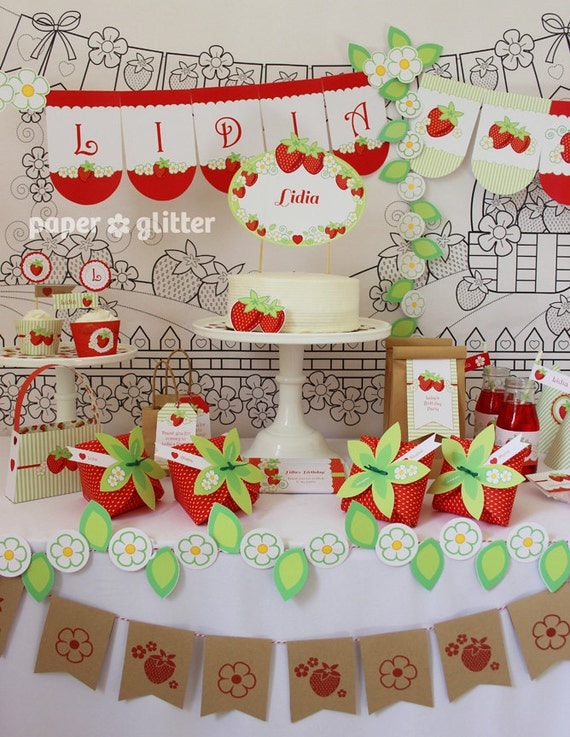
Here is the set I chose from the paperglitter store on etsy. It's called the Strawberry Printable Party Kit.  It is SUPER CUTE!! The best part about this set is that I can customize it with all my child's info and print as many as I want!