Showing posts with label dogs. Show all posts

Wednesday, November 11, 2020

Tea Cup Christmas- Santa Paws Card

Hey, Crafty Friends... It's been a while but I'm back with the Eileen Hull Inspiration Team!
Christmas is inching closer and it's time to get into Christmas card making mode!! Here's a card for those pet lovers out there! These little teacup cuties are sure to put a smile on anyone's face!


Supplies Used
Eileen Hull 3D Teacup & Spoon (Sizzix)
Jen Long Snowflake Wreath- Snowflake (Sizzix)
Christmas Greetings (Authentique)
PITT Artist Pen (Faber-Castell)
Distress Oxide Ink- Black Soot (Ranger Ink)
110 lb White Cardstock
Glitter Cardstock- Gold
Chipboard
Foam Adhesive
CutterBee Scissors (EK Sucess)
Craft Knife

For today's card, I will be using Eileen Hull's new 3D Teacup & Spoon Die along with festive papers from Authentique's Christmas Greetings Collection.

I started by cutting my patterned papers and chipboard into 4"x 6" pieces. I'll be making a stack of three cups so I'll need 3 pieces of each.

Then, I ran my patterned paper through my Xyron Create-A-Sticker machine to adhesive onto the backs of each of the papers. I peeled them from the film then attached them onto the chipboard pieces.


After I mounted each piece, I die cut the chipboard using Eileen Hull's 3D Teacup die. I only needed the teacups so I didn't need to cover the entire die, just the teacup portion, making sure to place it over the die with the patterned paper side DOWN.

To get the handle to appear on the opposite side of the cup. I placed the chipboard with the patterned paper face side UP.


This way, when I stack my cups, it will stagger... Handle- No Handle- Handle.

But before stacking my cups, I wanted to give the illusion of three-dimensional cups that could actually be filled. So, I used another cup and flipped it over to trace a line with a Faber-Castell PITT Artist Pen. Which gave my cups a lip. Then I outlined the cups with the same pen to make the lines consistent throughout all the cups.

Next, I took a craft knife and made a slit right above the "lip". I did not cut this lip completely across, but just enough so another cup can nestle inside.


Then, I fussy cut this cute kitten and puppy from one of my sheets of paper. Authentique's Christmas Greeting Collection has an entire sheet of just puppies and kittens and like sentiments. I found these little guys and they were the perfect sizes for my teacups!


For my card base, I created a 5"x7" card base from white cardstock and matted it with gold glitter paper and a red polka-dotted background paper, each piece had a 1/8" difference between them.

Base: 5"x7"
Gold Glitter: 4-7/8"x 6-7/8"
Red Polka-Dot: 4-3/4"x 6-3/4"

I layered and adhered the pieces together using my Xyron Mega Runner.

Side note: 
At the last minute, before adhering the red polka-dotted paper, I inked the edges of it with Black Soot Distress Oxide Ink.


I also inked the edges of all my teacups with the same Black Soot ink. Then, I nestled each cup inside one another and mounted foam adhesive onto the backside.

I attached the stack of cups onto the from of my card. Then I added more foam adhesive onto the backs of my kitten, puppy, and the sentiment, and attached them onto the card front.


For the final touch, I cut out white snowflakes using the snowflake die from Jen Long's Snowflake Wreath Stamp & Die set and staggered them throughout the background.

And here is my finished card...


How adorable are these little guys!!


This card is perfect for any pet lover in your life or even for your family vet!


I hope you enjoyed today's tutorial and you are inspired to use your Eileen Hull Teacup die in a new way!

Thank you so much for stopping by!

Until Next Time...
   HAPPY CRAFTING!!
~Mitsyana


Sunday, May 15, 2016

Woof!


Hello, Crafty Friends! I have an adorable card for you today using 3 different stamp sets as well as the NEW Stitched Rounded Rectangles Dies!
Other Supplies Used
DCWV Seaside Yacht Stack
DCWV Double Sided Cardstock Stack
White Cardstock (Bazzill Basics)
Xyron Mega Runner
Momento Tuxedo Black Ink (Imagine Crafts/ Tsukineko)
3D Dots (EK Success)
Spectrum Noir Color Pencils
Odorless Mineral Spirits
Blending Stumps
Bakers Twine
Red Buttons
Glossy Accents (Ranger)

For my main image, I used the puppy dog in the Fur Friends set and stamped him with Momento Tuxedo Black ink and colored him in with Spectrum Noir colored Pencils and blended out the color with Odorless Mineral Spirits and Blending stumps. Then I fussy cut him out and added foam adhesive behind him to give him some dimension.

For my sentiment I used this phrase from the Animal Faces set. I love how I can mix and match the different pet and animal sets together to maximize my possibilities!

I thought my banner looked plain and flat so I decided to stamp this houndstooth pattern using this stamp from the Mister set. It also makes a great background stamp when aligned and stamped multiple times.
And then for my card front mats of patterned paper I used the new Stitched Rounded Rectangles for that awesome stitched line detail. And something new has recently happened to all Pink & Main dies… They are now ALL PINK!! How awesome is that??!!
I added more foam adhesive behind my banner and tied bakers twine at both end.
And here is my finished card…

If the puppy dog face isn’t cuddle worthy, I don’t know what is!!
I hope you like today’s card!!
~Mitsy

Tuesday, November 10, 2015

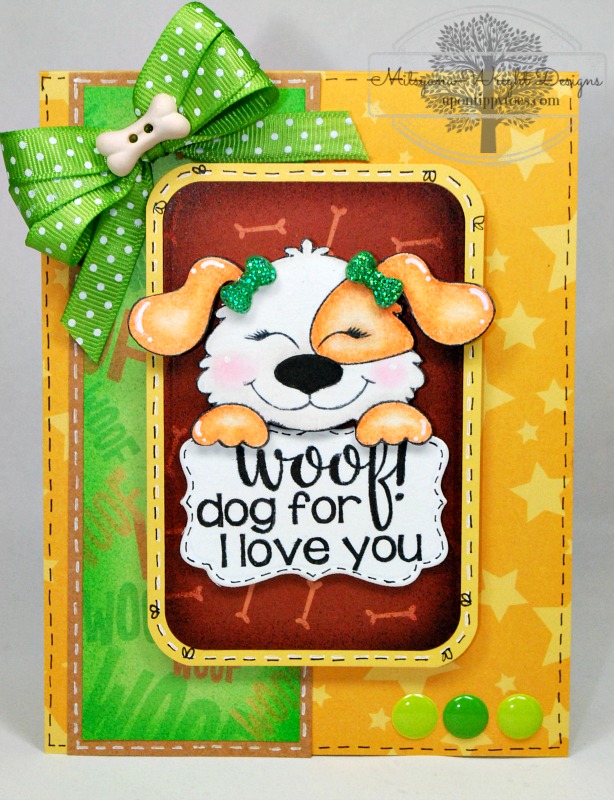
Woof! Dog for I love you

Hi, Crafty Friends... I have an adorable card for you today! I am so loving these new interchangeable faces from Pink & Main's "Sweet Faces" Collection!! I love being able to customize these little cuties. It's amazing how not only changing the faces but also positioning the faces (either higher, lower, or more to one side) can change the look of each character. I am just over the moon excited about these sets ( I hope it's not too obvious, LOL)!!

Here is a card I made using the puppy head from the Animal Faces set with the squinty animal face from the Sweet Faces Set 2.


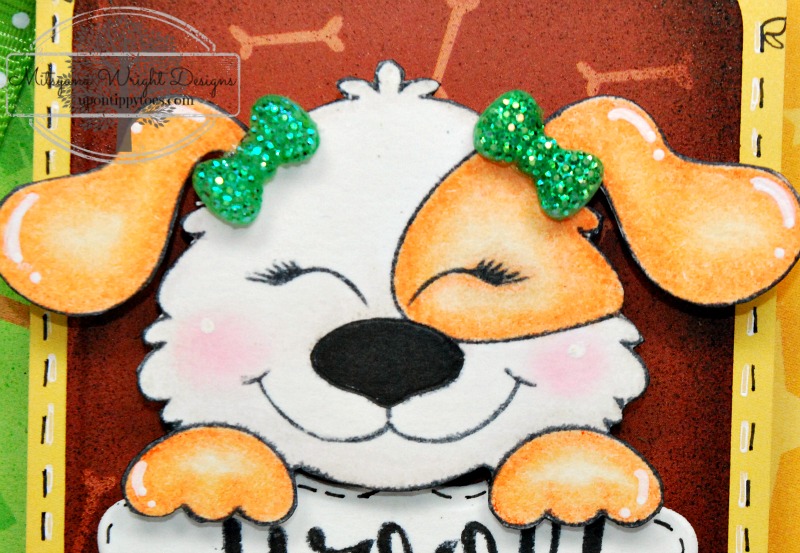
I stamped my image using Momento Tuxedo Black ink. First, I stamped the head. Then I stamped the face. For this particular face, I wanted the nose to be touching the patch around  the eye.

 Next, I used my Spectrum Noir color pencil to outline the paws, ears, and patch. I used odorless thinner to blend the color pencil out, Then I added a tiny bit of pink chalk onto the cheeks for blush and used a white opaque marker for highlights. After my puppy was colored, I used a scissors to cut out my image.

I stamped out my sentiment and used my Darice Nested Rectangles dies to cut it out. I used my rounded rectangle die from my Die-namics Blueprints 14 die  set.


I cut a strip of craft cardstock to 2" x 5-1/2"... and a mat from patterned paper 1-3/4"x 5". Then I also cut another piece of patterned paper 2-5/8"x 4" to mat the rounded rectangle piece. Then I airbrushed my patterned paper pieces with my ebrush machine.

I used my Xyron Mega Runner to attach all the panels together onto my A2 (4-1/4"x 5-1/2") card base.

For added dimension, I added foam adhesive dots behind these pieces before attaching them to my card front.

Lastly, I made a triple looped bow and attached a bone shaped button to the center. Then I used 3D Laquer to arrach the bow to my card.

And here is my finished card...

woof

I love to make my characters girls for some reason and it super easy to do! I just attached a bow onto each puppy dog ear and presto... a cute little girl puppy!!

woof-a

And there you have it!!

I really hope you enjoyed today's card!!

Until next time...
Happy Crafting!!


Monday, April 27, 2015

KaDoodle Bug Designs, Cutie KaToodles, and Virginia Turtle

Hello Crafty Friends!! I made a few card last week for KaDoodle Bug Designs and Virginia Turtle and hadn't had the time to write up individual posts. So instead I'm writing one post for all of them and just going to list the KBD file and Virginia Turtle stamp that were used.


This card was made using the New Cutie KaToodle series that KaDoodle Bug Designs has put out. They are all the rage and become viral in the paper piecing community!!

This is the Cutie KaToodle Unicorn. I just LOVE unicorns!! And I just adore this sweetie!! My favorite out of the batch!


This one is the new Cutie KaToodle Foxy. She is so pretty and I love her sweet little bow!


This one is not a Cutie KaToodle, nor is it new... it is KaDoodle Bug's Salty Dogs file! And I paired it with Virginia Turtle's "Ruff Day" from their "Wild About Puns" set.


This cutie is from KBD's Cutie KaToodle Earth Day editions... Their Flower Skunk! I made the head slightly larger to make him look like a little bobblehead! This little guy went perfectly with Virginia Turtle's "That Stinks" stamp which is lso from their "Wild About Puns" set!


I love these Cutie KaToodles... and if you do too then you'll love this even more... 

                  
Cutie KaToodles - Rainy Day Duck

this cutie... Cutie KaToodle Rainy Day Ducky is FREE (for a limited time only) on the KBD website!  So scoop him up while you can! He won't be there for long!!

Happy Paper Piecing!!

~ Mitsy