Showing posts with label airbrushing. Show all posts

Saturday, April 29, 2017

Be A Unicorn

Happy Saturday! I hope everyone has had a great start to their weekend! \I am so excited to be a guest designer for Lori Whitlock. I've always been a big fan of her unique and whimsical designs. And I am over the moon thrilled to be able to share with you this adorable Unicorn Card I made using her Center Box Card Unicorn.


To check out my tutorial and to see additional pictures, please visit the Lori Whitlock Blog!! 
Thank you all for stopping by!!

~Mitsy

Friday, January 15, 2016

Die-Namites January Inspiration & Technique Blog Hop

Hey there, Crafty Friends... IT's that time again!! It's time for the Die-Namites' Monthly Techniques and Inspiration Blog Hop!! WOOHOO!!

Today, I decided to do something a little different with my dies. Instead of using them in a traditional manner (cutting paper and creating die-cuts), I am using them to create a stamp. Then using that stamp to create a card.


And creating stamps with your dies is so super easy!


Supplies Needed

Winter Fir
Fun Foam or Craft Foam Sheet
2way Glue
Acrylic Block

Other Supplies Used
Tim Holtz Distress Ink Pads (Ranger)
Multimedia Paper
eBrush (Craftwell)
Spectrum Noir Markers- GB1, GB3
Periwinkle Sharpie
PITT Artist Pen XS (Faber-Castell)
Alcohol Blending Solution (Ranger)

As a special treat I have a special coupon code to share with you all... Take 15% off your next  entire order!! Must using code mitsyana15 during checkout!! And as always, orders over $45 ship for free!!


This is so easy, you're gonna wonder why you didn't make your own stamps sooner...

First, use you die to die-cut your foam sheet. You made need to pass it through your die-cut machine a few times, depending on the thickness an density of your foam.


Then apply a layer of 2way glue onto your foam die-cut and set aside to dry. It is now a repositionable / removable stamp.

Once dry, adhere to  acrylic stamp block and ink up with your favorite ink. Lightly mist with water and stamp image onto paper.


I used a very thick mixed media paper. This paper is specially formulated to uphold liquid applications with little to NO WARPING.


If you read my blog regularly, you'll know that I love to airbrush almost everything. And in this case I airbrushed a sun-setting horizon behind my trees. First, I airbrushed the golds. I used Spectrum Noirs GB1 and GB3. And for my blue skies, I used a periwinkle colored sharpie.

You don't have to use an airbrush... you can get very similar results by using ink pads and a sponge blending tool. Use what makes you comfortable.

Then I traced around the perimeter of my stamped image with a PITT Artist Pen in XS. This helped define the stamped images. 


And lastly, I splattered/ splashed Alcohol blending solution onto my card front and then stamped my sentiment using VersaFine Onyx Black ink.

And here is my finished card...


I hope you enjoyed my Tip & Technique project ... 

Don't forget to check out the rest of the Die-Namites Design Team Family!!

Check out the full Blog Hop line-up here

Martha Luciahttp://wp.me/p5TnaH-3eY

Thank you for hopping with us today!!
Your next stop is the awesomely talented

Have fun and Have a very crafty day!!
~ Mitsy

Tuesday, January 12, 2016

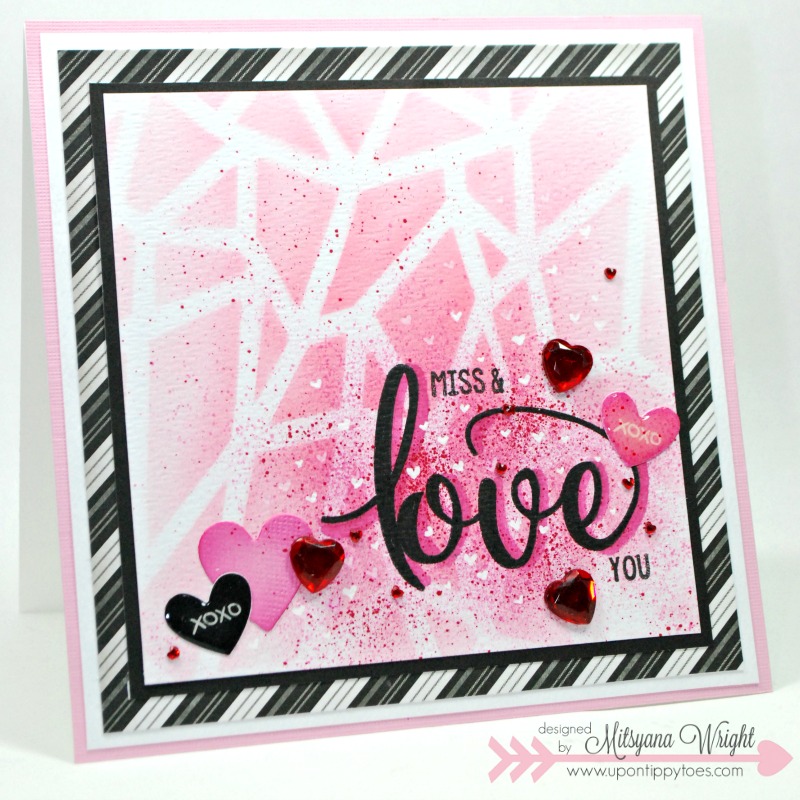
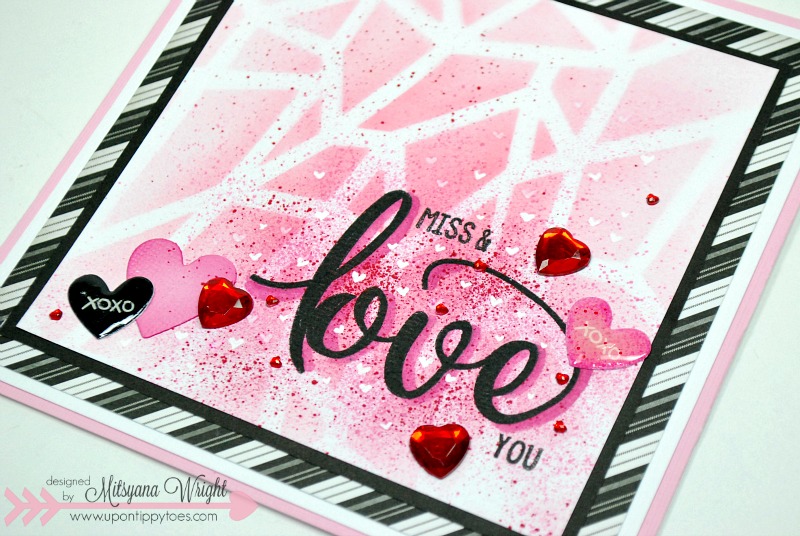
Miss & Love You

Hello, Crafty Friends!!
I hope you're loving all the new Pink and Main Releases!!I know I am!! If you haven't seen them yet, check them out HERE!!
And, speaking of Love, I am "loving" the new word stamps!!
Here is a card I made with the True Love stamp set...
Love
Supplies Used
True Love Stamp Set (Pink and Main)
Cardstock (Bazzill Basics)
Patterned Paper (DCWV- Bella Armoire Stack)
Heart Die- Teresa Collins Lovers Lane (Craftwell)
eBrush (Craftwell)
Xyron Mega Runner
Stencil- 101 Collection (Faber-Castell/ Design Memory Craft)
Spectrum Noir Markers- CR5, CR6, Blender
Red Sharpie
White Gel Pen (Sakura)
VersaFine Onyx Black Ink Pad (Tsukineko)
Diamond Glaze (Judikins)
Heart Rhinestones

Love1


I "love" the fact that there are so many interchangeable phrases.
And that script font... oh my, talk about FABULOUS!!
 
And if you "love" this set, you'll be head over heels over these other sets too...
            
Make sure to collect them all for even more possibilities!! All 3 sets can be mix and matched with each other!!
And let's not forget the matching dies! 
      
These take your words and sentiments to a whole new level of awesome!!
Hope these and all the rest of the new January releases have got you pumped and primed to create!!

Don't forget to share with us all of your Pink and Main projects on our Facebook Page and our Pink and Main Creations Gallery... we'd love to see what you're making!!
Until next time...
HAPPY CRAFTING!
~Mitsy

Monday, January 11, 2016

Dreaming of Spring

Hello, Crafty Friends!!
I don't know about you but I'm ready for Spring already!! I wouldn't mind winter so much if the weather decided on one particular kind of weather and stuck with it. If it's gonna snow, snow! If it''s gonna be hot and sunshiny, then stay that way! But I live in Texas... where the weather doesn't just change day by day but sometimes hour by hour as well. We can walk out the house in a snow coat in the morning just to be in sweating by mid day and tank top and shorts by the afternoon. I am so over it!! I want Spring! I want flowers! I want blue skies! And, most of all ,I don't be so darn cold! Until then, I guess I' just dream of Spring!!

Today, I have a card that resembles all the good thing I love about Spring.

Supplies Used
Cut'n'boss (Craftwell)
Ebrush (Craftwell)
Xyron Creative Station with 9" Permanent Adhesive Refill
Spectrum Noir Markers- CR3, CR6, DG3, CG4, GB11, TN3
Anna Griffin Flower Bramble Die (Cuttlebug)
White Cardstock
Craft Cardstock
Glitter Vellum
VersaMagic Jumbo Java Ink Pad (Tsukineko)
Ink Sweeper (Tsukineko)
Fun Foam
Diamond Glaze (Judikins)

I started by cutting my Flower Bramble die out of white cardstock by running it through my Cut'n'boss machine. 

I used the following plate configuration...

From Bottom to Top
D Plate
B Plate
A Plate
Paper
Die
A Plate

To get the detailed embossing remove the B Plate and then use the following configuration...

From Bottom to Top
D Plate
A Plate
Fun Foam or Silicone Rubber Sheet
Paper still in Die
A Plate

Now to make all the details come to life and really show off the embossing I airbrushed my die-cut with Spectrum Noir Markers in my ebrush machine. 

I started by putting down a layer of GB11 over only the vines and leaves. Then layered a bit of CG4 over some areas to deepen the green tones. 

For the flowers I layed down a base of CR6 but it was a tad bit too bright so I layered on TN3 to tone down the brightness. 

Then lastly, I deepened the Green vines a bit more with DG3 and highlighted my flower stamens wth a gold glitter gel pen.

For a background to my lovely flowers I ran a 4-3/4"x 6-3/4" piece of craft cardstock with my Teresa Collins Honeycomb embossing folder through my Cut'n'boss machine.

For embossing I used the following plate configuration...

From Bottom to Top
D Plate
A Plate
Embossing Folder with Paper
A Plate

To make those honeycombs really stand out, I sponged on brown ink over the raised areas.


To add to my card front I die-cut my butterfly and sentiment out of thick white cardstock. I also cut an addition butterfly out of  glittered vellum.

I ebrushed my vellum butterfly with Spectrum Noir CR3 to coordinate with my flowers.  I folded the wings slightly back to give more dimension and used diamond glaze on the thorax (torso) of the butterfly to attach the two butterflies together.

Then I ran my honeycomb background, completed butterfly and sentiment through my Xyron Creative Station with 9" refill cartridge to add adhesive to all my pieces at one time. The I simply peeled and stuck all my pieces on a 5"x7" white cardbase. 

And my here is my final results...

My Spring Daydream Card


Here's a closer view of the details...


I hope you enjoyed today's card!

I hope you were inspired!

And, as always...
HAPPY CRAFTING EVERYONE!!

~Mitsy


Wednesday, January 6, 2016

Brutus/Monroe- You make me happy


Hello, Crafty Friends!! I have another awesome "bluesy" card for you today!!

Being blue shouldn't be looked at as a bad thing.Yeah, it's a term often referred to as being sad. But did you know that the color blue is also calming? The visual stimuli actually makes your body release "feel good" chemicals. How awesome is that! LEt me go paint the inside of my house now! The color blue is also is associated with happiness( like a clear blue sky) and mystery (like the deep blue sea). So, yup, I'm in a blue mood today... tranquil, happy, and a bit mysterious!

So today I have a card using the Brutus/ Monroe Botanical Sentiment I stamp set and a couple cool techniques you may want to try!

Botanical Sentiment I

Supplies Used
Ebrush (Craftwell)
Spectrum Noir Color Pencils
Momento Tuxedo Black Ink (Tsukineko)
Sharpie Markers- Aqua, Periwinkle
Alcohol Blending Solution
Cardstock- White, Black (Bazzill Basics)
Gamsol
Blending Stumps
Hemp Twine
Purple Button
Dragonfly Charm


First, I stamped my hydrangea flower image from the "Bru/Mo" Botanical Sentiments I set multiple times onto smooth white cardstock. I overlapped the images in some areas to make it look like how hydrangeas naturally grow, bundled together like a bush/shrub.

With my ebrush and aqua and periwinkle markers, I airbrushed my background color . I'm not sure if those are their actual names... it just what they look like to me. I wish the company would print their names on the markers! 

Then I colored the hydrangea centers with my Spectrum Noir Color Pencils and blended out the color with gamsol and blending stumps.

Sfter I got the desired look to my flowers that I wanted I splashed and splattered Alcohol blending solution onto the background. The alcohol reacts with the markers and gives a splattered bleach effect.

Then I stamped my sentiment "You make me happy" onto my card front using more black ink.

I used my awesome Xyron Mega Runner to adhere my card front onto a A2 sized card base made from black textured cardstock.

I wrapped hemp twine around the top and tied a quadruple looped bow. Topped with  a purple button on my bow and hung a dragonfly charm from the bow. Then lastly, wrapped the tail ends of my bows around a pen to make them curl.

And here is my finished card!!


I just love how this card turned out!! I especially love the bleaching effect I was able to create with the blending solution!!

I hope that this inspire you to try the technique for yourself!! 
No ebrush... no problem!! You can try a similar technique by simply coloring your background with alcohol ink based markers and splashing blending solution over that!

Go ahead and give it a whirl!! Be creative and most importantly have fun!!

Until next time...
HAPPY CRAFTING!!

~Mitsy

Tuesday, November 10, 2015

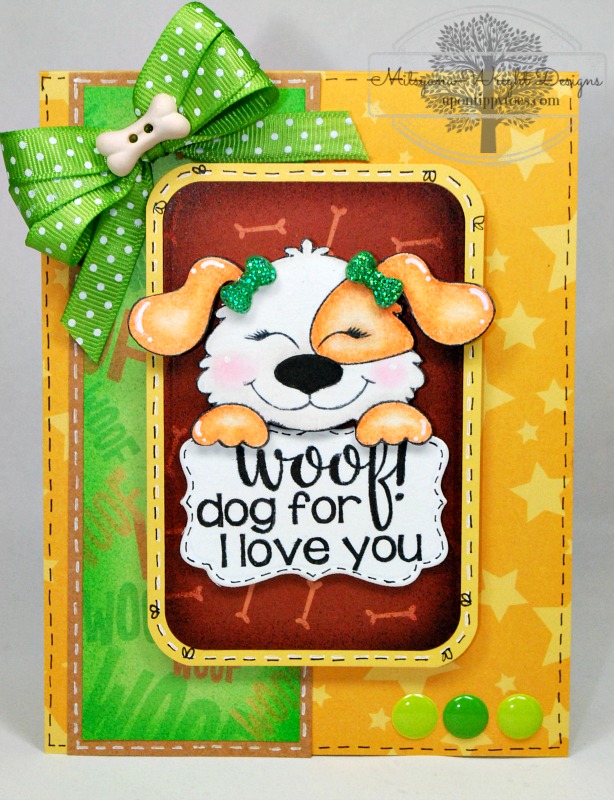
Woof! Dog for I love you

Hi, Crafty Friends... I have an adorable card for you today! I am so loving these new interchangeable faces from Pink & Main's "Sweet Faces" Collection!! I love being able to customize these little cuties. It's amazing how not only changing the faces but also positioning the faces (either higher, lower, or more to one side) can change the look of each character. I am just over the moon excited about these sets ( I hope it's not too obvious, LOL)!!

Here is a card I made using the puppy head from the Animal Faces set with the squinty animal face from the Sweet Faces Set 2.


I stamped my image using Momento Tuxedo Black ink. First, I stamped the head. Then I stamped the face. For this particular face, I wanted the nose to be touching the patch around  the eye.

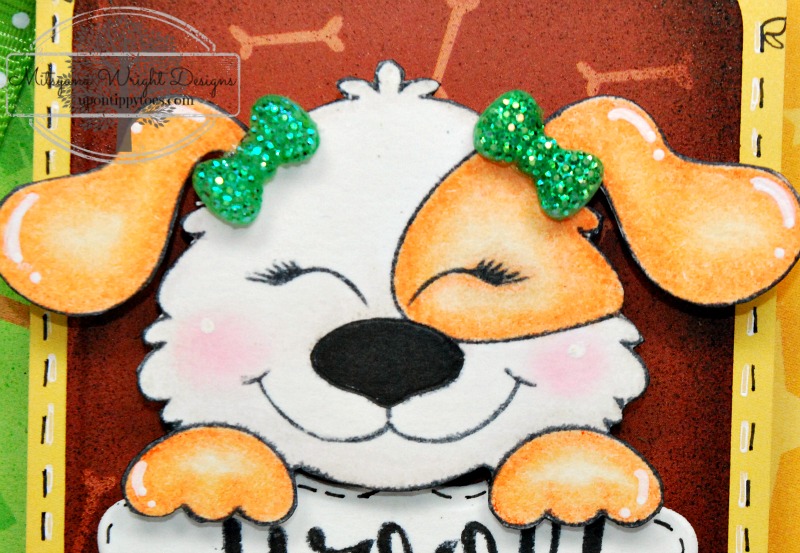
 Next, I used my Spectrum Noir color pencil to outline the paws, ears, and patch. I used odorless thinner to blend the color pencil out, Then I added a tiny bit of pink chalk onto the cheeks for blush and used a white opaque marker for highlights. After my puppy was colored, I used a scissors to cut out my image.

I stamped out my sentiment and used my Darice Nested Rectangles dies to cut it out. I used my rounded rectangle die from my Die-namics Blueprints 14 die  set.


I cut a strip of craft cardstock to 2" x 5-1/2"... and a mat from patterned paper 1-3/4"x 5". Then I also cut another piece of patterned paper 2-5/8"x 4" to mat the rounded rectangle piece. Then I airbrushed my patterned paper pieces with my ebrush machine.

I used my Xyron Mega Runner to attach all the panels together onto my A2 (4-1/4"x 5-1/2") card base.

For added dimension, I added foam adhesive dots behind these pieces before attaching them to my card front.

Lastly, I made a triple looped bow and attached a bone shaped button to the center. Then I used 3D Laquer to arrach the bow to my card.

And here is my finished card...

woof

I love to make my characters girls for some reason and it super easy to do! I just attached a bow onto each puppy dog ear and presto... a cute little girl puppy!!

woof-a

And there you have it!!

I really hope you enjoyed today's card!!

Until next time...
Happy Crafting!!


Monday, September 15, 2014

Ebrush hack #4... Edible Food Markers

Hello Crafty Friends and eBrush enthusiasts... I got another eBrush hack for you all!! Yay!!
Recently a topic of discussion on Facebook was "what good, food safe, markers are available that would work in the eBrush system?".  I found a few brands online that I  thought looked promising. And all were comparable in price to a pack of Spectrum Noir markers... yeah right, not gonna happen. So, I took to my local Walmart and this is what I found...


Betty Crocker brand Easy Writers. And, these were $2 and some change... SCORE!! My wallet can handle a couple bucks!


For this hack you'll need:

foam pencil cushion/grips (just one)
a package of Betty Crocker Easy Writers
eBrush (with the Spectrum Noir "SN" adapter )
and a pair of scissors (not pictured above).


Cut about 1/3 of a foam cushion. Cut a horizontal slit through one side (as shown above).


Fit around marker with open end on top.


Insert into SN adapter head.
 Pardon the food coloring on my nail.


Marker tip should not touch air nozzle.


If you cannot get the marker into adapter with cushion, try inserting your cushion first...


Now, try inserting your pen.

Once you have the right fit and your marker head is centered... test your eBrush for airflow.

If you do not get a burst of color and your pen doesn't seem to be releasing any of it's food coloring or your marker seems to be dry to the touch... chances are it probably is.

On my first try I didn't get a single drip or even glob (like others had complained about their pens doing), I just got air. :( And I was about to give up when I decided to check the packaging for directions. Here's what the back of the package had to say:


That's right people... "If tip of decorator appears dry, briefly dip the tip in water to activate"!!
And, you know what?? It worked!! That tip sucked up water like a sponge... because basically, that's what it really was... LOL! I only had the tip in there for only a split second and it started to release color into the small cup of water.

Now it looked too juicy. So, I blotted the tip, and again tested my spray.

And BINGO... just right!!


Now to test on some cupcakes!!


AWESOME!!


OH MY!! I think these look too good now...  because now they look fake!

So here's some proof that they are in fact edible. After our pizza dinner this evening I gave the cuppy cakes to my kids...


Pardon the messy food face but the last munchkin had pizza everywhere and was screaming for his cupcake. And, that darn little booger got it and LOVED it too!!

I hope you enjoyed this HACK and decide to give it a try. If you find a new hack or even try this one, we would really love it if you'd share it with us!! 

Thanks for stopping by!!