
Hi, Crafty Peeps!!
And HELLLLLO, SUMMER!!
Yup, the summer heat is here and it's time to hit the water! You could say I take to it like a fish in water... but I'd say, you're WRONG!! I'm not a fish in water... I'm a MERMAID!
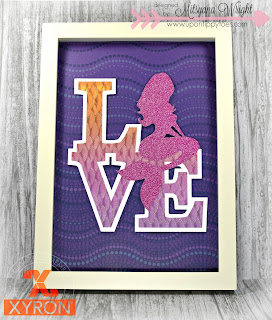
And if you're a mermaid or LOVE everything mermaid, you'll love this quick and easy "Mer"-decor! Yes, Mer-decor is a thing!! Which is why it's a good thing that I am here today with Team Xyron and this week's amazing partner, my good friends from DCWV!! Because I'll be playing with their new Ocean Wonder Stack and it's gonna help take my home decor from awesome to "MERMAZING"!!
Supplies Used
Ocean Wonder (DCWV/ American Crafts)
Glitzy (DCWV/ American Crafts)
Stacked Love with Mermaid SVG File (Kolette Hall Studio)
Creative Station w/ 9" Permanent Cartridge (Xyron)
White Cardstock
Craft Foam
Picture Frame

When I saw this paper I immediately thought of Mermaids! And I found the super cool SVG file by Kolette Hall that was absolutely perfect!
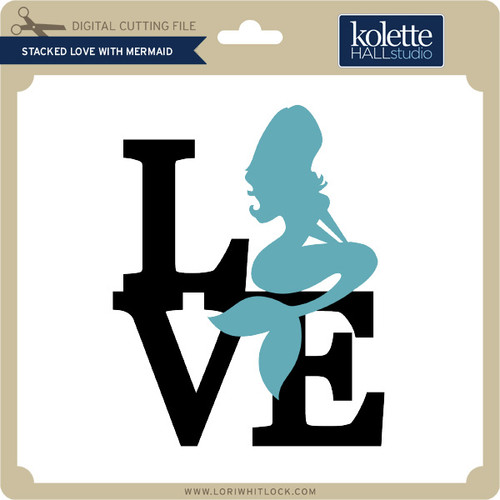
I downloaded it onto my computer and loaded it into my ecal software.
And HELLLLLO, SUMMER!!
Yup, the summer heat is here and it's time to hit the water! You could say I take to it like a fish in water... but I'd say, you're WRONG!! I'm not a fish in water... I'm a MERMAID!
And if you're a mermaid or LOVE everything mermaid, you'll love this quick and easy "Mer"-decor! Yes, Mer-decor is a thing!! Which is why it's a good thing that I am here today with Team Xyron and this week's amazing partner, my good friends from DCWV!! Because I'll be playing with their new Ocean Wonder Stack and it's gonna help take my home decor from awesome to "MERMAZING"!!

Supplies Used
Ocean Wonder (DCWV/ American Crafts)
Glitzy (DCWV/ American Crafts)
Stacked Love with Mermaid SVG File (Kolette Hall Studio)
Creative Station w/ 9" Permanent Cartridge (Xyron)
White Cardstock
Craft Foam
Picture Frame

When I saw this paper I immediately thought of Mermaids! And I found the super cool SVG file by Kolette Hall that was absolutely perfect!
I downloaded it onto my computer and loaded it into my ecal software.
When loaded into my software, the default size was too big for what I had in mind. So I resized it.

I simply adjust the sizing in the panel to the right of the screen. I used the drop-down arrow in the width section (which is simply labeled with a "w") and clicked it from it's 8.563" default sizing till it got to, what I thought was just right, at 7.060".

These pieces are also attached together (by default) and I want to cut multiples to stack them for a thicker three-dimensional look so I right-clicked, then clicked on "Ungroup" to separate them.

I knew I was going to be working with lots of colors and patterns and didn't want them to get lost or distracting. So, I broke it up by adding a .015" border around my "LOVE" word.
Simply, right click on the word, go to "Appearance", then "Add Shadow Layer...".

Then, set the sizing box to 0.15".

You can set what color you want your border to be, and in this case, I wanted it white. But that color blends into my virtual cutting mat. So I simply adjusted the outline to black. Go to the paint palette icon on the right of the screen, Go to "Stroke" box, then click in the color box and choose black.
Now, I can see that awesome border around my words!
I did those same steps to fill in color to my shapes too. but in those cases, I entered my selections in the "fill" box.
Both of these steps are optional, they just help me see what I'm doing better and help me get a better visual of what I am creating.

I separated my shadow onto another cutting mat. Remember, I wanted to create a stacked/ thick chipboard type of look. I only need to stack the shadow to achieve that look. So I duplicated 3 more and spread them over an entire mat.

Cutting multiple images is easier when you group like colors together and cut them all at once.
For the shadow, I cut in plain white cardstock. But for the main LOVE stacked word, I used this AMAZING or should I say MERMAZING fish scaled paper with a beautiful gradient and gold foil outlines and for my mermaid silhouette, I used this gorgeous pink glitter paper (also from DCWV).

I ran all my die cut pieces through the Xyron Creative Station, then layered all the LOVE stacks together.

I wanted the mermaid to have dimension but it seemed pointless to cover a bunch of glitter paper. So instead, I ran a piece of craft foam through the creative station and made my own foam adhesive to prop up my mermaid.
I attached the foam to the back of her head and torso only since her fins will be attached to the LOVE stack.


I took my stacked LOVE... look how nice and thick this piece is... and attached it to the center of my background paper, then inserted it into my frame and closed it up.
And there ya have it, EASY-PEASY!!
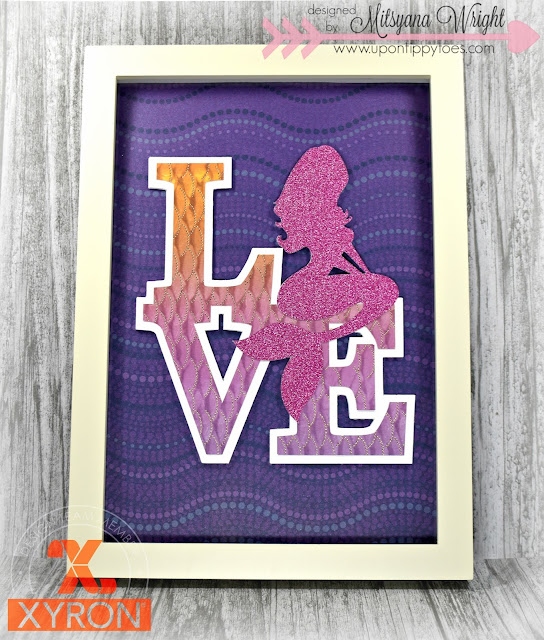
These papers are absolutely GORGEOUS and when the light hits it... Oh my gosh... STUNNING!!


I simply adjust the sizing in the panel to the right of the screen. I used the drop-down arrow in the width section (which is simply labeled with a "w") and clicked it from it's 8.563" default sizing till it got to, what I thought was just right, at 7.060".

These pieces are also attached together (by default) and I want to cut multiples to stack them for a thicker three-dimensional look so I right-clicked, then clicked on "Ungroup" to separate them.

I knew I was going to be working with lots of colors and patterns and didn't want them to get lost or distracting. So, I broke it up by adding a .015" border around my "LOVE" word.
Simply, right click on the word, go to "Appearance", then "Add Shadow Layer...".

Then, set the sizing box to 0.15".

You can set what color you want your border to be, and in this case, I wanted it white. But that color blends into my virtual cutting mat. So I simply adjusted the outline to black. Go to the paint palette icon on the right of the screen, Go to "Stroke" box, then click in the color box and choose black.
Now, I can see that awesome border around my words!
I did those same steps to fill in color to my shapes too. but in those cases, I entered my selections in the "fill" box.
Both of these steps are optional, they just help me see what I'm doing better and help me get a better visual of what I am creating.

I separated my shadow onto another cutting mat. Remember, I wanted to create a stacked/ thick chipboard type of look. I only need to stack the shadow to achieve that look. So I duplicated 3 more and spread them over an entire mat.

Cutting multiple images is easier when you group like colors together and cut them all at once.
For the shadow, I cut in plain white cardstock. But for the main LOVE stacked word, I used this AMAZING or should I say MERMAZING fish scaled paper with a beautiful gradient and gold foil outlines and for my mermaid silhouette, I used this gorgeous pink glitter paper (also from DCWV).

I ran all my die cut pieces through the Xyron Creative Station, then layered all the LOVE stacks together.

I wanted the mermaid to have dimension but it seemed pointless to cover a bunch of glitter paper. So instead, I ran a piece of craft foam through the creative station and made my own foam adhesive to prop up my mermaid.
I attached the foam to the back of her head and torso only since her fins will be attached to the LOVE stack.

For my background, I used this deep purple paper with dotted waves. I think it looks a lot like deep sea currents. But it could just be me... HA!
I cut it down to fit inside my 7"x 10" frame... I know... what an awkward size! But use whatever size frame you can find and adjust accordingly.

I took my stacked LOVE... look how nice and thick this piece is... and attached it to the center of my background paper, then inserted it into my frame and closed it up.
And there ya have it, EASY-PEASY!!
These papers are absolutely GORGEOUS and when the light hits it... Oh my gosh... STUNNING!!

This is clean and simple!
Aaaaaand...
makes for perfect decor or gift for all those mermaid lovers out there!
Hope you enjoyed this tutorial!
Thanks for stopping by!!
Until next time...
HAPPY CRAFTING!!
~Mitsyana
**Disclaimer**
This blog is compensated to provide opinion on products, services, websites and various other topics. Even though the owner(s) of this blog receives compensation for our posts or advertisements, I always give my honest opinions, findings, beliefs, or experiences on those topics or products.
This blog is compensated to provide opinion on products, services, websites and various other topics. Even though the owner(s) of this blog receives compensation for our posts or advertisements, I always give my honest opinions, findings, beliefs, or experiences on those topics or products.
The views and opinions expressed on this blog are purely my own. Any product claim, statistic, quote or other representation about a product or service should be verified with each manufacturer, provider, or party in question.


