Showing posts with label design challenges. Show all posts

Sunday, August 21, 2016

DCWV Monthly Stack-a-holic Challenge


Hello again, Crafty Friends!! Have you all entered the DCWV Stack-a-holic Challenge yet?? Well, great news if you haven't, you still have lots of time to get crafting!! 

Just check out this month's awesome sketches...


Today, I'm sharing with you my take on this month's card sketch ...


with beautiful papers from the Ocean Breeze Stack.

Supplies Used
Ocean Breeze Stack (DCWV)
Mega Runner (Xyron)
Die-namics Blueprints 18 (My Favorite Things)
Big Shot (Sizzix)
Pearlescent Orchid (Tsukineko/ Imagine Crafts)
Finger Dauber (Tsukineko/ Imagine Crafts)
3D Dots (EK Success)
Scissors (EK Success)
Paper Trimmer (Martha Stewart Crafts)

First, I made a A2 sized (vertical flap) card base.
I cut a piece of cardstock to 4.25" x 11".
With a bone folder, scored at 5.5" and folded at 5.5".
Making it a 4.25"x 5.5" card with a vertical flap.

I die cut this pretty flower paper using a die from MFT's Blueprints 18 set. It was the perfect match for this month sketch!

Then, I matted the die-cut onto this bold blue and white paper... love the bold pattern in white!! I used my Xyron Mega Runner to attach and layer my die-cut to the paper. And then used my paper trimmer to create a 1/4" border all around the die-cut.

I found this beautiful sentiment also included in the stack. I fussy cut the oval and inked around the edges with a shimmery ink and finger dauber.

Then used the leftover paper from my die-cut and hand cut a few little flowers. I mounted them on foam adhesive and adhered them onto the flowers around the oval cutout. Then used my Wink of Srella pen to add a glitter over the mounted flowers.

Then I used my Mega Runner to assemble all my layers onto my card base and added more foam adhesive under my oval cut-out and mounted it onto my card.

Lastly, I hand cut a couple of fishtail flags from more leftover paper and tucked and adhered them under the diagonal layer.

And here is my fished card...


I hope you enjoyed today's tutorial and are inspired to join in on this month's Stack-a-holic Challenge!!

If you would like to learn more details about our challenges, please go here.

Good Luck & Happy Crafting!!
~ DT Mitsy

Tuesday, February 9, 2016

Somebunny Love You

Hi there, Crafty Friends... I hope you all are having an awesomely crafty month so far!! Don't forget that Pink and Main holds monthly challenges... and this month's theme is LOVE.

 So, get your super fab Pink and Main stamps out and get crafting!!
I'm joining in on the fun and sharing a little "Love" too!!

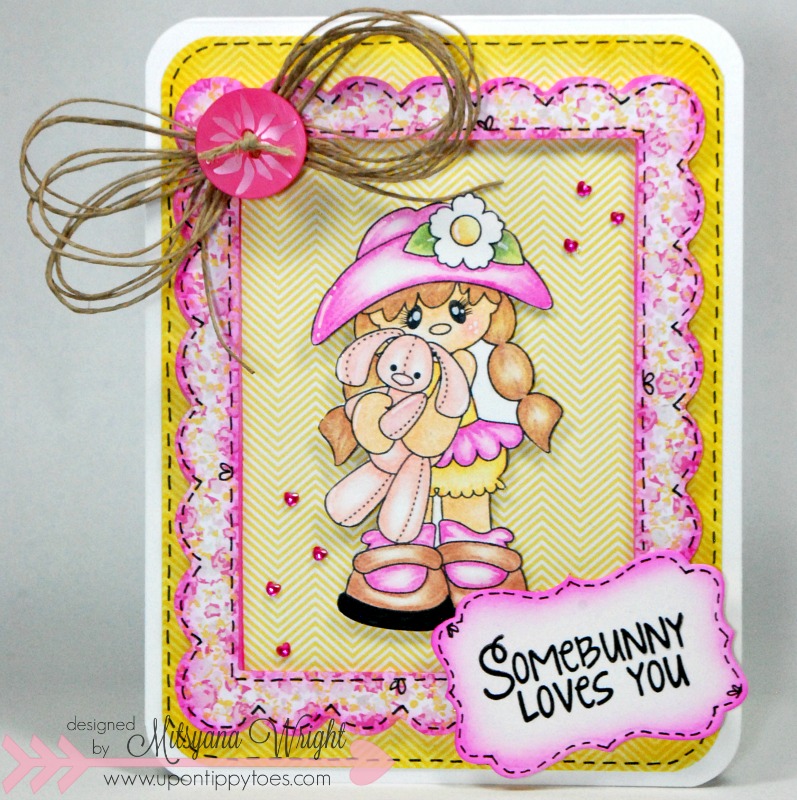
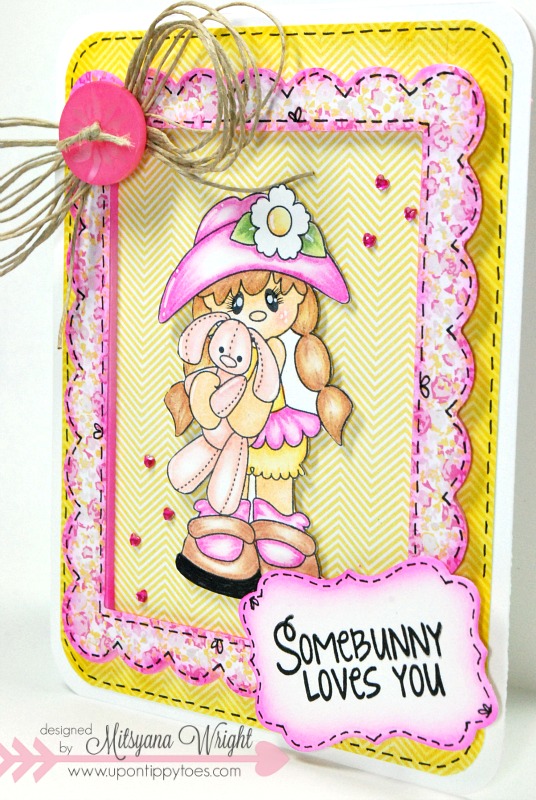
Here is my card for this month's challenge...
SOMEBUNNY
For this card, I used Pink and Main's Somebunny stamps set. I thin this little girl is absolutely adorable clutching her little bunny rabbit.

She also come with a couple sentiment options to use with her, as well as flower, center, and leaf stamps to coordinate.

I colored my little girl with Spectrum Noir color pencils and blended the color with low odor mineral spirits and blending stumps.

Here is a before and after...
SOMEBUNNY3
The first picture (left) is before being fully colored with Spectrum Noir Pencils and mineral spirits. The second picture (right) after being colored and blended.

I also added eyelashes and highlights to her eyes and freckles to her cheeks. I find the smallest details add the most character. It's the same little girl in both pics but the faces look so different.


Then, I fussy cut her out and backed her with foam adhesive for dimension.

For the card base I cut a A2(4.25"x 5.5" folded) sized card base. I also cut out a 4"x5.25" card mat. I rounded both the card and mat''s edges with a corner punch.

The frame was cut from an old Sizzix die that has been retired called Frame, Scallop. I used it to cut my patterned paper as well fun foam. The foam makes the frame just pop!!

I also hand drew faux stitching throughout the entire card. 
SOMEBUNNY2
The sentiment was stamped in Versafine Onyx Black on white cardstock cut with the second to the smsllest Darice Nested Rectangles die.

I topped the card with a quadruple loop hemp bow and bright pink button. Then added tiny heart rhinestones around my little sweetie. These are so super small, they are what manicurist use to put on nails. I think you can find them in the nail section of most super stores or even the dollar stores. I attached all my embellies with a tiny amount of 3D Lacquer.

Supplies used:
Somebunny Stamp Set (Pink and Main)
Patterned Paper- Happy Day (My Mind's Eye)
White Cardstock-Bazzill Basics
Spectrum Noir Color Pencils
eBrush (Craftwell)
Sharpie Markers- Yellow, Pink
VersaFine Onyx Black Ink Pad (Imagine Crafts/ Tsukineko)
Fun Foam
Nested Rectangles (Darice)
Corner Punch (EK Success)
PITT Artist Pen- XS (Faber-Castell)
White Gel Pen (Sakura)
3D Lacquer
Foam Adhesive
Hemp Twine
Pink Button
Heart Rhinestones

I hope this project has inspired you to join in on this month's challenge!!
You can read more about it here.
Happy Crafting!
~DT Mitsy

Saturday, January 9, 2016

A pocket full of wishes

Hello Crafty Friends... I hope you all are having a beautiful weekend so far!! 
I have for you today on my project for Die-Namites Dies' monthly inspiration challenge!!

This month's inspirational picture makes me feel warm and cozy! And I love the cool color scheme!!


So for my inspiration piece I chose to follow those cool colors!

But instead of a winter theme I chose to do a birthday card. My family has many birthdays in the month of January... including that of my husband and youngest son! So with that in mind a birthday card was a perfect fit!!

Supplies Used
Heart Branch Die (Die-Namites)
Jeans Pocket (Die-Namites)
eBrush (Craftwell)
Sentiment Die (Taj Clubhouse)
VersaFine Onyx Black Ink Pad (Tsukineko)
Red Sharpie Markers
Polka-dot Craft Paper (Craftsmith)
White Cardstock (Bazzill Basics)
Red and White Polka-dot Paper (Martha Stewart)
Red and White Twine
Stitched Turquoise Grosgrain Ribbon
Red Flower Button
Diamond Glaze (Judikins)
Gesso (Liquitex)

With a paint brush and gesso... I made paint splatter onto my patterned paper. I used a heating tool to speed drying time. I applied heat on both sides to minimize bowing and warping.

I used my Xyron Mega Runner to apply adhesive to my card front and attach it to a 4"x 5-1/4" white cardstock mat.

 When the sharpies are pushed too far into the adapter head it has a tendency to splatter... perfect... just the look I was going for!! I add red splatters along with my white ones.

Using white cardstock I die-cut both a Jeans Pocket and 3 Heart Branches.

Jeans Pocket   

 Heart Branch


The pocket I kept white. But I airbrushed all my stems using a red Sharpie and an airbrush (ebrush) machine.

My stems were too long and hanging out of the pocket too much. Much too long for my card... so I trimmed about 1 inch off each branch.


Then I glued my pocket a slight diagonal and glued my heart branches into the pocket and once the glue dried tucked in a few birthday candles. 

 I stamped my sentiment "a pocket full of wishes" along the top of my card. I figure this a perfect sentiment since it is customary for everyone to makes a wish before blowing out candles.

For a finishing touch, I made a quadruple loop bow made from red and white twine. Then I used a turquoise grosgrain with red stitching to make a regular looped bow and layered it over my twine bow, tied to them together, and topped it with a red flower button. 

And here is my finished card...


I hope you enjoyed my card and are inspired to join in on our challenge fun!!

For more info on the Die-Namites Challenge or to upload your project, please click here!

You could be the next winner of a $25 gift certificate from Die-Namite Dies!!

Thanks for stopping by and...
HAPPY CRAFTING!!

~ Mitsy


Wednesday, December 16, 2015

December Challenge and Photo Inspiration


Hello, my  crafty friends!! More holiday inspiration coming your way! And it's time for another Challenge!!

Come on by the Die-Namites Blog for our monthly challenges. Each month we'll have a challenge with a photo as our inspiration. This month's photo is:

Use this as inspiration and just create!

You can enter your projects for your chance of winning a $25 Die-Namites Gift Card. 

To find out more about our monthly challenge or to link your challenge project, see the original post here.

I like the organic feel of the inspiration photo. All the natural textures and colors. It gave me a very woodsy/ rustic vibe.

I didn't go the rustic route... but kept the neutral color palette.

Here is my challenge project:


I started off using my Cricut electric cutting machine to cut my card base.


I found an awesome cut file in the Cricut library for a trifold card... You can find the same file in the subscription area of Cricut Design Space.

It's a trifold card complete with score lines and a frame.

I used my Xyron Mega Runner to adhere my panels to the outer right-hand flap and onto the inside middle panel...

And because it had a 1/4" refill in it, I even used the Mega Runner on my frame!

Pinecone
For my focal point, I used Die-Namites' Pinecone die.

And, guess what, you can get 15% off your next purchase... that's right not just off this die but your ENTIRE purchase!! How awesome is that??!! Just use my special code mitsyana15 during checkout!!

I used my manual die cut machine to cut two die cut pinecones out of craft cardstock. This die is just GORGEOUS!! And these dies just slide out of the die!!The die has poke holes but never had to use them or a poke tool to get my pieces out!! And that is just AWESOME!

Then I ebrushed my pinecones using brown and green Sharpie Markers.

Supplies Used
Pinecone Die (Die-Namites)
Cricut Explore Air
Trifold Card File (Cricut DS Subscription)
Patterned Paper (Craft Smith)
Craft Cardstock
Hemp Twine
3D Lacquer
Green and Brown Sharpie Markers
eBrush (Craftwell)
VersaFine Onyx Black Ink Pad (Tsukineko)

Then I used my liquid adhesive (3D Lacquer) to attach my pinecones to the flap of my card.
I tied a quadruple loop bow out of hemp twin and also attached with liquid adhesive.

And, last but not least I stamped my sentiment from the "All I want for Christmas" stamp set with VersaFine onyx black ink.

And here is my finished card: 


I love how elegant this card turned out!


This inside panel I left blank for writing or if I wanted to attach a gift card.

Hope you enjoyed this card and are inspired to join us in our challenge fun!!

Until next time...
HAPPY CRAFTING FRIENDS!!
~Mitsy

Wednesday, October 21, 2015

Autumn Blessing Die-Namites Challenge Inspiration


Hello, Die Lovers!!
If you haven't yet, stop on by the Die-Namite's blog and join in on our October Photo Inspiration Challenge. There is still some time to get those entries in!! The deadline is Halloween night at 11:55 EST!! So don't forget to link up!  For official rules and other details, please see the original challenge post here.

Here is this month's inspirational photo:


and here is my inspirational card...


I used Die-Namites' Pear Tree Die


Other Supplies used
Cut'n'boss (Craftwell)
eBrush (Craftwell)
Thankful Stamp Set (Pink and Main)
Cardstock ( Bazzill Basics)
Patterned Paper (My Mind's Eye)
VersaFine Onyx Black (Tsukineko)
Martha Stewart Deluxe Trimmer
Martha Stewart Scoring Board
Sharpies- orange, green, brown, red
PITT Artist Pen XS (Faber-Castell)
Hemp Twine
Diamond Glaze (Judikins)
Blue Painter's Tape
2Way Glue Pen (EK Success)


 I started off by cutting a 4.5"x11" piece of cardstock and scoring it at the 5.5" and folding it in half creating an A2 sized card base.  I also cut a 4"x5.25" piece of cardstock and a 3.75"x5" piece of patterned paper to use as mats and ran them through my Xyron Creative Station.


I pieced together my card and mats. Then taped off the edges using painters tape. I airbrushed a circle of orange and yellow to the center of my card using my ebrush machine with orange and yellow Sharpies. 


I used my Die-Namites Pear Tree and cut 4 trees from cardstock and glued them together using a glue pen.


Then I ebrushed my tree using brown, green, orange, and red Sharpies. I added details using a PITT Arist Pen and Diamond Glaze on the pears and bird. I used Diamond Glaze to adhere my tree onto my card. 


Then stamped my sentiment under the tree using a Versafine Onyx Black ink pad. I used Pink and Main's "Thankful" stamp set for the "Autumn Blessings sentiment.

Here is my finished card:

I stayed with the warm autumn colors that reminded me a lot of a sunset... I love golden sunsets!! And, I love how this card turned out. It was a simple, yet elegant. A card that I could easily replicate multiples of. 


 This is such a gorgeous die and I didn't want to spoil it by adding too much fluff and frill, so I kept it simple.  I just added warm bold colors and a bit of hemp twine bow to give it an organic feel.

Happy Fall Y'all!!

Hope you enjoyed my inspirational project!

~ Mitsyana Wright