Showing posts with label Craft Smith. Show all posts

Tuesday, May 24, 2016

Missing your hugs

Hello, Crafty Friends!!
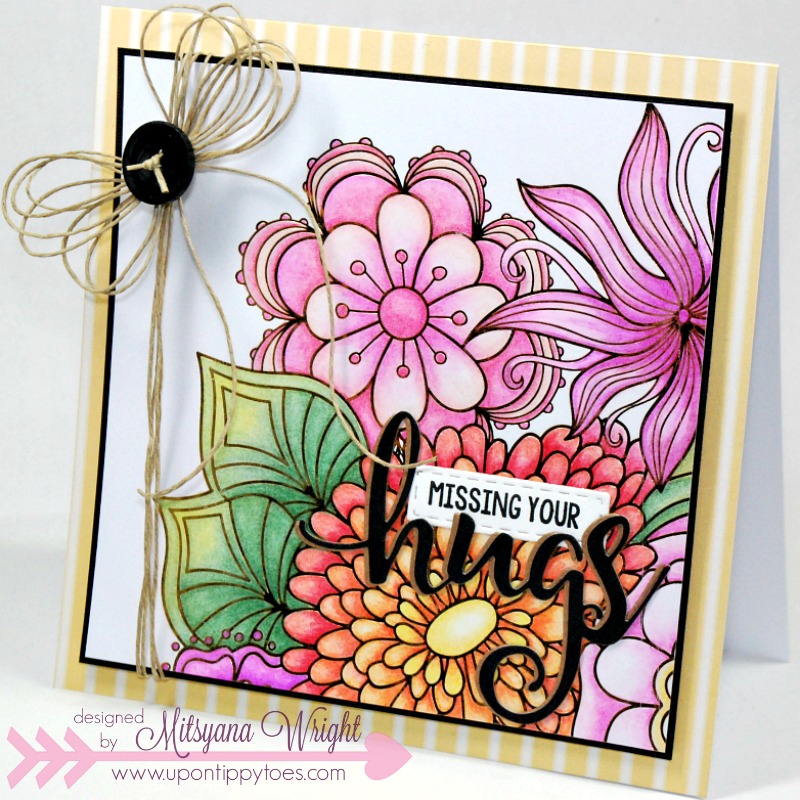
Today, I am turning a coloring book page into a beautiful card. Ok, so, I've been bit by the "adult coloring book trend" bug... bad!! But What does one do with all the finished pages once done?? Do you just discard the book? Do I put it back on the book shelf and let it collect dust?? Nope, not this gal! I turn them into gorgeous cards!


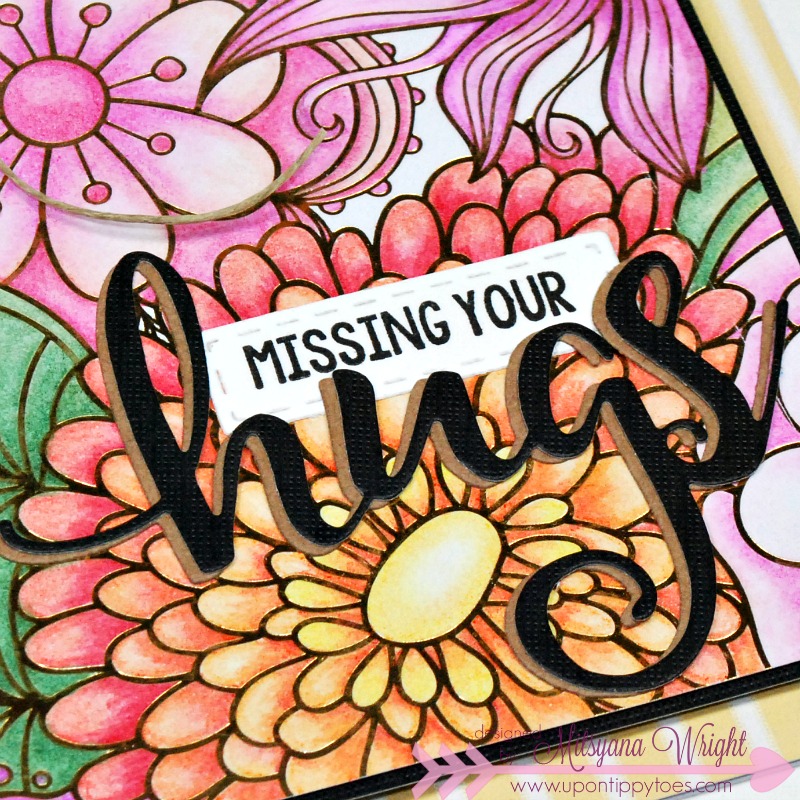
I trimmed my image a tiny bit down and mat my little work of art.  Then attached it to a card base. But what transforms my coloring into an exquisite card are these gorgeous script dies from Pink and Main!! 

And, today, I used the Hugs Dies...

with coordinating Hugs Needed stamp set...

and the smallest rectangle die from the Stitched Rounded Rectangle Dies to create my card.

The smallest die, in the Stitched Rounded Rectangles Dies, fit most of the "add-ons" to the coordinating word stamps. In the Hugs Needed set, it fits all of the add-ons.
missingyourhugs2
I love the look of shadows behind words, but the shadow for the Hugs Dies was a little too big for my card... So, instead, I cut my word twice and slightly offset it creating the illusion of a shadow.

And most shadows are darker than the actual word on top, but I found that putting the darker color on top and the lighter color on bottom, really makes the word pop especially when you have many bright colors under it. Another awesome tip... if you have a bold or busy pattern background use a solid color on top to break apart the patterns and colors. 

 Sometimes too much of a good thing can be distracting!
So, if you are like me and love to color... try turning your coloring pages into beautiful cards!! They are a so much fun to make and you (and other) get to enjoy you colored masterpieces that much longer!

Here is my finished card...

missingyourhugs

Supplies Used
Hugs Dies (Pink and Main)
Hugs Needed (Pink and Main)
Stitched Rounded Rectangles Dies (Pink and Main)
Gold Garden Coloring Book (Craft Smith)
Tea Party Paper Pad (Craft Smith)
Colored  Pencils (Spectrum Noir)
Odorless Mineral Spirits
VersaFine Onyx Black Ink Pad (Imagine Crafts/ Tsukineko)
Black, White, & Kraft Cardstock
Mega Runner (Xyron)
Hemp Twine
Black Button

Hope you enjoyed my project for today!!
~Mitsy

Wednesday, March 16, 2016

Truly Love These Moments

Hello again, crafty friends!! I have a lovely card for you today. I recently received a few new dies from Die-Namites Dies and they are GORGEOUS. One of the dies that really stuck out to me is this beautiful die called Sunflower Serenade.

Sunflower Serenade
What's kind of funny is that this does not look like your typical sunflower, despite the name. Which gives me prime opportunity to color it any which way I want. I don't have to stick to the traditional yellow petals with brown center. Nope today these flowers shall be red!!

I absolutely love coloring flowers! And for me, there's no better way to shade and color than ebrushing!! Especial on very details dies like this one. I love being able to layer and blend my colors and have them dry almost instantly.


I used my ebrush with  Lime Green, Olive Green, Red, Magenta, Orange and Brown Sharpies.

Then I hand drew detail line throughout the die cut to give it a bit of definition. I also used a glitter gellyroll pen toThen  used a scissors and trimmed off the surrounding frame off away/ from the flowers. 


I die cut the "love these moments" from the Teresa Collins "Noteworthy" set in a black and gold foil cardstock. I used a glue pen at layered them one on top the other but off set it so that the die cut in the back works as a shadow. I know that the black cardstock show up as blue... Kind of reminds me of the black/blue / White Gold dress that circulated  all over social media. 

But I promise you, the cardstock in black. LOL


Then I ran both sets of die cuts through my new Xyron Creative Station Lite. Yes, I said "Lite"... that's right, the Creative Station now has a baby sister!! And it is absolutely adorable!! I love this little machine. It uses 5" Creative Station cartridges as well as the new 3" Creative Station cartridges in an array of materials... magnet, laminate, permanent and repositionable adhesives.


The New Xyron Creative Station Lite will be making its World Launch on HSN today,  March 16th. So stay tuned!!

For my card front, I cut black cardstock to 4"x 5.25". and the craft cardstock 3.75"x 5". I distressed and shaded the edges. Then decided to emboss the craft cardstock using We R Memory Keepers Happy Birthday embossing folder.

I attached my sentiment and flowery focal point onto my card front. Then ran the entire card front through the Creative Station.


I just peeled and attached my card front onto the card base I made using Craft Smith's Natural Luxury Stack. Then I tied sheer black ribbon across the top making a simple bow. 

I really hope hope you all enjoyed this card today!! I know I did! Hehehe!

And, don't forget to Stay tuned to HSN to watch the Xyron's NEW Creative Station Lite!!

I hope this inspires you to get crafting!!

Hope you all have a wonderful day!!
~Mitsy

Supplies Used 
Cut'n'boss (Craftwell)
Sunflower Serenade (Die-Namites)
Love These Moments- Teresa Collins Noteworthy die set (Craftwell)
ebrush (Craftwell)
Creative Station Lite w/ 5" Permanent Adhesive Cartridge (Xyron)
Sharpie Markers- Lime Green, Olive Green, Orange, Brown, Red, Magenta
Black Cardstock (Bazzill Basics)
Woodgrain cardstock- Natural Luxury (Craft Smith)
Gold Foil Cardstock (Grafix)
Craft Cardstock (DCWV, Colorbok)
Happy Birthday Embossing Folder (We R Memory Keepers)
Tim Holtz Distressing Tool (Tonic)
2 Way Glue (EK Success)
Glitter Gellyroll Pen (Sakura)
PITT Artist B (Faber-Castell)


Friday, August 21, 2015

Hello- Monarch Butterfly Card


Hello Crafty Friends!! It has been such an amazing week!! Today is the last day of the Xyron & Craftwell Inspiration Hop. I hope you had a great time viewing all the fabulous projects from Both the Xyron and Craftwell Design Teams!! 

Supplies Used
Cut'n'boss (Craftwell)

Teresa Collins Pocket Dies (Craftwell): 
Butterfly, Hello- Memory Collection, Doily- Lover's Lane, Stem, Leaves- Thankful 

eBrush w/ Sharpie Adapter


Cardtsock:
Bazzill Basics - Black, Green Monochromatic, Yellow Monochromatic
Core'dinations- Harvest Yellows
Craft cardstock (Colorbok)
Patterned Paper-  Craft Smith Natural Luxury

Sharpie Markers:
Moss Green, Brown, Mustard, Gray, Yellow, Orange

PITT Artist Pen B (Faber-Castell)
Gesso (Liquitex)
Diamond Glaze
Toothpick
Cutterbee Scissors

First I started of by cutting out my die shapes out of cardstock. Because of the Cut'n'boss' huge platform I cut cut several dies at once and that means I don't have to make as many passes as I would if I were using a smaller machine.  

For my sandwich combo (especially when cutting multiple layers) I use the following combination:

From Bottom to Top
D Plate
A Plate
Magnetic Plate
Die
Paper
Metal Plate
A Plate

In one pass I was able to cut 1 doily, 2 layers of butterflies, 2 hellos, and (because my craft cardstock was on the thin side) I was also able to cut 3 layers of sprigs and 3 layers of leaves all at the same time.

Next airbrushing my die cut pieces...

I airbrushed my yellow butterfly using my ebrush machine and a yellow and orange Sharpie.Concentrating the orange to the tips and center of my butterfly.


After ebrushing I hand drew the black details using a  Brush PITT Artist Pen. Coloring in the body of the butterfly and outlining the wings. I did a web search for Monarch Butterfly images as a reference to my outlines.

Monarch Butterfly don't have a little "tail" (that's what I;m calling them) at the bottom of their wings, so I snipped them off with a pair of scissors.

With some gesso and a toothpick I added the small white details to my butterfly's wings and body. Set aside to dry.

While my butterfly was drying... I snipped off the tails from the second butterfly and ran it through.
 I bent my butterfly wings back and just applied diamond glaze to the body and adhered it to the top of my second butterfly that I just ran through my Xyron Sticker Maker. Once it was dried I had a three dimensional butterfly sticker.

I then ebrushed my sprigs and leaves. I ebrused the springs with mustard and gray. And my leaves in moss green and brown. I also ebrushed 1 layer of my "hello" word. This be my top layer. I adhered the rest of my helloes together using 2way glue and stack them onto each other with the ebrushed layer on top.

I ran my all my freshly ebrushed pieces through my Xyron Creative Station all at the same time and included a mat for a 5"x7" card. 


At the very last minute I decided I wanted an additional mat for my mat... LOL... so I just attached it, with my Xyron Mega Runner, directly to my 5"x7" card base I made out of black cardstock..


Then I peeled and adhered all my elements to my card front.

And finally peeled my butterfly and adhered it to my cardfront.

And here is my finished card... 

 I absolutely love how this card, especially the butterfly, turned out!! I am just so happy with all the little details on just this piece alone!

 Here are a couple more shots of the butterfly...


I hope I was able to inspire you with today's tutorial!!
Until next time...

HAPPY CRAFTING!!
~ Mitsy

Don't forget to visit Xyron & Craftwell on Facebook for more amazing projects!!


Sunday, June 28, 2015

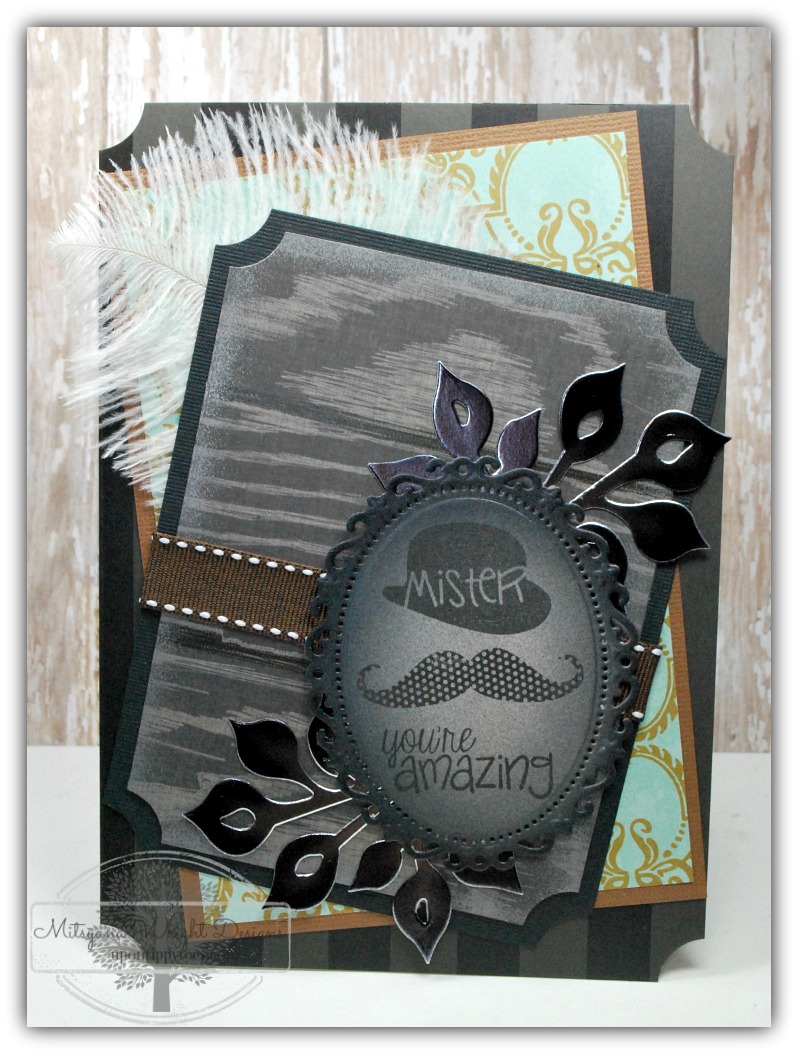
Mister... you're amazing!!


Hey Crafty Friends, Mitsy here!!!  I'm entering Die-Namites monthly Sketch Challenge and Dare!! 
This month's dare was to create something "manly".
The sketch doesn't have to be exact and can be loose interpretation... which I love. I just need to "somewhat" follow their sketch and make it "manly"... ok, I can do that... I think. LOL
Here is the sketch:

And I used the Die-Namites Small Ivy Die to incorporate into my card. I love that this isn't a flowery die. Flowers are pretty and delicate and some "men" (not all) don't like a card that is too frilly. So these ivys are a great choice.

Small Ivy


This card is for my Father-in-law. I would summarize him as very classy with a bit of old world. He likes to sit outside at night and smoke cigars and read the newspaper. Sometimes my husband and I take the kids over to visit… he’ll come inside and share a bottle of wine with me and my husband and ask about our day, our kids, or my side of the family.  Simple courtesies that in today’s society have become a rarity. He’s a classy man who’s entitled to a classy card.  

I thought the Mister set from Pink & Main would go great with this month's challenge. This is an awesome “Guy” set. I Love how it come with several different mustaches in different sizes, shapes, and even patterns!! But my favorite stamp of this has to be the houndstooth stamp! I also used it to make an awesome background for another card here.


Here is how I put my manly card together...
First, I started off by cutting a scrolled oval from my Spellbinders Floral Oval set. I airbrushed around the edges with my ebrush machine and my Spectrum Noir MArkers in BGR1, BGR2, and BGR3.

Then I used my hat, mustache, and sentiment from Pink and Main's Mister stamps set with my Momento ink pad in Tuxedo Black.
  I wanted a bit of shine on my card and since rhinestone don't appeal to too many men I opted for metallic paper instead. Graffix makes cool metallic cardstock that comes in different color bit I chose their plain silver...


I used my Die-Namics Small Ivy die and cut out 2 ivy branches.

Then I airbrushed the leaves with a black Sharpie marker. Even though I airbrushed the color over the paper it still maintains all the shine of the metallic paper.
I set that on the side.
I made a couple of mats and ran them through my Xyron Creative Station.
I also made a card base and another mat from these awesome dark , masculine paper by Craft Smith... this is from their Natural Luxury stack.
Then I ran all my pieces through my Xyron Creative Station. 

And pieced all my elements together. I decide to add an ostrich feather behind one of the mats at the last minute... I think I like it!

And here is my finished card...


I hope you liked my project!!

Come back and visit for more crafty inspiration!
~ Mitsy


Saturday, May 30, 2015

Father's Day Candy Bouquet

Hello Crafty Friends!! I am back with another handmade gift idea. As we know, Father's Day is just around the bend. I don't know about you but I am always plagued with the decision on what to get my my husband for Father's Day.

Getting him a tie would be pointless... his work attire is ultra casual and consists for the most part of polo shirts and jeans... yes, jeans... told you ultra casual! 
Then, there's cuff links... Shoot, the last time he wore a set we were getting married, and that was practically a decade ago.
T-shirts... nah!! He's got a closet full.
Cologne... uh-uh, I have a sensitive nose... poor thing wouldn't be able to wear it.

Ok, well if you're just like me and in a rut... there's always that age-old saying...
"The way to a man's heart is his stomach"!

And my hubby (aka... my babies' daddy) is no exception. That is fine by me because it always seems that I'm gifting someone FOOD and it "food gifting" has become of my specialties!

I decided I wanted to make him a candy bouquet but not just any candy bouquet a manly bouquet. Packed full of "GUY" treats like beef jerky, nuts, and ok, a little bit of chocolate... hahaha, who am I kidding... I'm stock piling it with behemoth sized servings of chocolate.. because that is just how I roll! LOL
 And then the icing on the cake... gift cards!! My children wanted to get involved and helped get daddy something special... so each of their cute little selves chipped in to buy their daddy some google play gift cards. How sweet are they?!!
My husband is a big computer geek so I know these are always a welcomed gift.


Here is what I used to make this Daddy Bouquet...

Tools and Supplies Used
Xyron Creative Station
Spellbinders Nestablities- Label Twenty-Five
Spellbinders Shapeablities - Damask Motifs
Cut'n'Boss Machine
Eclips Machine with ecal software
Craft Smith - Natural Luxury
Grafix Arts Metallic Silver Cardstock
Bazzill Basics Paper- Raven
Wooden Dowels
Transparent Tape
Green Styrofoam block
Ad-Tech Hi Temp Glue Gun and Glue Stick
True North Chocolate Nut Crunch
Reese's Big Cup Peanut Butter Cups
Jack Links Beef Steak Sticks
Polka Dot Tissue Paper
Powdered Drink Container


This project is another easy way to recycle all your old powdered drink mix containers, oatmeal canisters, or empty coffee cans. Just remove the paper label (if any) and clean out the inside and presto... instant base for your bouquet.

First thing I did was measure my container. There is a lip at both the top and the container... so make sure you measure from the inside of both lips. Mine measured 6.75" high  by 16" around. 

Then, I added at least two inches onto the circumference to allow my paper to overlap a bit when wrapping the can.

Since I don't have 18" paper I made 2- 6.75"x9" pieces instead.

I then ran both pieces through my Xyron Creative Station(with 9" permanent adhesive cartridge). And set aside.

I then used my Cut'n'Boss Machine to cut all my Spellbinders dies at once... Gotta love that extra large cutting platform!!


Cuts like butter every time!!


I ran all my die cut shapes through my Xyron Creative Station... this time using the 5" permanent refill cartridge. Love how this bad boy takes the place of 2 machines!


And the 5" cartridge still has plenty of space to run all my pieces at one time!! LOVE IT!


Next using my Sizzix Eclips and ecal I spelled out "DAD". 

 T

Since these are smaller I decided to use my smaller Xyron  2.5" Create-a-Sticker. My Xyron machines make creating a breeze. There's no drying time and virtually no clean up too!! Simplicity at it's best!


I used to hot glue my paper but ran into a couple of problems with the glue cooling too fast and leaving unsightly lumps under the paper or my paper. I like that I can just peel the backing and stick and that my surface looks and feels smooth!


I took all my small damask diecuts peeled and adhered them onto my label making one big sticker label.


Then placed it onto the front of my canister,


This the only place hot glue onto my project. I added a good amount of hot glue on the inside bottom of my container and added my styrofoam. If you can't fit your foam in try cutting down your edges before inserting.


Then I taped my dowels to all my treats, even the big bag if chocolate covered nuts. For the heavier items I made sure to give it a sufficient amount of tape to support all the weight. 


Then I inserted the dowels into the foam. I made sure to arrange the dowels so that they look like they are cascading or "tiered". You may have to cut some of you dowels down in order to achieve the stadium seating type arrangement. LOL


Lastly, I inserted tissue paper in between the dowels and down into the can ... covering the gaps and concealing all the dowels.


I hope you enjoyed this yummy gift idea.. my Father's Day "Man" Bouquet!!

See you all again next time!!

Happy Crafting!!

~Mitsy