
Hello, Friends!! Welcome back!!
I'm up on Day 2 of the Rinea and Pink & Main collaboration!
All week long we will be featuring amazing projects from our talented Design Team Members using both Rinea and Pink & Main products. And if tons of crafty inspiration was not amazing enough, You can enter to win a $25 Gift Certificate to the Pink and Main Store. All you have to do to enter to win is stop by the Pink and Main blog each day this week and leave a wonderful comment on the featured post!! Easy-peasy!!
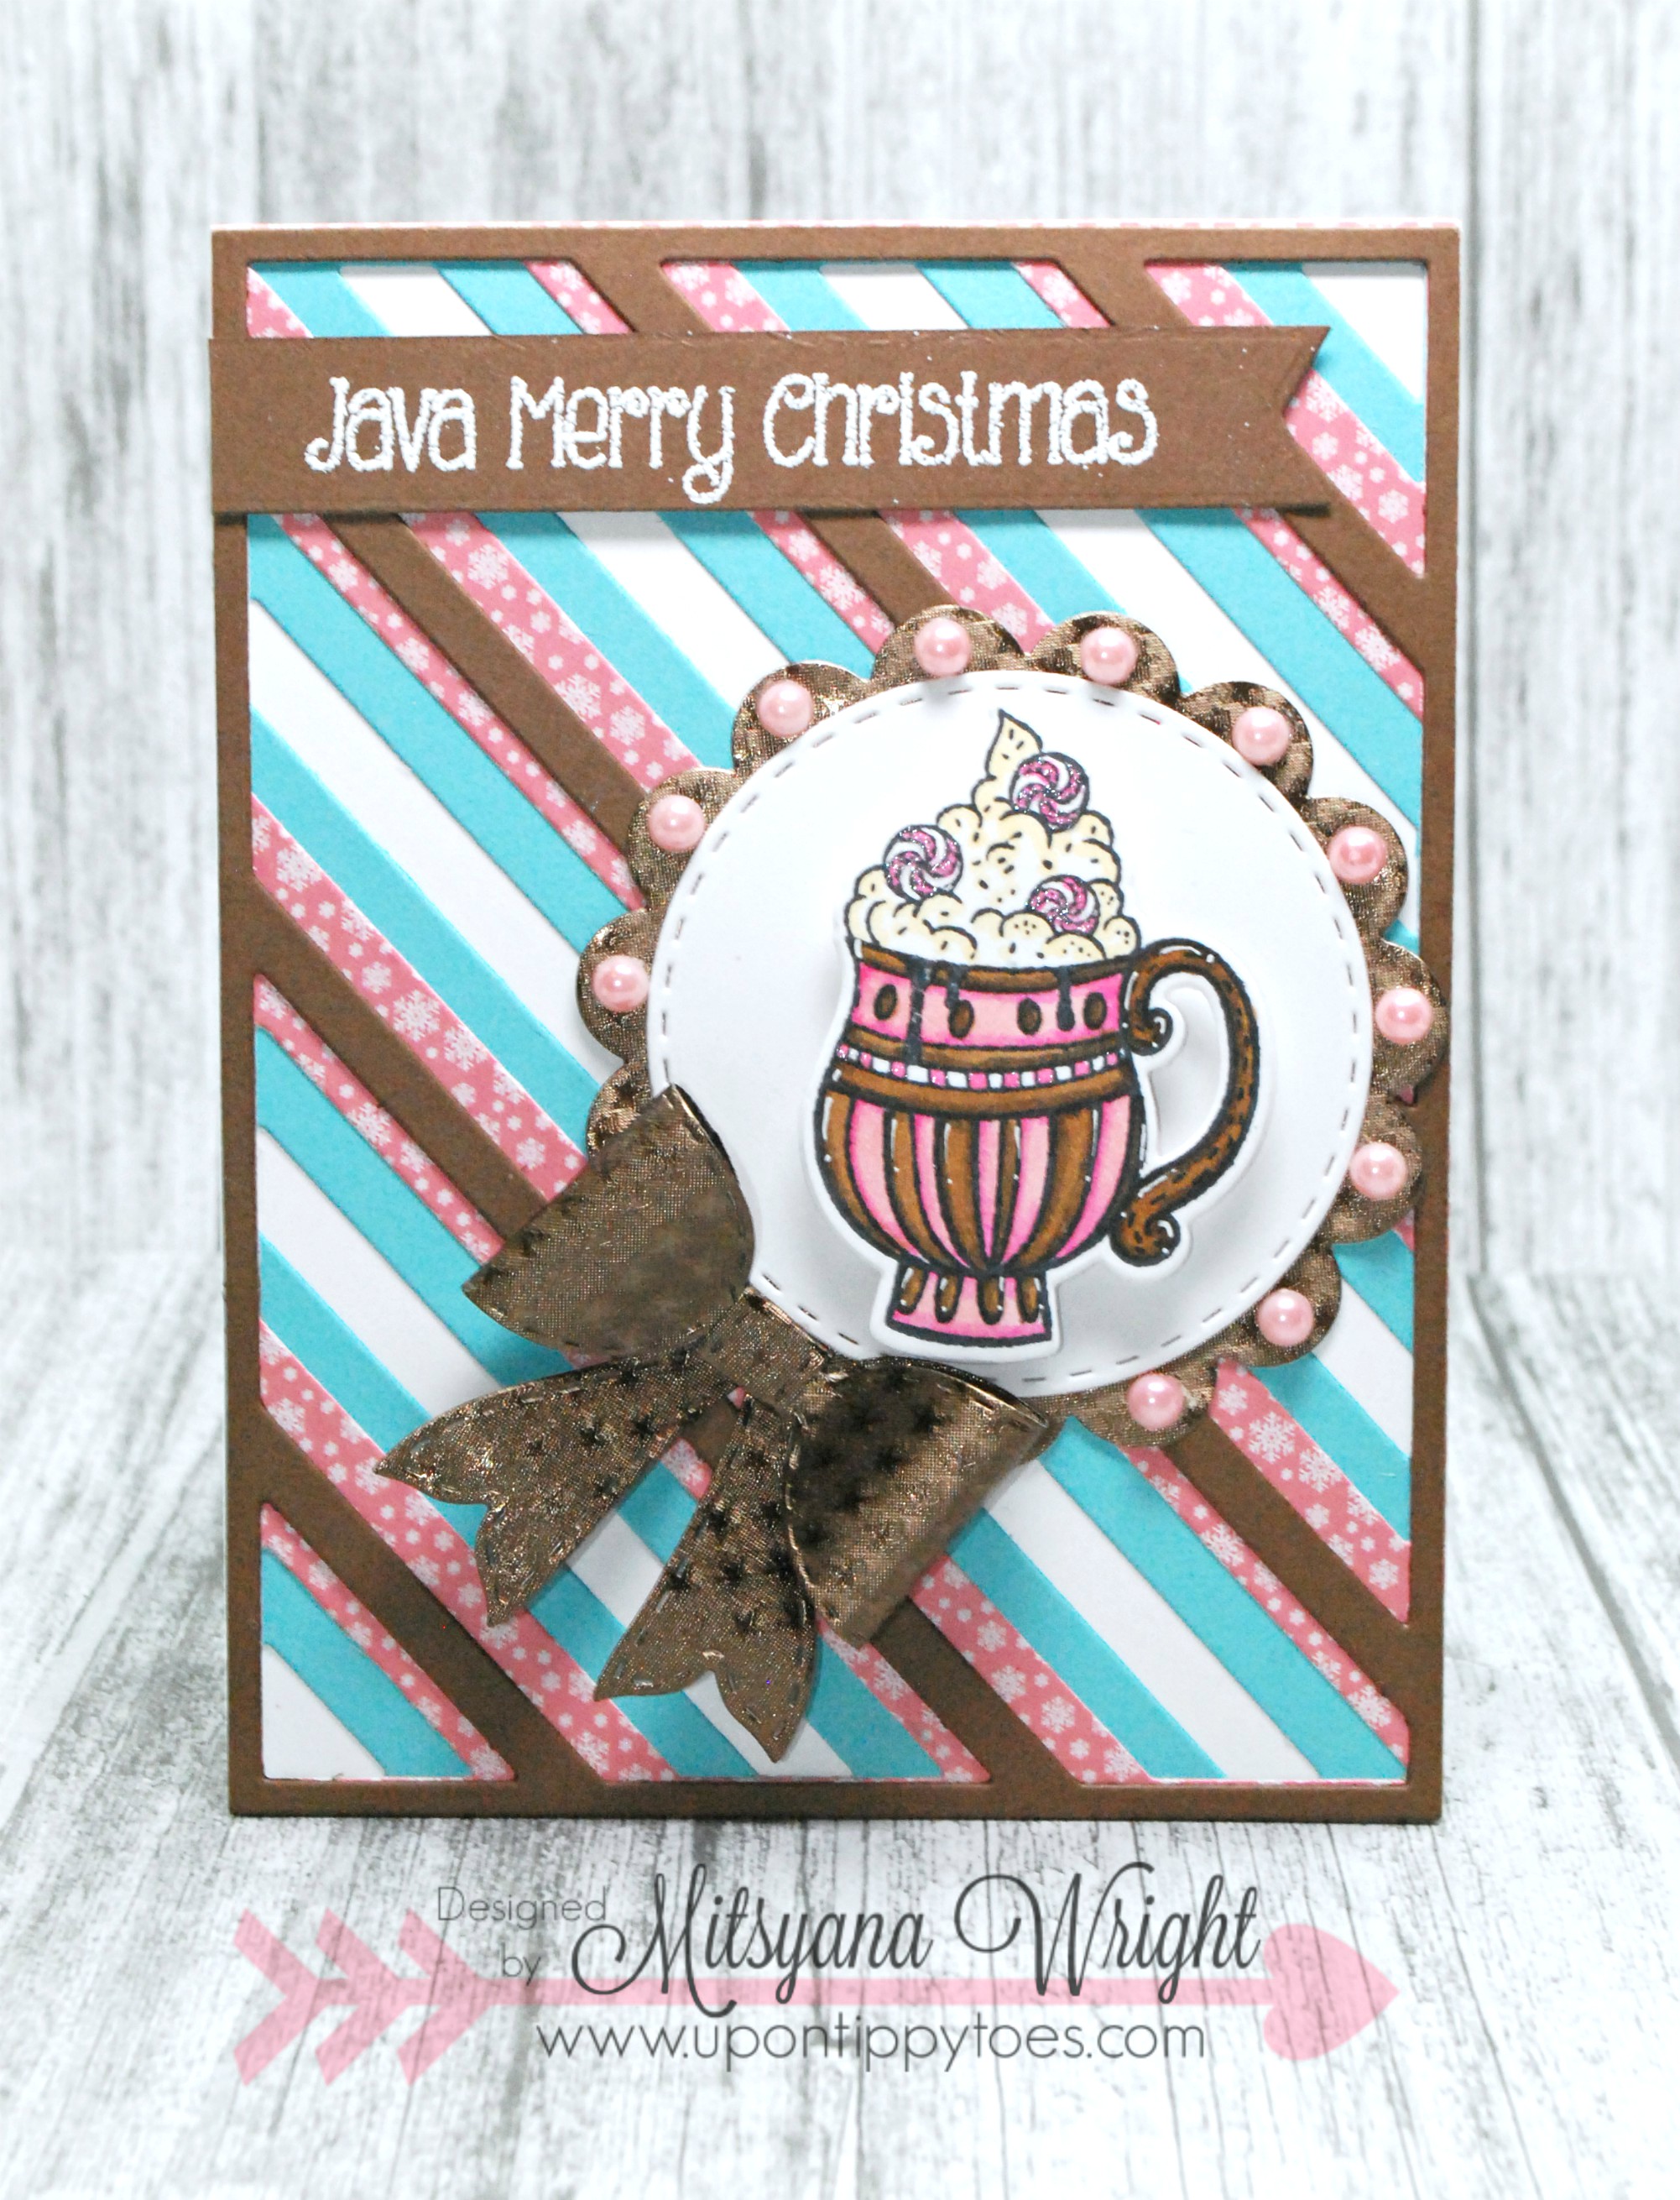
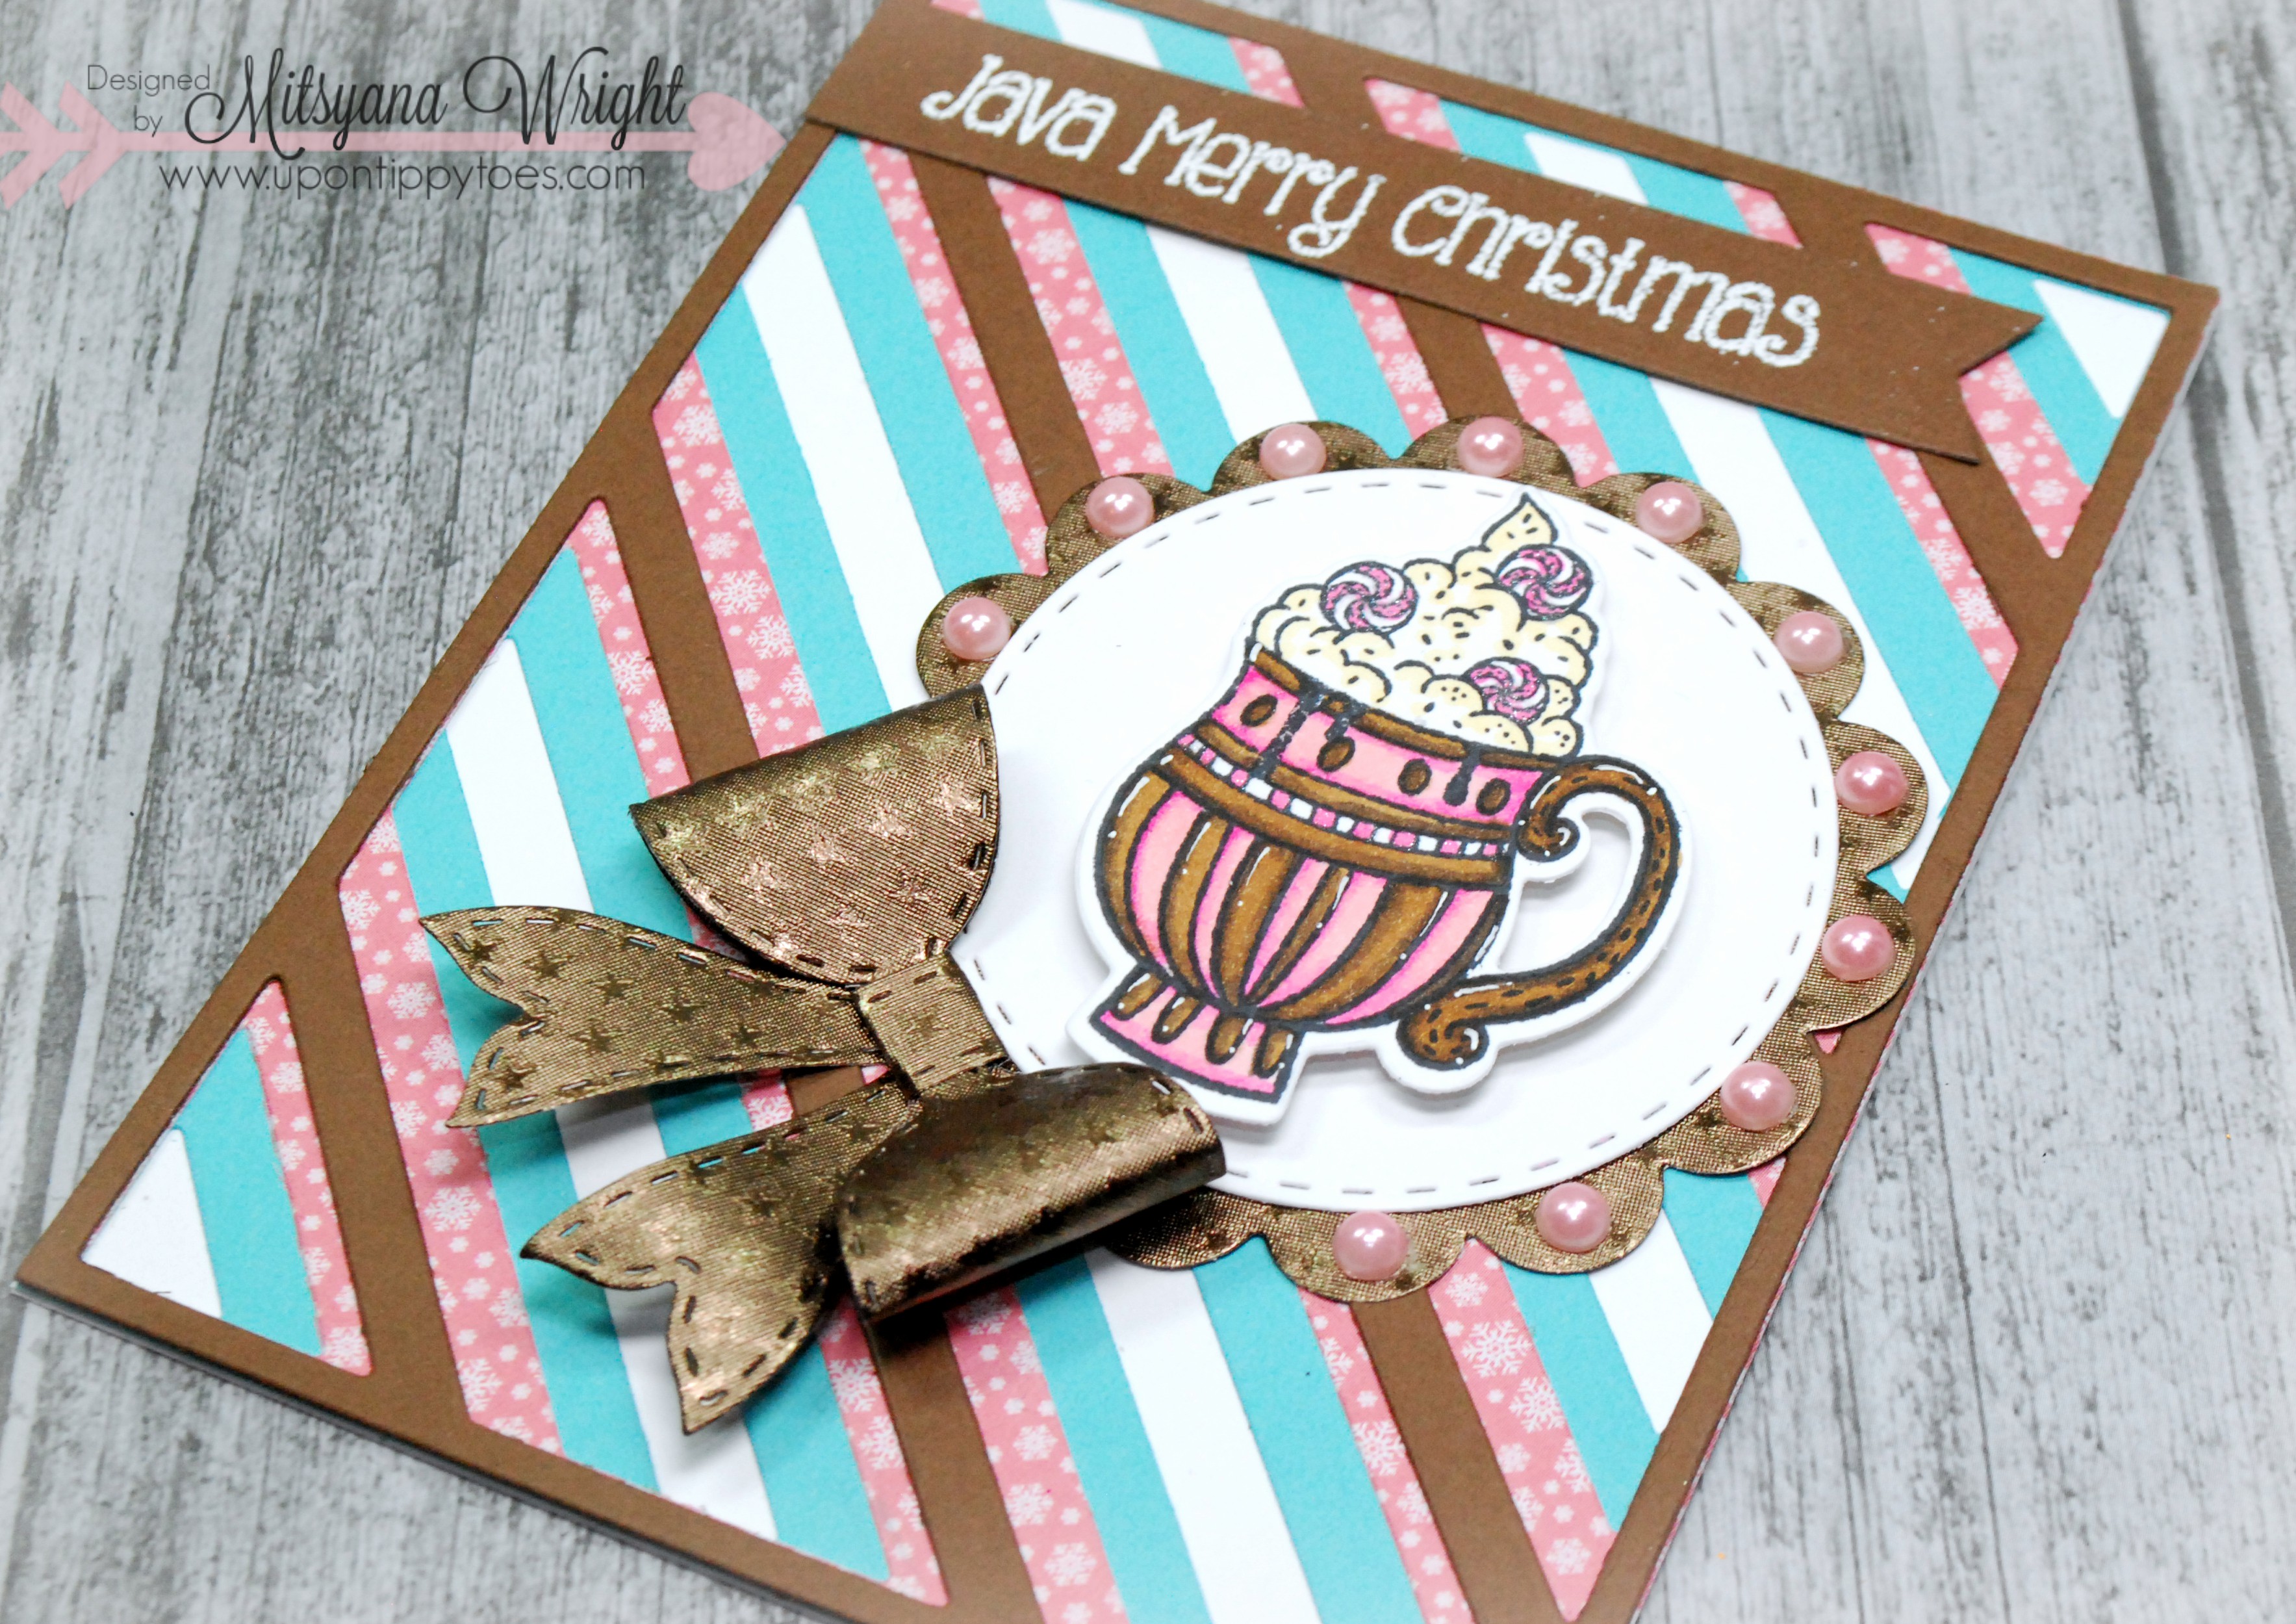
For my project today, I created this card...
Supplies Used


Other Supplies Used
Big Shot (Sizzix)
Ultra Smooth Premium Cardstock (Crafter's Companion)
Spectrum Noir Illustrator Markers- AB1, AB3, PP1, PP6, EB2, EB7, FS9 (Crafter's Companion)
Momento Tuxedo Black Ink (Tsukineko/ Imagine Crafts)
VersaMark (Tsukineko/ Imagine Crafts)
White Embossing Powder (Tsukineko/ Imagine Crafts)
Self Adhesive Flatback Pearls
Mega Runner (Xyron)
I started by stamping my images from Pink and Main's Christmas Mugs stamp set onto ultra smooth cardstock with Momento ink. I always stamp more images than I need "just in case".
Tip: can use any brand ink as long as it is dye based ink. It needs to be dye based so that the ink doesn't smear or bleed when coloring with the alcohol based markers.
I colored my images using my Illustrator Markers.
Cup on the LEFT I used:
AB1, AB3, PP1, PP6, & FS9
Cup on the RIGHT I used:
PP1, PP6, EB2, EB7, & FS9
I colored my images using my Illustrator Markers.
Cup on the LEFT I used:
AB1, AB3, PP1, PP6, & FS9
Cup on the RIGHT I used:
PP1, PP6, EB2, EB7, & FS9

Once my images were colored, I cut them out using the matching Christmas Mugs Dies.

Then I die cut Rinea's Star Struck Mocha Brown foil paper from the Autumn Variety Pack using Pink and Main's Scalloped Circle and Large Bow Dies.
These are just too cute and so much fun to make. And when cutting them with Rinea's foil paper you can curve and mold them for added dimension and the will stay!How cool is that?!!

Then, to make the background to my card I used Pink and Main's Layered Stripes Dies and cut each layer to the background in different colors. The thick lines in aqua, the medium in pink, and the thin lines in a chocolate brown.
I adhere them together using my Xyron mega runner starting with the thickest stripe at the bottom and working my way to the thinnest stripe on top. Then mounted my background stripes onto an A2 sized card made from white cardstock.
I stamped my sentiment onto more chocolate brown cardstock using a Versamark ink pad and covered it with white embossing powder. Then heat set it, cut it into a flag, and mounted it over the top of the card.
Then lastly, I attached the scallop circle and bow onto the front of my card. I used foam adhesive dots to adhere my little mug and attached little flatback pearls in the center of each scallop.
And here is my finished card...

Here is another close-up...
I hope you enjoyed my card for today!
Don't forget to head on over to the Pink and Main Blog and leave a comment below to enter into our GIVEAWAY!!
HOPE YOU ALL HAVE A SUPER CRAFTY DAY!!
~Mitsyana
***Disclaimer***
This blog is compensated to provide opinion on products, services, websites and various other topics. Even though the owner(s) of this blog receives compensation for our posts or advertisements, I always give my honest opinions, findings, beliefs, or experiences on those topics or products.
The views and opinions expressed on this blog are purely my own. Any product claim, statistic, quote or other representation about a product or service should be verified with each manufacturer, provider, or party in question.
Love the pretty color palette & bow!!Gorgeous card my friend!!
ReplyDeleteHave a wonderful day,
Migdalia
Crafting with Creative M
Adorable and sweet card!!! Colors are amazing!!!
ReplyDeleteSuch a beautiful card Mitsyanna!
ReplyDelete