Saturday, December 24, 2016

Christmas Sleigh Favor Boxes


Hello Crafty Friends!! 
Can you believe Christmas is here already?!! How crazy is that? Where did the time go? I could have sworn it was just Halloween!

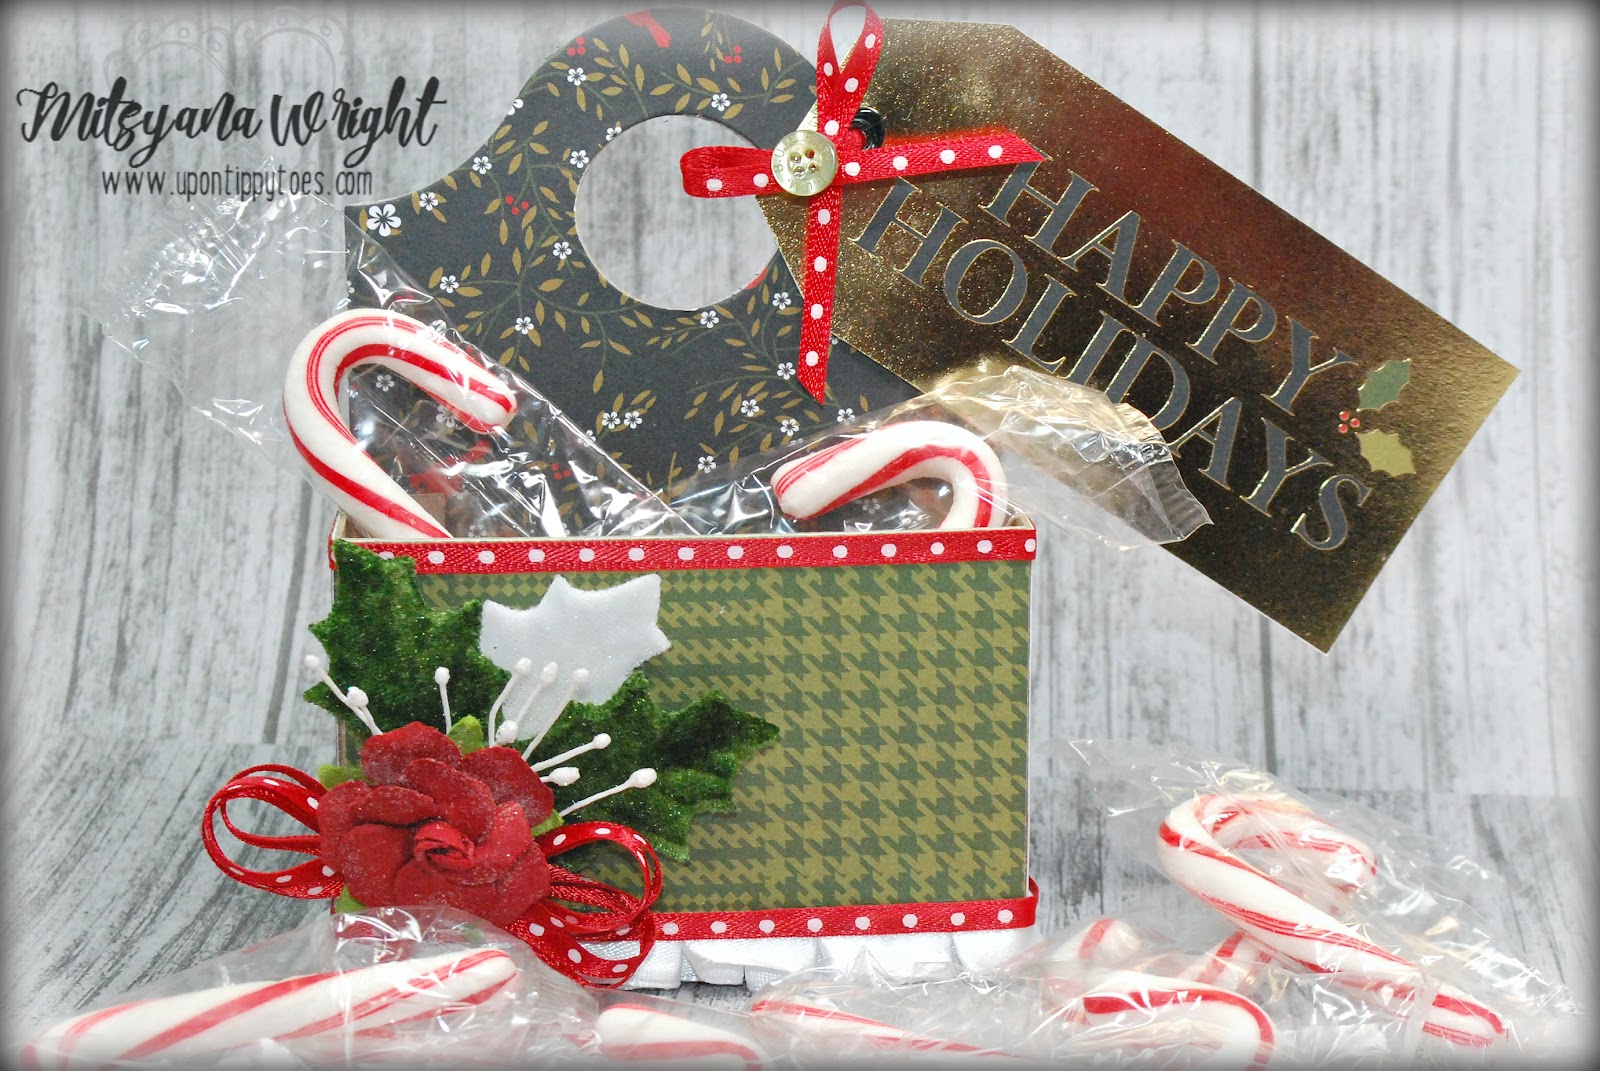
Anyway, today I'm back with DCWV to share these adorable Christmas Sleigh favor boxes with you all. If you regularly follow me, you may remember me mentioning that each year the women on my husband's side of the family gift each other handmade gifts on Christmas day. I originally was going to make everyone these amazing tea cups I made in a previous post HERE.

But, I saw this darling sleigh and needed to have it!! What a great occasion to break it in. These favors definitely give a "WOW" factor!

For such an awesome project I needed to some of my favorite stacks...


and also...
Embossed Foil Stack (DCWV)

Other Supplies
Big Shot (Sizzix)
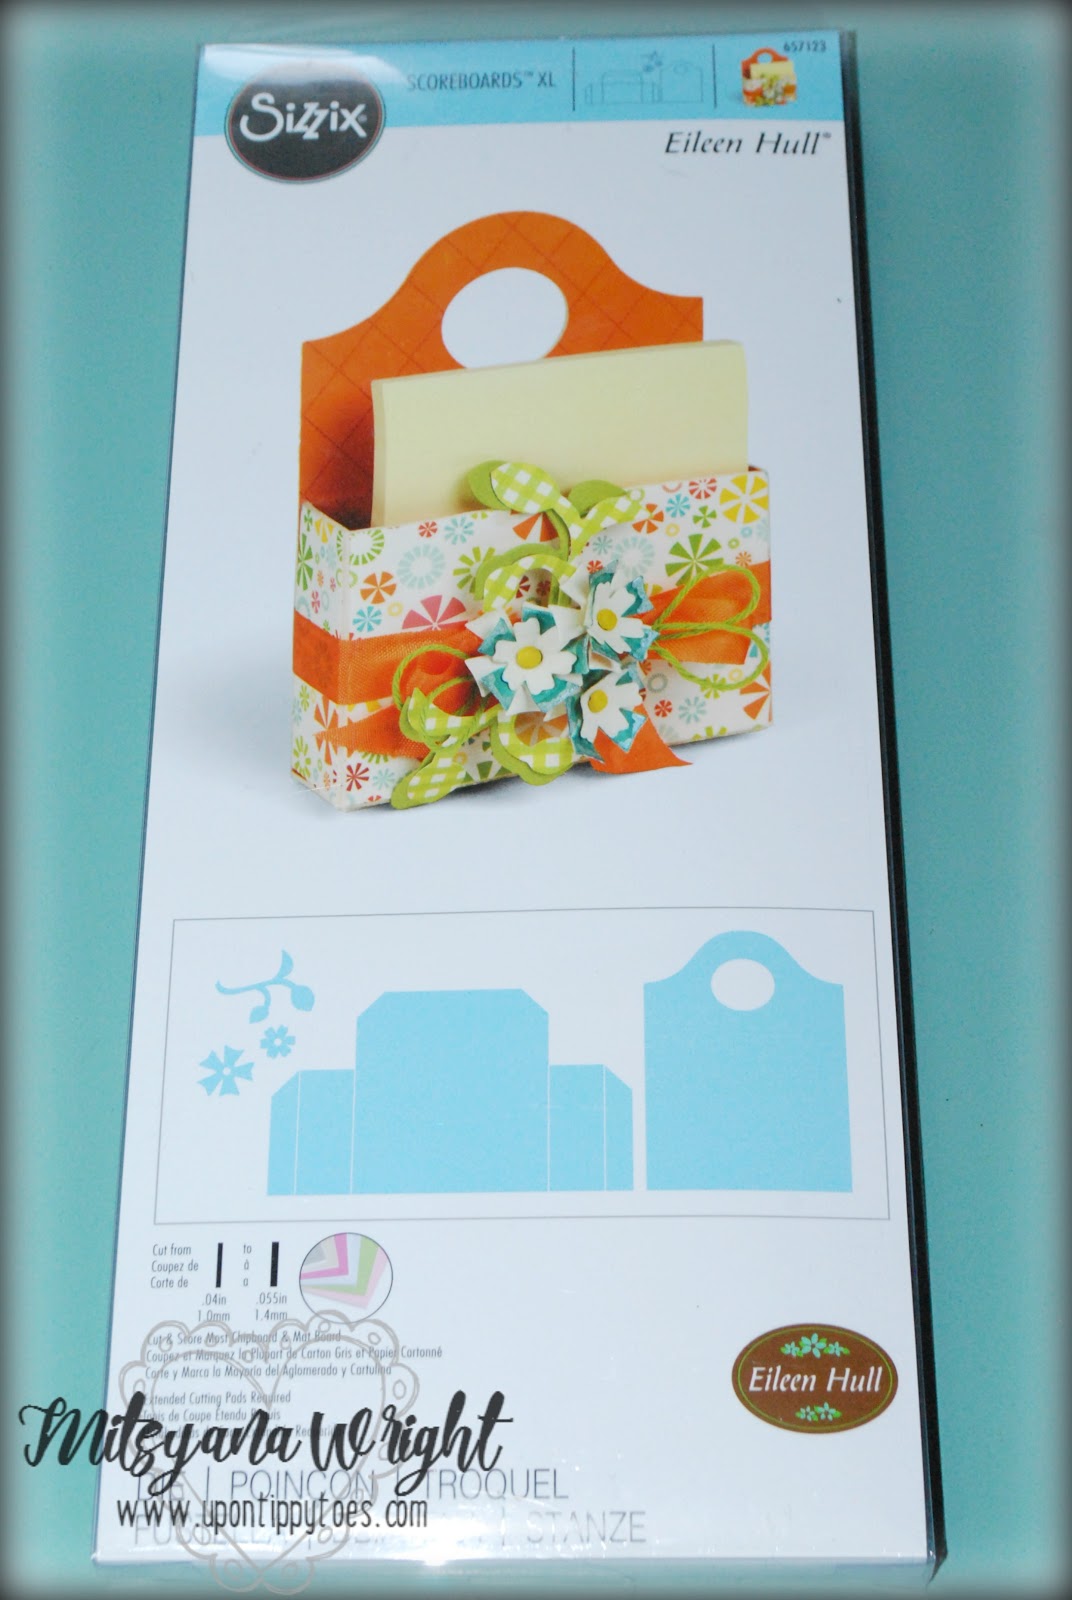
Brenda Walton's Sleigh Favor Box (Sizzix)
Chipboard
Red & White Bakers Twine
Glossy Accents (Ranger)
Glitter Enamel Dots
Holly Leaves (Prima Marketing)
Cellophane Bags


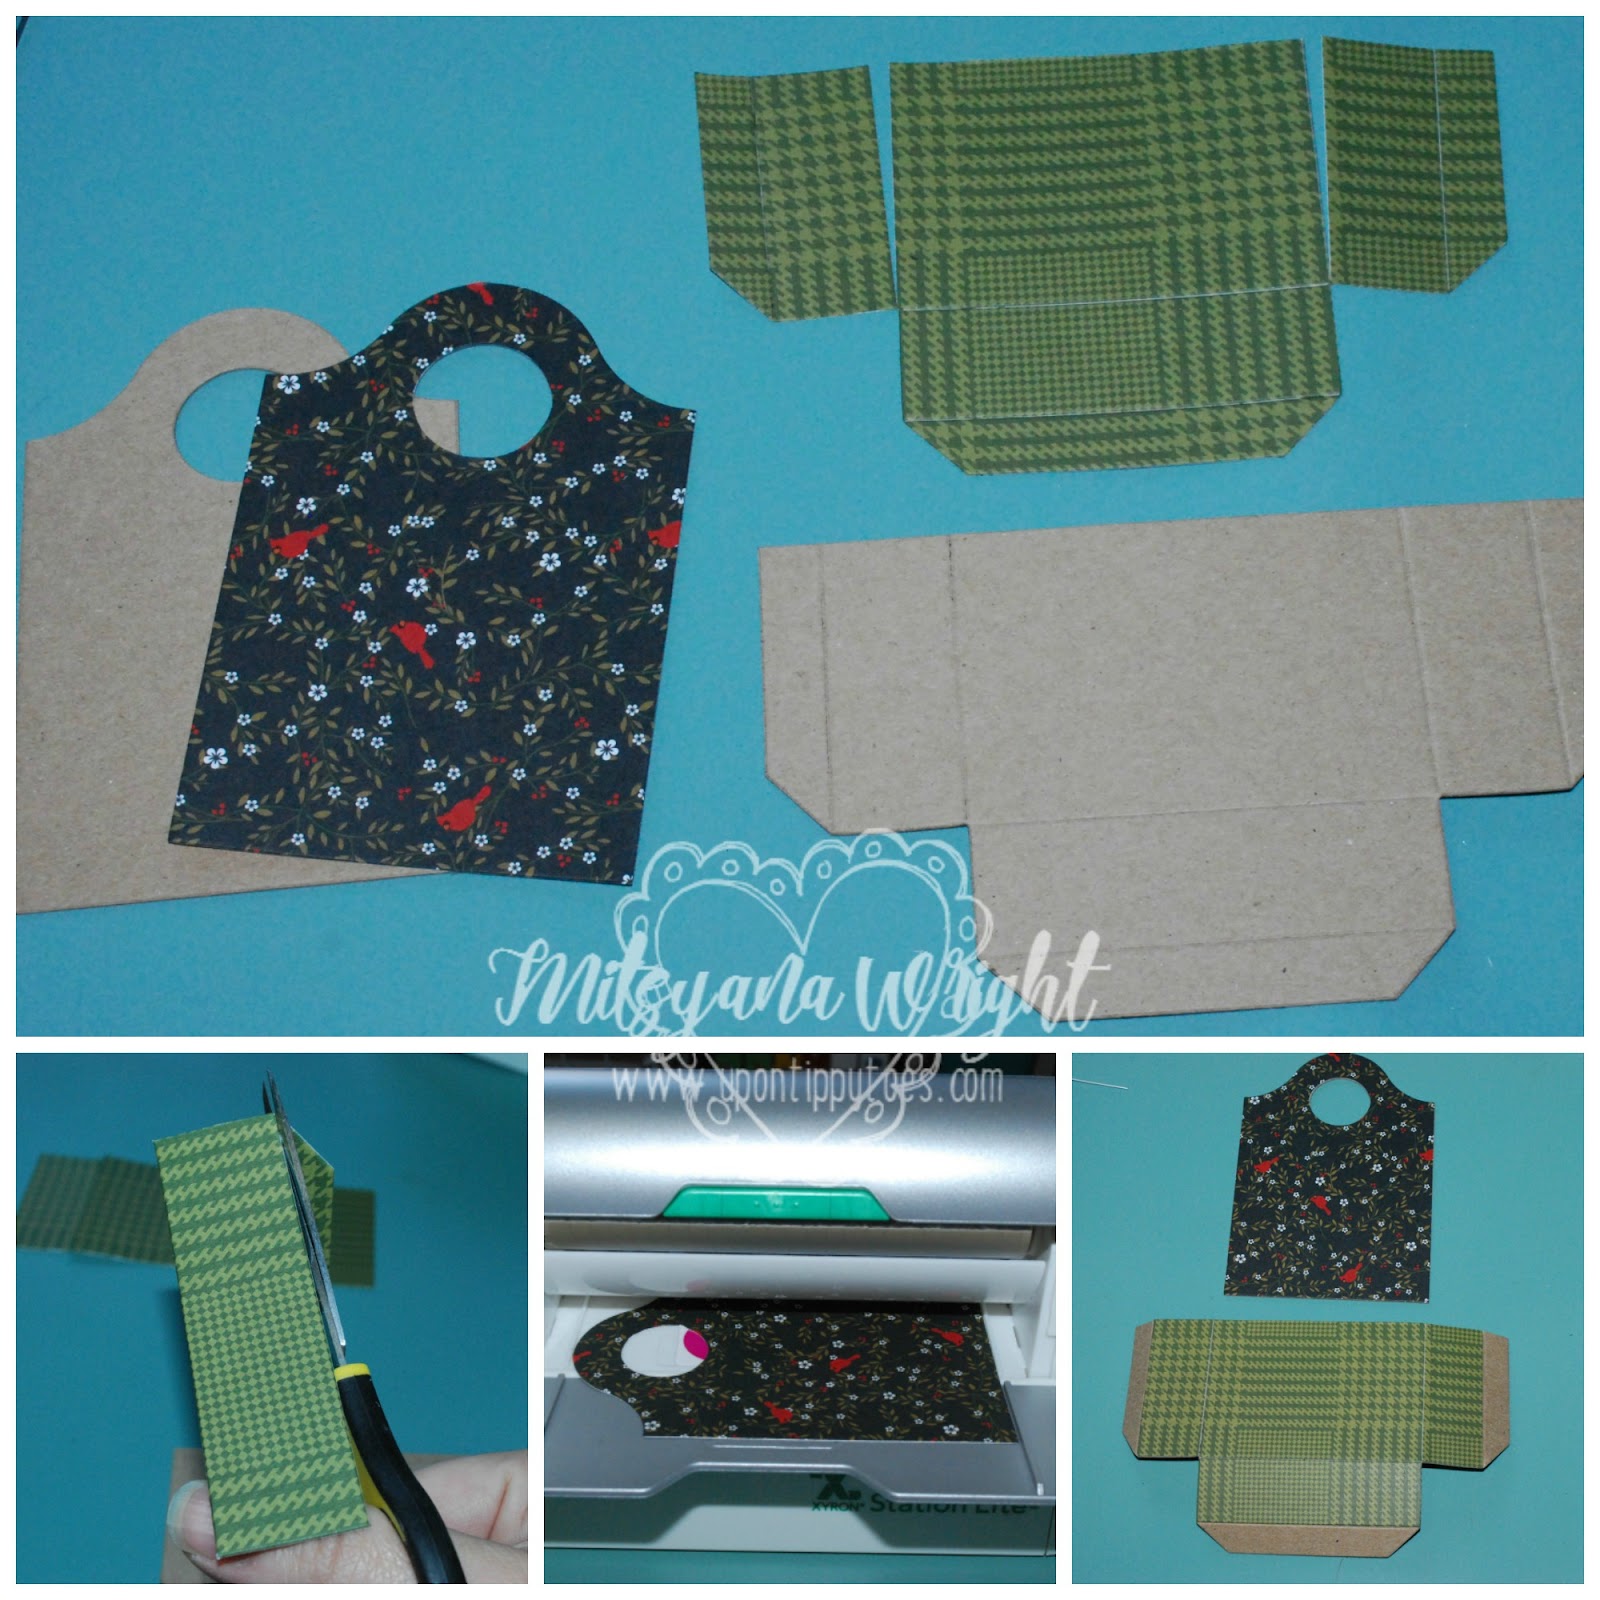
 I started by first trimming down my material down to a die-cuttable size. This is a sizzix L die so I like to cut my material down to 5.5" x 8.25". This way I can get two sets of cuts with one 8.5"x11" piece of paper. 

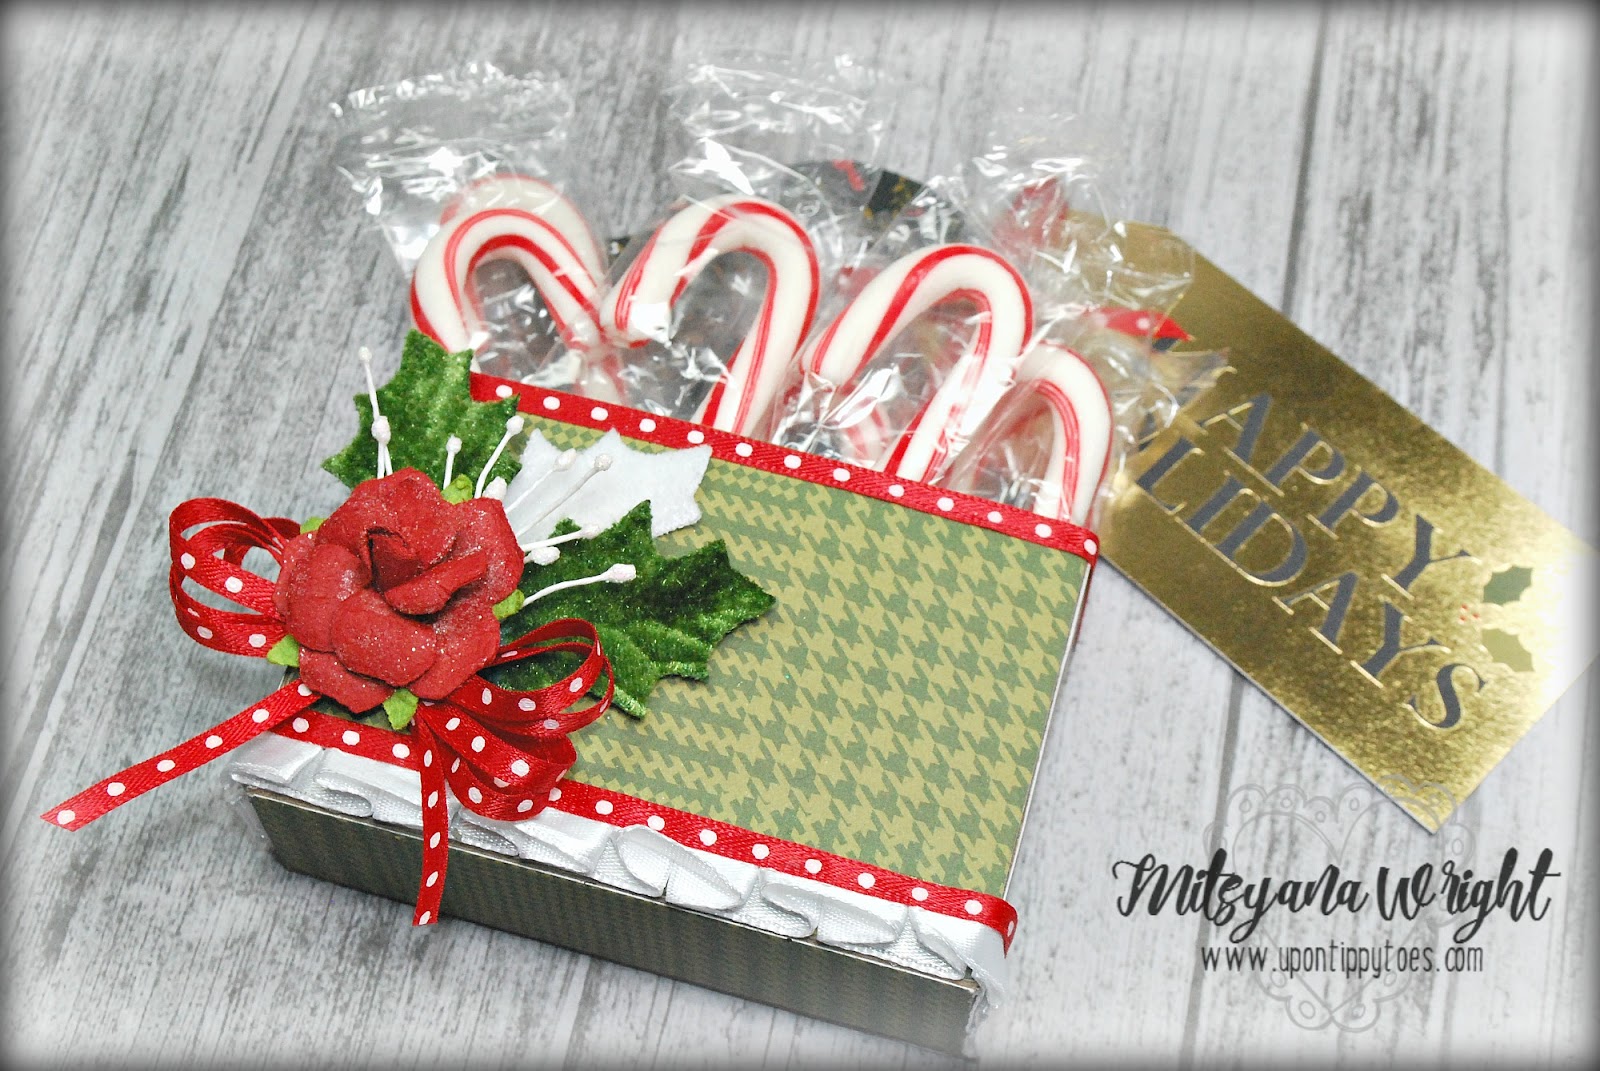
I love how lots of the DCWV stacks complement and coordinate with each other... for my sleigh I used a combination of gorgeous papers from both the Christmas Plaid and the Cranberry Christmas stacks and for a little added shine, also used the Embossed Foil stack as well.

I layered the paper (print side down) then chipboard onto my die and run it through my die-cut machine all together.


I needed 2 sets of cuts... but I needed my second set to mirror my first. To get the mirrored cut I simply flip my paper over to the other side.


For quick and easy adhesive I ran my die cut pieces through my Xyron Creative Station.

Then applied them to their coordinating chipboard pieces. Remember to flip over one of the chipboard sleighs to get the "mirrored" cut.

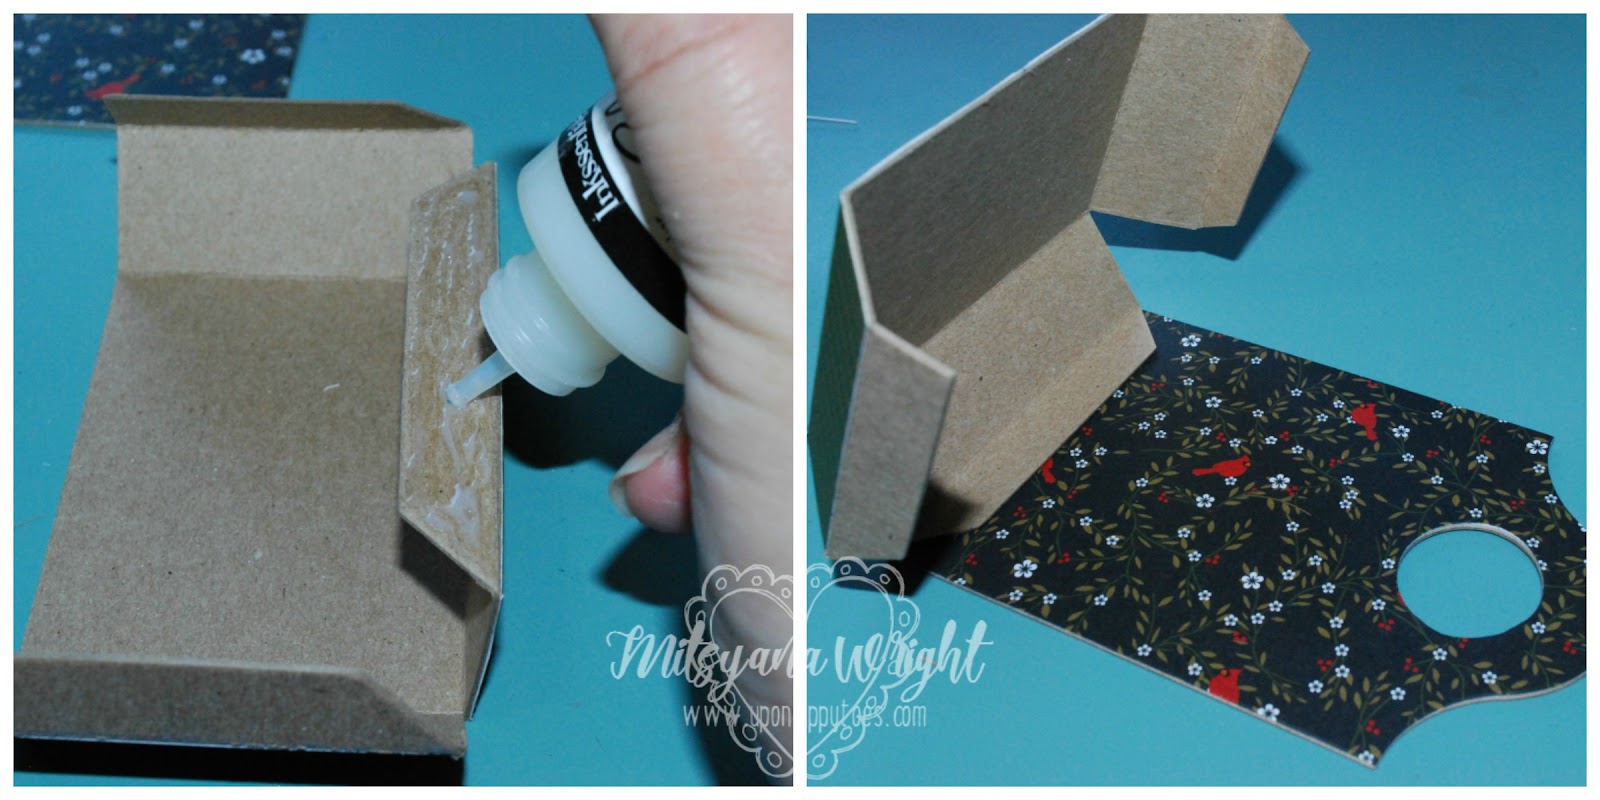
To assemble the carriage of the sleigh, I used a clear liquid adhesive. Hot glue also will work for this step. Just make sure the glue is super hot, otherwise it may cool too fast to adhere properly. 

I also die cut this panel out of more patterned paper to cover the inside and back and front panel of the carriage. I cut the piece into separate segments, using the crease marks as guides.

Then ran those pieces through my adhesive machine and adhered to the carriage.

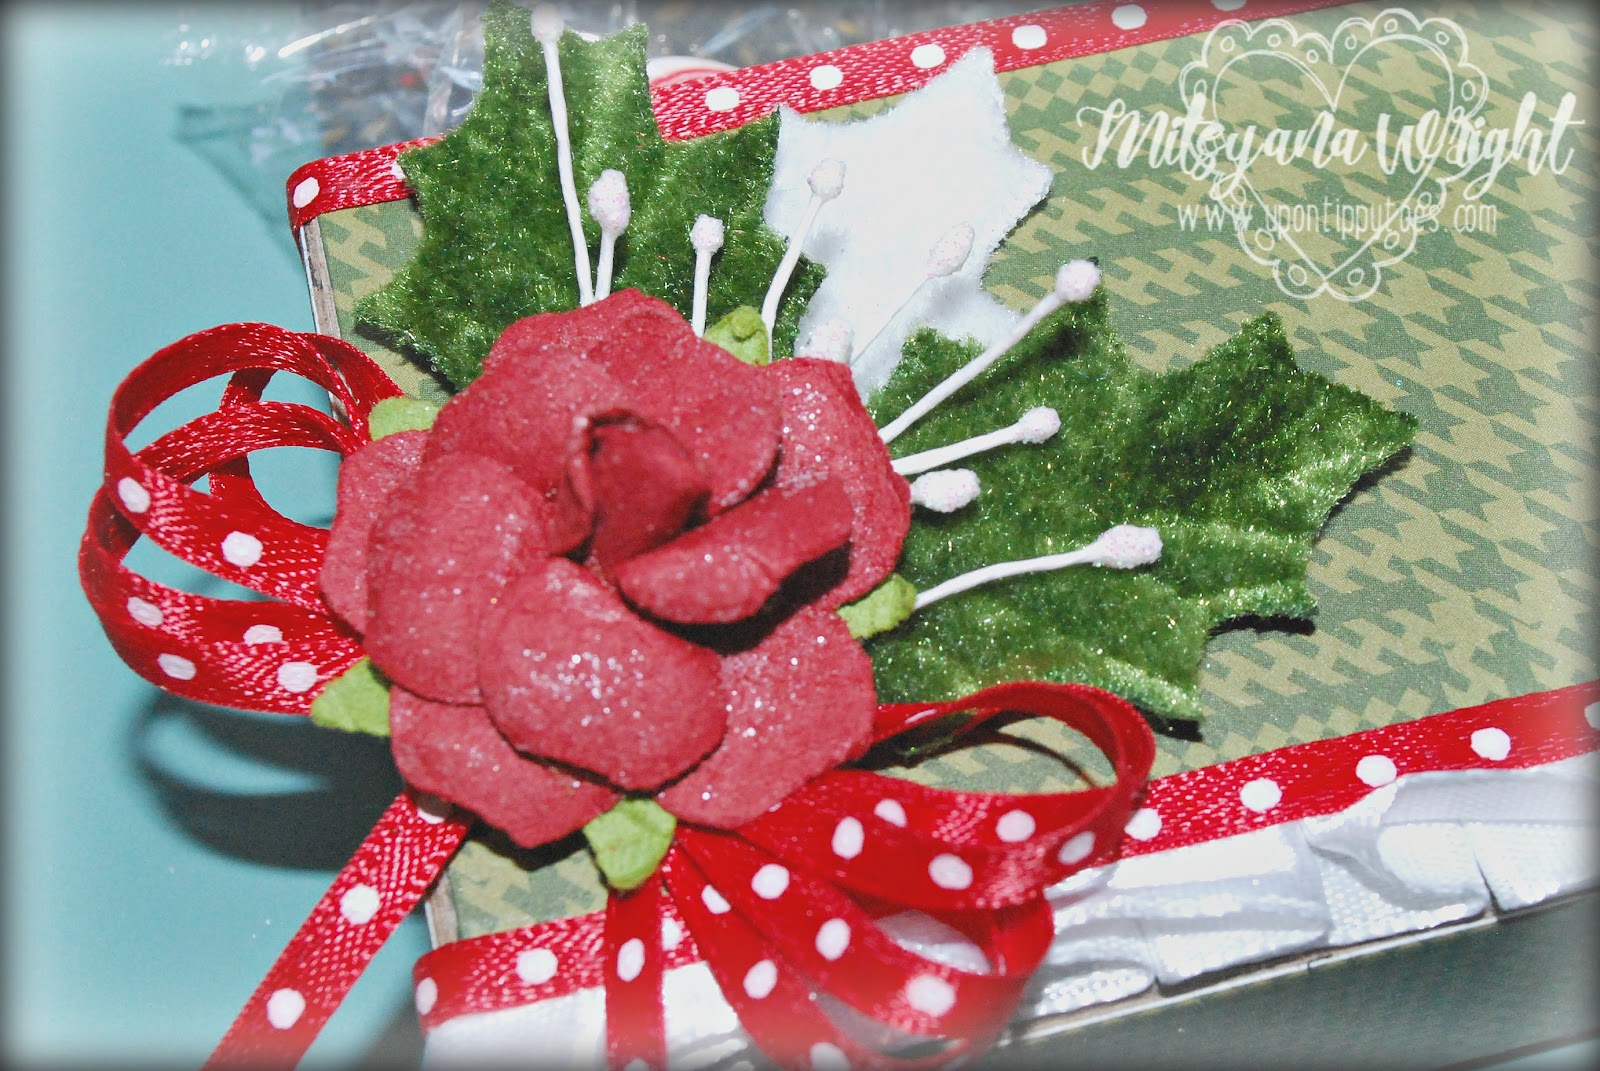
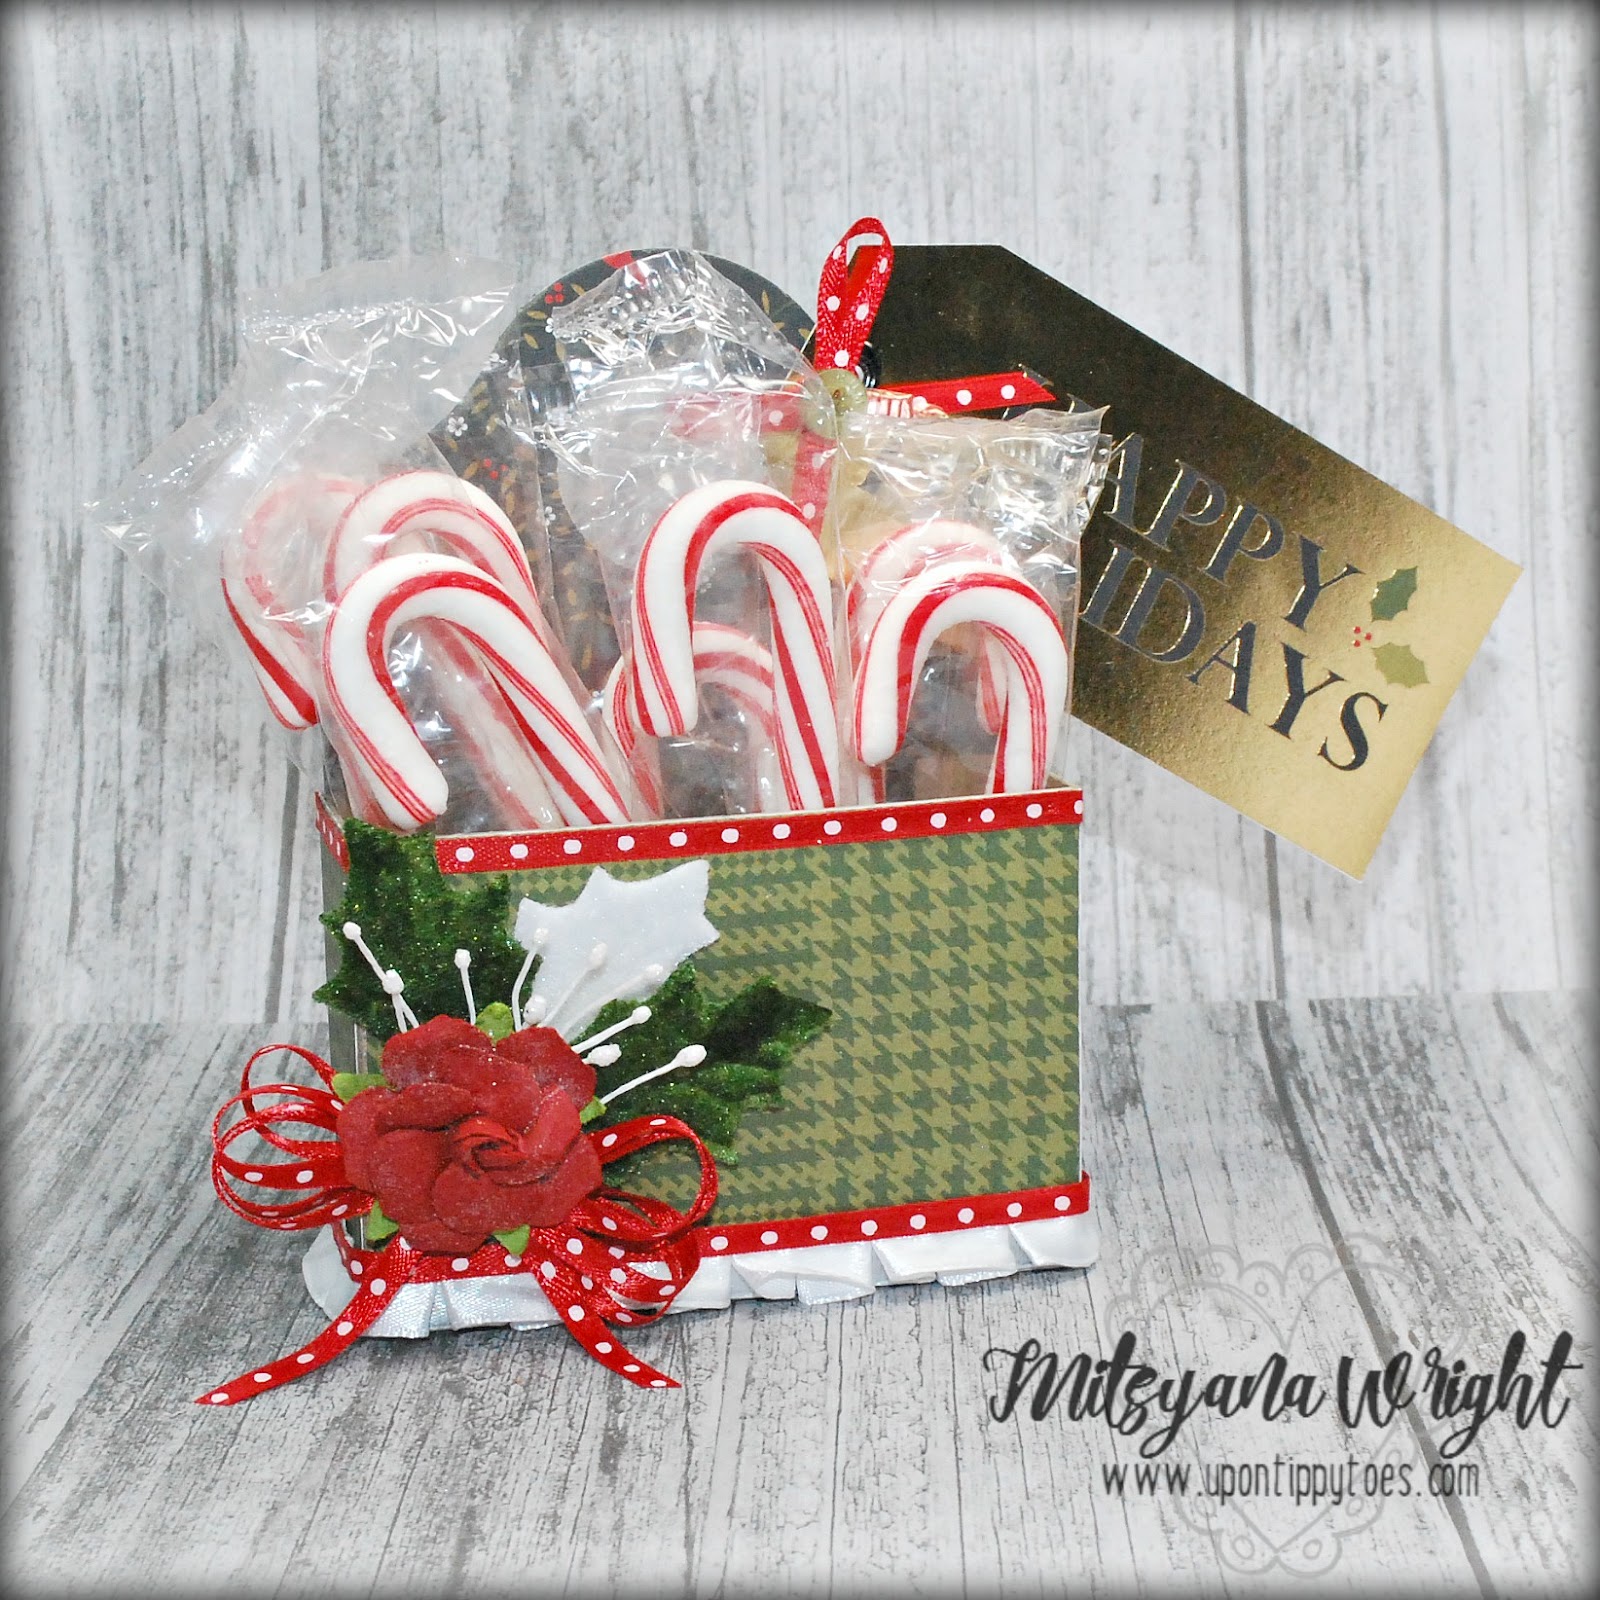
This die also came with a flower die cut as well... I opted for a two layered flower with contrasting pattern to make them pop. Then added an enamel dot for the center and 2 holly leaves.

I filled each sleigh with delicious Ghirardelli peppermint bark. I can fit 4 squares it to this box easily. I placed each in a cellophane bag and tied them close with bakers twine.

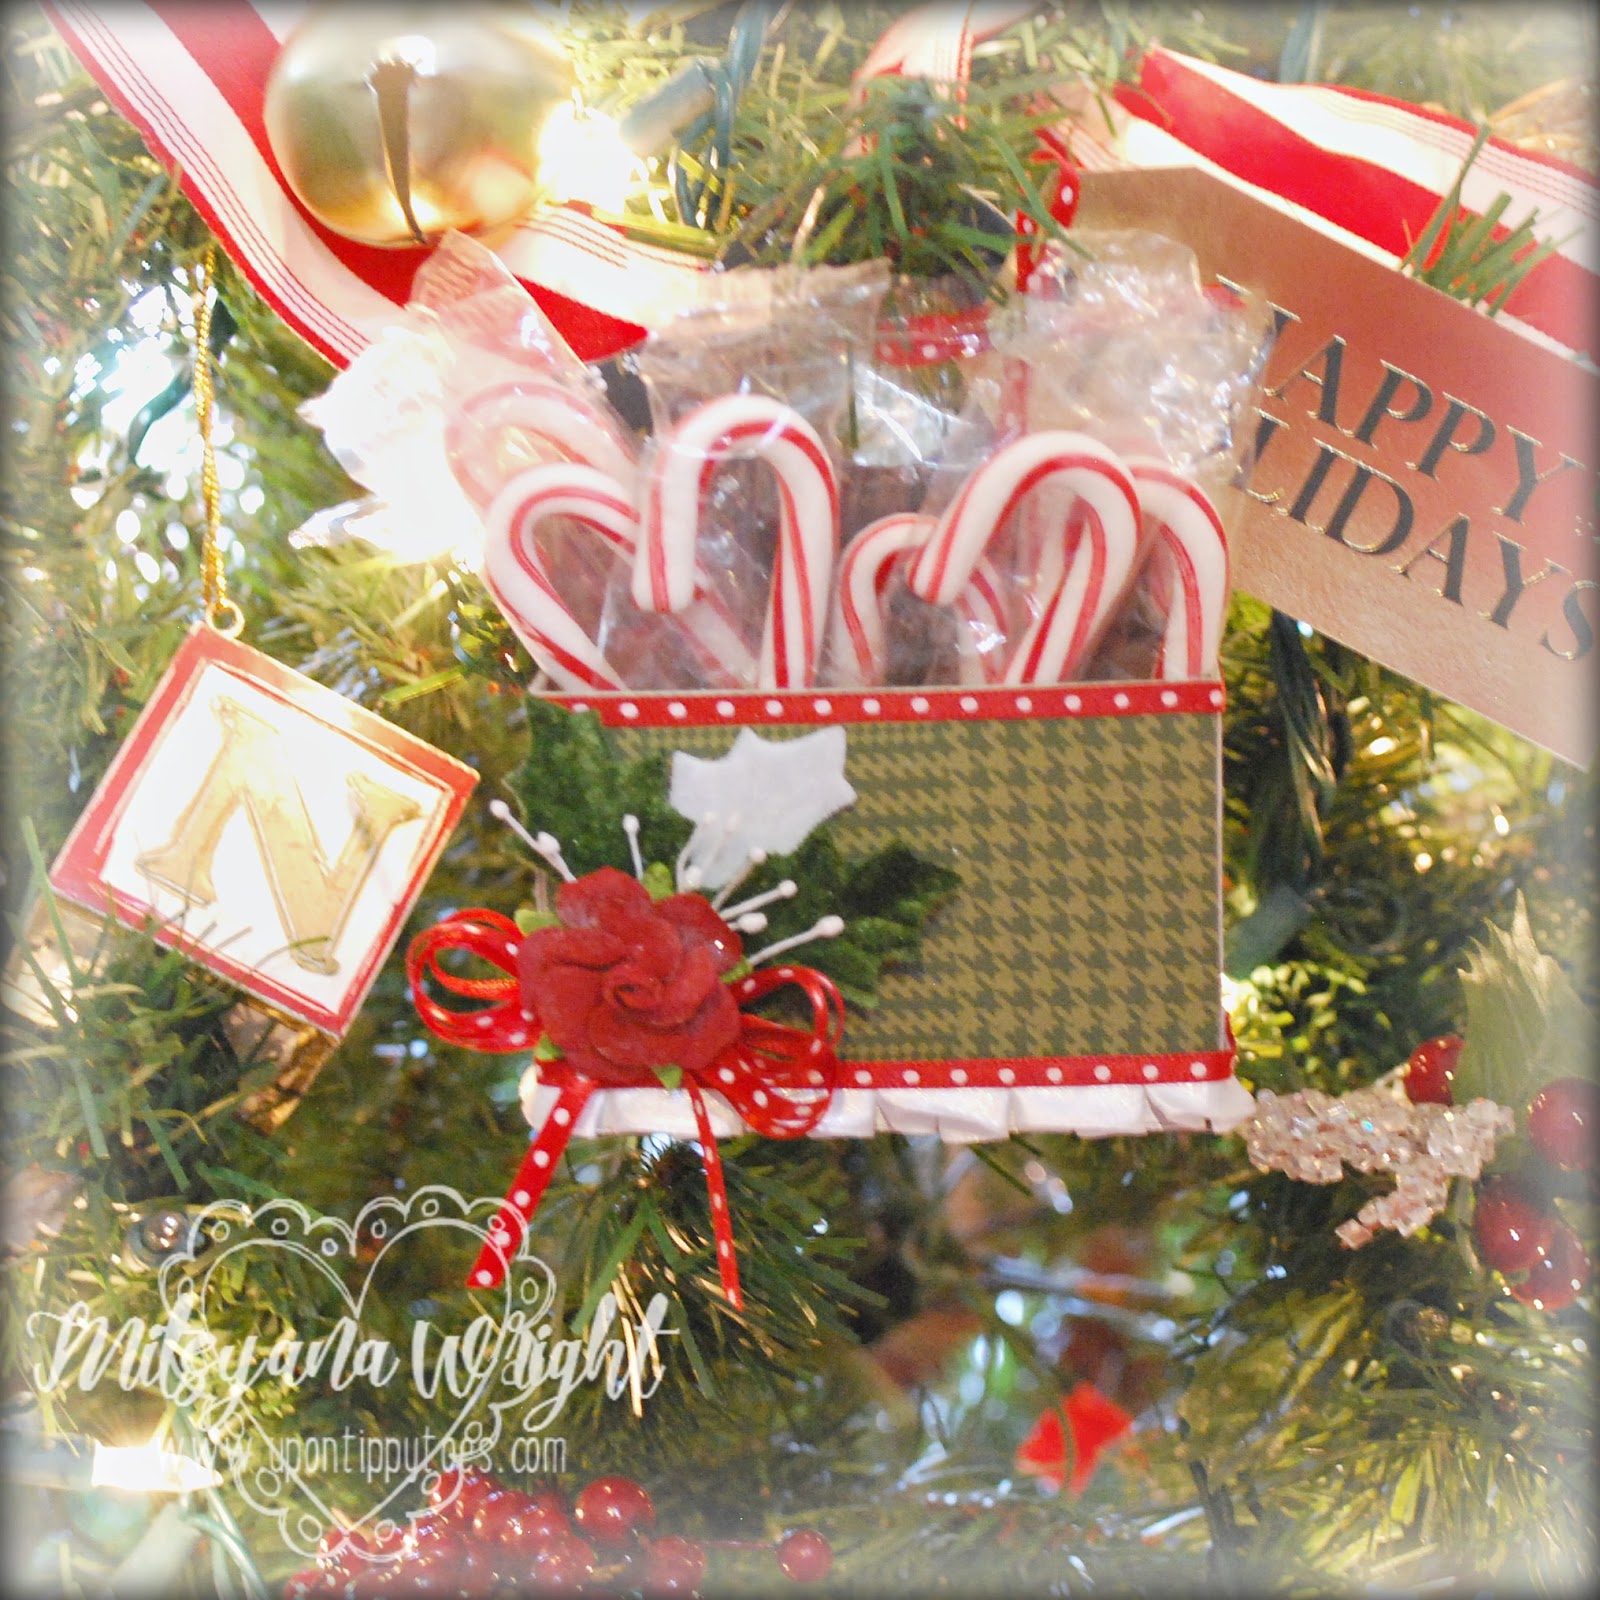
These were so worth a little extra time to create. I know the family will absolutely love them!


Mixing and matching several patterns made all the sleighs unique and one of a kind. There are no identical sleighs!


 I hope everyone enjoyed this project and has 
a very Merry Christmas!!

~ Mitsy

Thursday, December 22, 2016

Candy Cane Caddy

Happy Holidays Crafty Friends!
I am super excited to be guest designing for Eileen Hull Designs today!!
I love the versatility of her dies and how many of her designs are multifunctional. Here, I’ve made a candy cane caddy that also doubles as a Christmas ornament!

candy cane caddy2.jpg

For today’s project, I used Eileen Hull’s Caddy Die by Sizzix.

caddydie.jpg

This is a steel rule XL Scoreboard die. You will need to use the Sizzix Big Shot Extended Cutting Pads in order to use these dies.

Other Supplies Used
Big Shot (Sizzix)
Christmas Plaid Stack (DCWV)
Chipboard
Creative Station Lite (Xyron)
1/8" Red w/ White Polka-dot Ribbon (Offray)
White Pleated Ribbon (Offray)
Velvet Holly Leaves (Petaloo)
Flower Stamens (Wilton)
Paper Rose (Michael's)
Glossy Accents (Ranger)
Green Button


candy cane caddy3.jpg

I started my project by first cutting down my 12” x 12” materials (chipboard and patterned paper), down to a workable 6” x 12” size so I can die cut them.

I didn’t want the entire caddy to be just one patterned paper. So, I trimmed down my 6” X 12” sheet into smaller pieces (4”x 6” and 6”x 8”) to cover just one of the panel pieces each.

Then, layered my chipboard piece over the patterned papers and ran all the material through my die-cut machine at the same time.

It cut through all the layers with ease!!

candy cane caddy4.jpg

I trimmed off the “tucking” flap pieces of the bottom box portion (for the patterned paper only)... you will not see these pieces so there’s no need to add them.

Then, I cut apart this cut out on the crease lines.

Next, I ran my papers through my Xyron Creative Station Lite and attached them to their coordinating chipboard pieces.

I also cut an extra back piece out of the same black patterned paper to cover the back of the caddy, ran it through my adhesive machine, and attached it to the backside of the caddy’s back wall.

candy cane caddy5.jpg

I added clear adhesive to the bare flaps and adhered them to the back panel.
candy cane caddy6.jpg

Then, I used more clear adhesive to attach a few embellishments and to trim with ribbons.

candy cane caddy0.jpg

You can fill with your favorite holiday treats…

candy cane caddy1.jpg

Ready to gift as favors...
candy cane caddy.jpg

OR

Because it has the wonderful handle built in…
Hang it on the tree as festive decor!!
candy cane caddy2.jpg

I hope you enjoyed my project for today!! I am very honored to be able to guest design for the Eileen Hull Design Team.

HAPPY HOLIDAYS, EVERYONE!!
~ Mitsy

Saturday, December 17, 2016

Meowy Christmas!!


Meowy Christmas, Crafty Peeps!! We only have a little over a week to get those Christmas cards out and I'm back again with another holiday card inspiration for you all!!


Today, I'm using this adorable set from Pink and Main called Santa Paws.

The puns in this set are too cute and funny!! They're just as cute as the characters in the set!! It's filled with cute little cats, dogs, and all things christmas-y!!

I stamped my image with dye based Black ink. Then colored them in using colored pencils.

Once colored, I used the matching Santa Paws Dies to cut them out.

For the card base and the inner embossed rectangle I used Pink and Main's Stitched Rounded Rectangles.

For the circle window cut-out, I used the Stitched Circle Dies.

Meowy Christmas, Crafty Peeps!! We only have a little over a week to get those Christmas cards out and I'm back again with more  holiday card inspiration for you all!!

Today, I'm using this adorable set from Pink and Main called Santa Paws.

The puns in this set are too cute and funny!! They're just as cute as the characters in the set!! It's filled with cute little cats, dogs, and all things christmas-y!! My favorite one is the Santa Cat holding the present with a puppy peeking out of the box! Too cute!! 
I stamped my image with dye based Black ink. Then colored them in using colored pencils.

Once colored, I used the matching Santa Paws Dies to cut them out.


For the card base, the embossed card mat, and the smaller rectangles used to frame my sentiment, I used Pink and Main's Stitched Rounded Rectangles.


For the circle window cut-out, I used the Stitched Circle Dies.  Just a quick tip... assemble you card first. then die-cut your window out. Once you have a window you can place your die cut image into the window. Mount with foam adhesive and attach to the inside of the card.

I absolutely love the stitching in these dies!! And, just a heads up... the stitching even holds up after embossing!! How awesome is that?!!

Take a long at the card below to see all the details!
I hope you all enjoyed this project!
Wishing you all Happy Holidays and Happy Crafting!!

~Mitsy

Other Supplies Used
Patterned Cork Stack (DCWV)
Kraft Paper Stack (DCWV)
Autumn Leaves Stack(DCWV)
Green Polka Dot Paper 
150 lb Mixed Media Paper (Strathmore)
Mega Runner (Xyron)
VersaFine Onyx Black Ink (Tsukineko/ Imagine Crafts)
Color Pencils (Prismacolor)
Embossing Folder (
White Gel Pen (Sakura)
Stitched Ribbon
Green & White Striped Paper String (Tim Holtz)
Red Button (Buttons Galore) 


Friday, December 16, 2016

More Christmas Inspiration

Hello Again Crafty Friends!!
Hope everyone is having a HOLLY JOLLY Christmas!!Are you in need of some last minute holiday mojo?? Well, I have a little Christmas inspiration for ya!!


I made this card using FB Stamps' Let it Snow stamps set!!


I love how elegant the Merry Christmas sentiment is in this set!! I love it so much I made it the focal point for my card!!

Other Supplies Used
Christmas Plaid Stack (DCWV)
Reds Family (Core'dinations)
Mega Runner (Xyron)
Zig Clean Color Real Brush Markers (Zig / Kuretake)
VersaFine Onyx Black Ink Pad (Tsukineko/ Imagine Crafts)
Classic Oval Dies (Spellbinders)
Floral Oval Dies (Spellbinders)
Scroll Border Die- Lace Trimmings (Anna Griffin)
Briar Rose Holiday Mix (Petaloo)
Velvet Holly Leaves (Petaloo)
Berry Stems (Dollar Tree)
Glossy Accents (Ranger)

I stamped this image with an VersaFine Onyx Black ink and colored in the image with my Zig Kuretake Clean Color Real Brush Markers.


Then die cut the image with an oval die and layered it onto ornate oval die to frame it.

Adhered my card layers together using my Xyron Mega Runner.

The scroll borders were aso die cuts. I cut out 2 pieces then I attached them together using a glue pen. Then, I attached the joined piece onto the card with clear liquid adhesive.

I added Petaloo flowers & holly leaves. I also added berries I purchased from Dollar Tree. I used a thick clear adhesive to attach the bigger embellishments to the card. You could also use hot glue for this.

Here is a close-up of my finished card...

Hope you all enjoyed today's holiday inspiration!!

Happy Crafting, Friends!!
~ DT Mitsy


Wednesday, December 14, 2016

Winter Cottage Christmas Ornament

Hello Crafty Friends!
It's beginning to look a lot like Christmas!! And I'm back again with Team Xyron to bring everyone a little bit of holiday cheer with today's project!

Today I will show you how I made this adorable Winter Cottage Christmas Ornament.


Supplies Used
Big Shot (Sizzix)
Tim Holtz-Village Dwelling (Sizzix)
Tim Holtz- Village Winter (Sizzix)
Chipboard
White Cardstock
Vintage Velvet Holly Leaves (Petaloo)
Tim Holtz- Paper String- Stripes (Advantus)
Tim Holtz Distress Ink- Vintage Photo (Ranger)
VersaMagic- Hint of Pesto (Imagine Crafts/ Tsukineko)
Glossy Accents (Ranger)
Sweeper (Imagine Crafts/ Tsukineko)
Piercing Tool
Scissors
Paper Trimmer
Red Button
White Felt

I started by cutting a 12"x12" woodgrain patterned paper ,from the Happy Day Stack, in half to measure 6"x 12". Then, I cut my chipboard down to the same measurements.

Using the Tim Holtz Village Dwelling Die, I layered the patterned paper (face down) and the chipboard onto the die. I sandwiched them between two clear cutting plates and used ran my it through my Big Shot machine.

I folded the creases on just the Chipboard pieces. I bent the walls into place and used clear adhesive on the small flaps to connect the pieces together to form a house's walls. 

Next, I trimmed off the flaps/ tabs of the patterned pieces and cut along the crease lines to separate the segmented pieces.

I used a sweeper tool and Tim Holtz' Vintage Photo Distress ink to shade the edges.

Once ink was dry, I ran the pieces through my 3" XYron Sticker Maker. Then peeled and applied to the chipboard house.

I also Die cut the roof and porch pieces out of chipboard but opted to use this gorgeous green plaid from the Christmas Plaid stack for the rooftop and door. I die-cut the windows from just plain white cardstock.

Using the Tim Holtz Village Winter die I die-cut all the snow and ice  from white felt. Then ran those through my Xyron Sticker Maker as well.

Helpful tip: Before peeling the protective film off the felt... give it a heavy handed press/ rubdown.

Then, I attached the snow onto the rooftop.


Before attaching the roof top to the cottage, I used my piercing tool to create a small hole atop the roofline. Then, I threaded some brown and white Paper String through the hole and double knotted it. 

Then with more clear liquid adhesive, I attached the roof as well as the porch.

I added a few green velvet holly leaves and a button topped bow and glued them to the top of my cottage.

I diecut the windows and and porch pillars from white cardstock then used more clear liquid adhesive to attach them to little dwelling.

And, here is my finished ornament...


This is just too adorable!!

Below are different angles of the Winter Cottage.


And here is a close up of it hanging in my tree!!


These are not overly big and not teeny tiny either. But because we used light weighted materials it is quite a substantial ornament.

This turned out so CUUUUTTEE!! I LOVE IT!!

Hope you all loved today's project as much as I did!!

Until next time...
HAPPY CHRAFTING!!
~ Mitsy


Wednesday, December 7, 2016

Bird Crazy Tag Card - Christmas Edition


Happy Hump Day Crafty Friends!! 
Oh my gosh...  It's only about 2-1/2 weeks till Christmas!! Where is the time going??

Today, I have a Christmas card that was inspired by Tim Holtz's 12 tags of Christmas series. I just love his tags and I was so over the moon excited when I heard Team Xyron would be collaborating with him... Eeeeek!! How exciting!! I've always wanted to make a T.H. tag... I'm so glad I finally took the dive and made one!!


Supplies Used
Tim Holtz-Alterations- Bird Talk (Sizzix)
Tim Holtz - Crazy Things (Stampers Anonymous)
Tim Holtz - The Journey (Stampers Anonymous)
Tim Holtz Stamp Stencil - THMM104 (Stampers Anonymous)
Tim Holtz Distress Inks- Brushed Corduroy, Worn Lipstick, Mowed Lawn, Salty Ocean, Tea Dye, Vintage Photo, Walnut Stain (Ranger)
Tim Holtz Distress Markers- Mermaid Lagoon, Carved Pumpkin (Ranger)
Tim Holtz Distress Stains- Abandoned Coral, Bundled Sage (Ranger)
Tim Holtz Idea-ology - Paper Stash- Collage (Advantus)
Tim Holtz Idea-ology - Paper String - Stripes (Advantus)
Tim Holtz Idea-ology - Small Talk - Occasions (Advantus)
Mega Runner (Xyron)
VersaFine- Onyx Black (Imagine Crafts / Tsukineko)
Classy Reds Cardstock (Core'dinations)
Manilla Tag
Regal Velvet Poinsettias (Petaloo)
Craft foam Burlap
Red Button


 I started by stamping my image, from the Bird Talk stamp set by Sizzix, with an archival black ink. Then traced around my image using Tim Holtz Distress Markers in Mermaid Lagoon (for the body) and Carved Pumpkin (for the beak). I then used a waterbrush to blend out the colors.

I used the coordinating dies to die-cut out the little bird. (these were included in this set).

 I don't have many marker colors, so I improvised by using Distress Stains. I dabbed some color onto an acrylic block to use it as my palette. I used Bundled Sage (for majority of the gift) and Abandoned Coral (for the bow). I also used the Abandoned Coral for the Santa hat.

Then with a water brush I picked up some color and traced around the areas I wanted to color. Then with more water blended that color out.

I didn't have the matching dies for this stamp set so I just fussy cut out both images.

 With a manilla tag, I used a mini blending tool and Distress Inks in Worn Lipstick, Mowed Lawn, and Salty Ocean to create a multicolored background.

 Using Tea Dye Distress Ink, I stenciled alphabets randomly onto my tag. 

Then, I used Vintage Photo and stenciled the harlequin design.

I, then, inked all around the edges of the tag with Walnut Stain.

Using more walnut stain, I used the ticket, clock, and conductors receipt to add another layer to my background. 

Then gave it a quick spritz of water. This part is totally optional. I just like the lightly splattered look onto my background. 

To add all the elements to my card and give it added dimension, I made my own foam adhesive.

I cut a 2"x 4" piece f craft foam and ran it through my 3" Sticker maker. Then trimmed it, flipped it over, and ran it through again.

Then, cut it down to the sizes I needed (making sure to keep the protective backings on while cutting).

I added foam to the back sides of the bird, gift, and Santa hat... as well as the back of my poinsettia.

 I also used my 3" Sticker Maker to add adhesive to the backs of holly leaves.

And attached them onto my tag.

Then added my colored images and flower.
 I used the "wishing you a very merry christmas" sentiment from the Small Talk Occasions book and trimmed it down to fit onto my tag.

I just love this book!! There are terrific sentiments for every occasion in here!!

I topped my tag off by adding a multi-looped  bow made of red and white paper string. I absolute am nuts over this stuff!! I really think this stuff is better than twine! It doesn't fray and because of it's stiffness it's easy to thread through holes!! This is some really awesome stuff!

Now onto the card base...
 I found this newspaper/ book Tim Holtz print paper and trimmed it down to 4"x 5.25" and inked the edges with Brushed Corduroy Distress Ink.

Then, used my Xyron Mega Runner to add adhesive to the back.

Next, I added more paper string. Wrapped a couple times horizontally and vertically and tucked the ends around back.

 For even more layers and to add texture, I ran a 2"x3" piece of burlap through my Sticker Maker. Peeled it and adhered it to my card mat, which I also attached to a 4-1/4"x 5.5" (A2 ) sized card.

Lastly, with the leftover foam adhesive i made earlier, I attached it to the back of my tag and adhered it to my card front.

And here is a close up of my finished card...


I hope you enjoyed this project for today!!

Here's "wishing you a very merry christmas"!!

~Mitsy