Hello, Crafty Friends.
It's been a while but I'm back to with another card tutorial. Today, I'm here with the Lynda Kanase Design Team to share creations using her new Window Box Impresslits Embossing Folder.
The Impresslits folders are designed to cut and emboss at the same time. And the Window Box is the perfect size for A2 cards. But in this tutorial, I will show you how to I extend my embossing and created this fairytale inspired tower card.
Supplies Used
Big Shot (Sizzix)
Lynda Kanase Window Box Impresslits Embossing Folder (Sizzix)
Eileen Hull ColorBox Blends Inks-
Frog, Leaf, Pansy, Melon, Sunshine, Ebony, Nutmeg, Flagstone, Uniform (Clearsnap)
ColorBox Premium Dye Ink- Coal (Clearsnap)
Mega Runner (Xyron)
X 150 Sticker Maker (Xyron)
Mixed Media Paper (Strathmore)
110lb White Cardstock (Recollections)
Paper Trimmer (Swingline)
Clear Stamp (Crafter's Companion)
Liquid Glue
I started out with a 4.25" x 5.5" piece of Strathmore mixed media paper. I used Lynda's Window Box Folder and ran it through my Big Shot machine.
Then, I inserted a 2" x 4.25" strip of mixed media paper, placing it directly under the window. I repeated those steps 2 more times for a total of 3 strips.
I arranged the embossing so that the bricks would vary on what sides the fell on by flipping every other strip.
I used Eileen Hull's Blends inks in Uniform, Nutmeg, Flagstone, and Ebony to ink and shade all the embossed stonework.
I accidentally got ink on my window shutters, so I used scissors to cut them off.
I also trimmed all the pieces down to be 3.5" wide.
Then, I die cut an extra window from white cardstock. I opened the window shutter with the assistance of an acrylic block. This helps ensure that my creases were folded nice and straight.
Next, I took my die cut shutters and inserted it into the window.
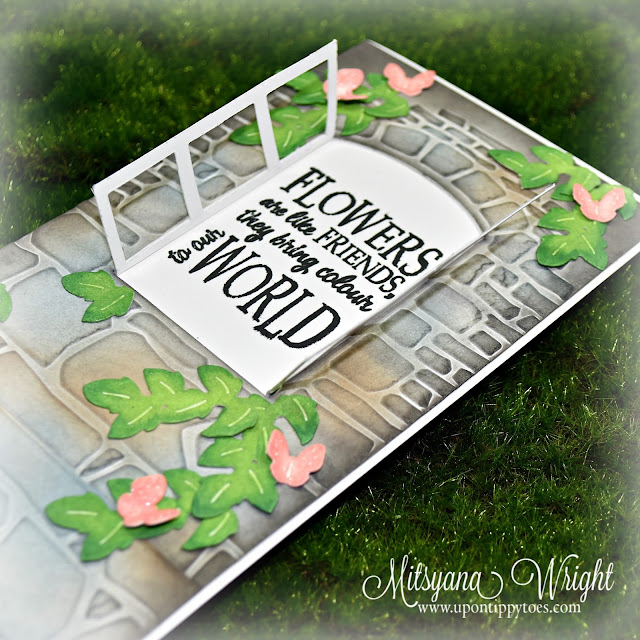
I secured the window in place using a Xyron Mega Runner. Then attached the window and the extra stone/ brick rows onto a #10 card base(9 1/4" x 7 3/4") made from 110 lb cardstock. I stamped my sentiment into the opened window using ColorBox Wicked Black ink.
I die cut multiple leaves, flowers, & butterflies from more mixed media paper. I used Blends inks in Leaf & Frog to color the leaves, Sunshine & Pansy to color the flowers, and Melon to color the butterflies.
I ran all the leaves through my Xyron X (150 Sticker Maker) and attached them onto the tower creating vines.
Then, I used a clear drying glue to attach the flowers and butterflies.
And here is my finished card...
I really love how this tower turned out.
The stonework in this embossing folder is absolutely gorgeous!
I love this sweet little dies Lynda included with this folder. It really adds so many beautiful details and makes projects come to life.
I'm in awe and I hope you are too!!
I hope you enjoyed this tutorial and are inspired to create your own fairytale tower!
If you loved my project don't forget to stop off and visit my design team sister and check out heir gorgeous projects too!!
Hope you all have a wonderful weekend!!
Until next time...
HAPPY CRAFTING!!
~Mitsyana
DISCLAIMERS
This blog is compensated to provide opinion on products, services, websites, and various other topics. Even though the owner(s) of this blog receives compensation for our posts or advertisements, I always give my honest opinions, findings, beliefs, or experiences on those topics or products.
The views and opinions expressed on this blog are purely my own. Any product claim, statistic, quote or other representation about a product or service should be verified with each manufacturer, provider, or party in question.
This blog contains affiliate links, clicking and shopping through these links helps to support and run the Up On Tippy Toes blog at no additional cost to you.


What a beautiful card! I love the way it feels like we're looking in through the window of a high castle tower. ❤️❤️❤️
ReplyDelete