Showing posts with label Stamps of Life. Show all posts

Friday, June 30, 2017

Flower Paneled Gatefold Card - Got Joy Creations Anniversary Blog Hop


Hello, Crafty Friends!!
Welcome to the blog anniversary and Youtube celebration for my good friend, Dana Joy, of Got Joy Creations! We have an incredible line-up planned filled with several amazingly talented and creative ladies. All projects shared during our blog hop are inspired by creations found on Dana's YouTube channel of which each lady put their own individual spin on.

The hop will run from June 30 - July 5.  

But wait, we have more...
Because what's a hop without prizes, right?!!

Here's are some of the fabulous prizes up for grabs...
https://blogger.googleusercontent.com/img/b/R29vZ2xl/AVvXsEgNd7N6uZ_ADuOtV6N3bhs0EZH6i2_oKNiNebQv21U2lTrpLh8bnLoaef8qPm5C_af7FjcJJkGcJnGlNbGVjvJMHyqwPX2Fk2Q1cEbk_GdnLiU5N8W14E6ynuaNXZQ-2e9U2pYDFu-xTyel/s320/DT+Member+badge.jpg

https://blogger.googleusercontent.com/img/b/R29vZ2xl/AVvXsEiCnOZ03Jd-p38qeXZk6BqAPnLLA52U2REJPFutyThHixrJsINpwU9Re_Nt6XWiT7WcFR6H9RBmOWvK64_HLDozo3NzlZMIfdrh10lqTZtRcRsaNJy3azGAb_nvxuJRTw41FrmCMzEeXNnz/s200/isla_500x500.25707222_glteph99.jpg

https://blogger.googleusercontent.com/img/b/R29vZ2xl/AVvXsEgzJD_zQkB2mwOJwKv_3RV8Mtqev6JqQvt_dMVk18ME7fbWCvt31hNWGrPDAOx7vUUOXFySnSlkQN9iuVnb_uZWLwxKBFBfHDacwyRlg_8aEMFcy-qieQVGYCPxSAXJ51r36SOlBHHQizdF/s1600/LawnFawnLogo.jpg
$25 Prize Pack- Donated by Jenn Shurkuss

https://blogger.googleusercontent.com/img/b/R29vZ2xl/AVvXsEiMAn3_8lyJoFpBpPy63JHv__8XWp5TP_MhNTfGy1xnYxvDyF9m5o-HDqr9aa5sYE7BJRVpCt4O1uL7eYU41d6KVbZAJTRZ-ee91vwjFUppuXpThD4fk341gsJExyDMPXl3zMwv6cL_WPO3/s320/Logo.jpg
FREE Diva Copic Coloring Class

All you have to do is visit each participating blog and leave a comment on their blog hop post!!
IT'S SO EASY!! See the full list of participating blogs down below.

Now let's get this party started!!
The inspiration for my project came from Dana's Standard Gatefold Card video...

This project was so super simple! Once the base of the gatefold card was made, embellishing was a breeze!

AND

Here 's my version of this project...

I just followed Dana's easy peasy instructions to make the gatefold base...

Using a 5-1/2" x 8-1/2" piece of card stock and a scoreboard, I made a crease at the 2-1/8"  and again 6-3/8" marks with a bone folder.

Folded the panel flaps inward and creased.

BAM, DONE!! 

I used paper from DCWV's Happy Day Stack for the card base and panels. I embellished my panel flaps with these cool flower panels from Stephanie Barnard's Half Card Panels Die set and "glitterfied" a chipboard panel underlay using my 3" sticker maker and ultrafine glitter.

I die cut a couple circles and mounted them on more chipboard. Then,
I used more paper from my Happy Day Stack to create the sentiment for the middle "closure". 


Close-up of the finished card...

Supplies Used
Chipboard
Stephanie Barnard's Half Card Panels Thinlits (Sizzix)
Stitched Circle Dies (Pink and Main)
 Light Green Ultra Fine Iridescent Glitter 

I really hope you liked my version of Dana's Gatefold Card! I had so much fun making it, especially because I got to play with glitter! This girl LOOOOVES GLITTER!! LOL

Thank you so much for dropping by

AAANNNDD...

Don't forget to visit the rest of our creative friends in the line-up and comment on all our blogs for a chance to win some awesome blog candy!!

Click on the links below!
Mitsyana Wright (YOU ARE HERE)

GOOD LUCK
&
Happy Hopping Everyone!!
~Mitsy

***Disclaimer***
This blog is compensated to provide opinion on products, services, websites and various other topics. Even though the owner(s) of this blog receives compensation for our posts or advertisements, I always give my honest opinions, findings, beliefs, or experiences on those topics or products.
The views and opinions expressed on this blog are purely my own. Any product claim, statistic, quote or other representation about a product or service should be verified with each manufacturer, provider, or party in question.

This blog may contain affiliate links, making a purchase through these links helps fund this blog at no additional cost to you.

The Blog Hop and Giveaway mentioned above are in no way sponsored or affiliated with Facebook, Instagram, Twitter, or any of their subsidiaries.

Thursday, April 27, 2017

Very Berry Strawberry Journal

Hello Crafty Friends!!
I had such great feedback from my Berry Train case and card set that I thought that the paper would make for a gorgeous journal too! Since I had one last sheet of my precious strawberry paper left, I went for it! And I am sure glad I did... It turned out beautifully!!


Supplies Used
Eileen Hull HeARTfelt Journal Die (Sizzix)
Chipboard
Strawberry Die Set (Stamps of Life)
Stitched Circle Dies (Pink and Main)
Tim Holtz Distress Stain- Bundles Sage (Ranger)
Tim Holtz Distress Paint-Candied Apple (Ranger)
Tim Holtz Distress Ink- Walnut Stain (Ranger)
White Gel Pen (Sakura)
Jumbo Metal Bookplate
Metal Embellishment (Momenta)
Metal Leaves - Mechanicals (Prima Marketing)
Flower Lace- Trim - Magnolia (Prima Marketing)
Paper Flowers- Flower Clippings- Love Clippings (Prima Marketing)
E6000
Self-adhesive Rhinestones
Twine

I love that these journals are so incredibly easy to make! Once you got the basic concept of how the come together assembly is a breeze and you can decorate as you please. GO WILD!! Your only limited by your imagination!!
 When making my journals I always cut my material down to size so they can easily be die cut. For the Eileen Hull Journal dies I start by cutting to pieces of chipboard and 4 pieces of patterned paper down to 6" x 10". 

I run my patterned paper (patterned paper side UP) into my Xyron Creative Station Lite to apply adhesive to the back. I do this for the back and front of my chipboard so that one side is covered in those pretty strawberries and the other with the black with white polka dots. Do this step for both chipboard pieces.

Once, the pieces are covered, I place one covered chipboard onto just the book panel of the die. Whichever side you want to be on the outside of the book should be face down (towards the foam and blades) on the die. In the last picture above, the polka dots shown, will be on the inside of my book when assembled. Again, do this for both covered panels.

Because we attached the paper to the chipboard first, all the crease lines are already pre-scored. 

Apply strong liquid adhesive to last segment of the spine on one of your book panels. Over lap the last segment of the other panel and line up all three pre-cut holes.

Make sure your covers are straight so they close nicely. Then put aside and leave to dry. I like to clip my books at each end to ensure the dry properly aligned. 

I decided to die-cut some strawberries, stems, and leaves from chipboard to go with the whole strawberry theme of my paper. These will go on my cover and on my inserts inside.

I cut the strawberries out using Stephanie Barnard's Strawberry Dies. I painted the strawberries with Tim Holtz's Candy Apple Distress Paint.

I colored the strawberry leaves and stems using Bundled Sage Distress Stain.

I inked the edges of all my pieces using Walnut Stain Distress Ink.

Then glued the stems to the strawberries and drew seeds and highlights with a white gel pen.

For an focal point I die cut a circle from more patterned paper and chipboard. Then ran them through a 3" Sticker Maker and adhered them together. Then ran the piece back through the sticker maker and attached to the front cover of my book.

I used a strong liquid adhesive to attach a jumbo metal bookplate over the circle.

Then attached my strawberry leaves surrounding the bookplate and my lone strawberry over top. The rest of the strawberries were left to add to the front of each insert.

Finally, I attached beautiful Prima lace and flowers over top. Tucking in metal leaves and adding rhinestones onto the tiny flowers. Then added my metal "laughter" embellishment to the center of the bookplate.

I bound my inserts using natural hemp twine. I usually use elastic bands but I think the twine adds to the country chic charm of this book.

And here is the final project...


This projects is so bright and cheery! Who wouldn't be happy receiving this journal as a gift?

I hope you enjoyed this tutorial and it put a smile on your face!!

Till next time...
HAPPY CRAFTING!!
~Mitsy

For other inspirational ideas using Eileen Hull dies, please check out Eileen's ebook...

**Disclaimer**
This site contains affiliate links. Making a purchase through these links helps support this blog at no extra cost to you.

Monday, February 20, 2017

My Bunny Filled Weekend

Hello Crafty Friends!! I'm back today to show you some crafty goodness with Team Pink and Main!!

I have been crafting up a storm this weekend and have a few cards to share with you all! 

All of which are made using some of  Pink and Main's New February Releases!!

Because I have more than one card to share, I decided to do a mostly pictorial post with you all today. Otherwise this would be an extremely long post and I don't want you all too get bored reading the same steps over and over for each new card. 

With all my cards I started by stamping out my images, from the Seeds of Kindness stamp set, with VersaFine Onyx Black ink onto Strathmore Mixed Media Paper and I colored them with my Clean Color Real Brush markers. I used a waterbrush to blend out and soften the colors. Then all my images were cut out using the Seeds of Kindness Dies.

Patterned papers used in this card are from the new Spring Flings (plaid paper) and the Shades of Spring (green dot) paper pads.
 I used the largest of the stitched rectangle dies for the card front. The largest circle was used for the semi-circle mat and the third largest circle was used to put behind the bunny and watering can.

I adhered all (with the exception of the images) to a plain white card base using my Xyron Mega Runner.

I used 3D dots to prop up the bunny and watering can and add dimension.

The patterned paper used on this card is from the Spring Flings (rainbow chevron) and the Shades of Spring (scallop circle and flags) paper pads.

I used the second to the largest stitched square die for my card mat. 

I hand cut two 1"x 2" pennants and tucked them under the scallop circle.

I used dies from the Stitched Circles and the Scallop Circles dies to house my little wheelbarrow bunny. I attached all together (flat) with my Mega Runner then popped the whole piece up with foam adhesive. 


For this card, I once again used the largest Stitched Rounded Rectangle die to cut my patterned paper. This gorgeous houndstooth pattern is from the Spring Color Pop paper pad. The pink gingham, from Spring Flings . And the pink heart paper from the Shades of Spring.

I cut out 2 lacy borders and attached them across the top of the card using my Mega Runner.

I used a glue pen to attach the smile word to the background cut-out. Then attached it to the oval. 

I added a foam dot to the bunny which coordinated with the ribbon and laid it diagonally across from the bow to give the card some balance.


BONUS CARD

I had an extra bunny so decided to make another card...


I didn't use P & M paper on this one. I used a fun plaid paper from DCWV's Birthday Stack along with Stephanie Barnard's Mini Chevron Background Dies. to create the card base. 

I left some of the chevrons still attached and attached a ribbon over top, giving it a little belly band. 

Then added my little bunny in a stitched circle.


NEW RELEASES USED


Other Pink and Main Dies Used


Additional Tools and Supplies Used
VersFine Onyx Black Ink Pad
Strathmore 140 lb Mixed Media Paper
Kuretake Zig Clean Color Real Brush Pens
Waterbrush
Enamel Dots
3D Dots
Fabri Tac
Ribbon
2way Glue Pen 


WHEW!! That was lots of projects done in one weekend (at least for me it was a lot)!! I was so pleased that I was able to get so many cards from one stamp set!!

I hope you enjoyed them! 

Until next time...
HAPPY CRAFTING!!!
~Mitsy


Saturday, February 11, 2017

No Prob Llama


Hello Crafty Friends! 
I'm back with my good friends at DCWV today! I am absolutely giddy about all their new paper lines that have been filling the shelves of Joann Craft store across the U.S! They have really out done themselves with this release! And I am head over heals in love and tickled over their new NO PROB LLAMA STACK!!!

This stack is full with bold color and tons of foil!
And...
Lots & lots of cacti and lla-a-a-a-a-a-a-a-mas!!!!
I am so in love with this stack that I immediately had to create something with it! So I decided to make a easel style card.

Supplies Used
No Prob Llama Stack (DCWV)
Stephanie Barnard's Circle Stand-Ups Card (Sizzix)
Border Die- Stephanie Barnard's Elegant Stand-Ups (Sizzix)
Stephanie Barnard's Succulents & SucculentsTWO Dies (Stamps of Life)
Mega Runner (Xyron)
Distress Inks- Weathered Wood, Antiqued Linen, & Seedless Preserves (Tim Holtz/ Ranger)
3D Dots (Ek Success)

 
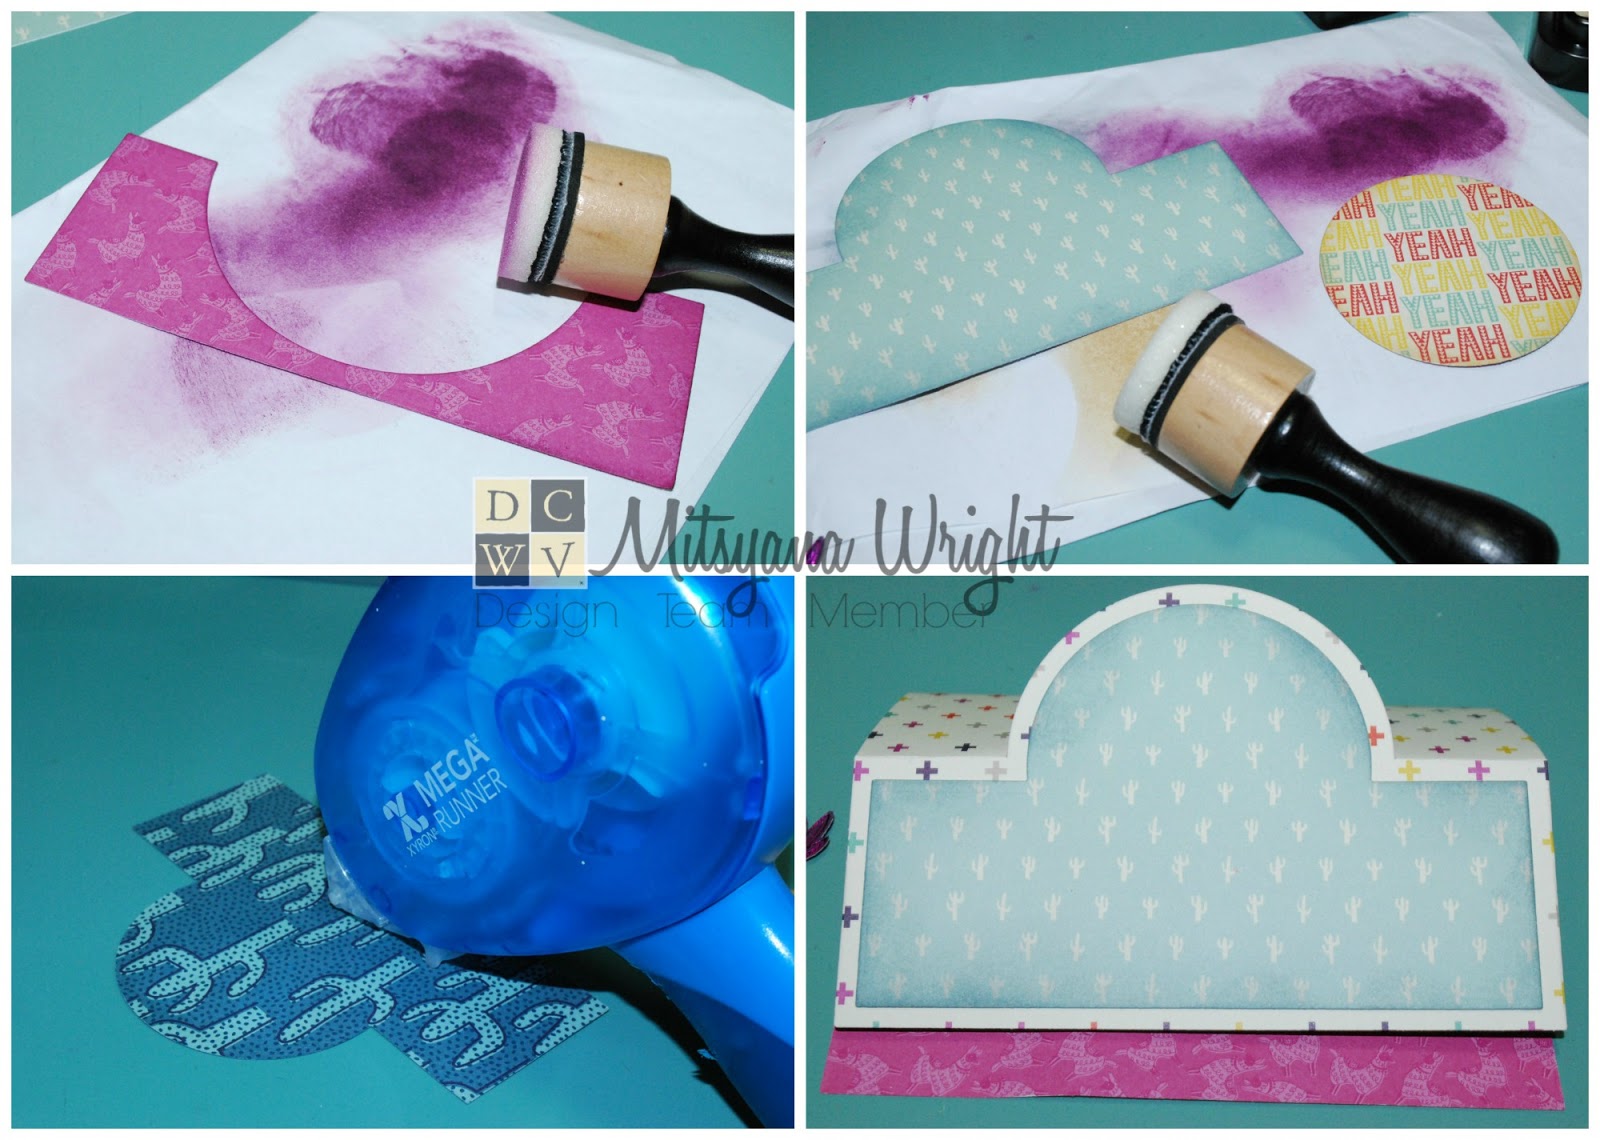
First, I cut my paper down to 6"x 12" pieces so that it can fit into my die-cut machine. Then I die-cut the card base and mat pieces from coordinating patterned paper.

I used my mini blending tool and inked the edges of my die-cut pieces.

I used my Xyron Mega Runner to adhere my panels onto my card base.

Then, folded my my card base on the score lines.

I added foam adhesive to the back of my circle die-cut and set it to the side.

I die cut cacti from green striped paper using the prickly cacti from my succulents and succulentsTWO die sets.

I found a sheet of cut-outs from the No Prob Llamas Stack and filled with different lamas, cacti, journaling tags, and sentiments. I found a tag with this cute lama and sentiment. I cut it out and separated the sentiment.

I kept the foiled cacti attached to the llamas, added tiny glitter enamel dots to my sentiment, then added foam adhesive to the back of both.

I attached all my element to my card front. Placed the circle in the center, layered the ferns on top that, then the llama in front of those. Added a cactus to each side and my sentiment in the bottom center. It created the most adorable desert landscape!

I finished the bottom flap with a simple border from the Elegant Stand-Ups die set.

Final here is my finished card...

This card is full of dimension!! I pulled some of the ferns forward so they stem and leaves are growing from behind the llama, as if he was standing under a shrub.

All the dimension and the foiled accents really makes the card pop!!

This was such a fun card and I can definitely see myself making tons and tons of llama themed everythings!!

I hope you all enjoyed my project for the day!

Until next time...
HAPPY CRAFTING!!
~Mitsy


Monday, January 30, 2017

Happy Everything!

Hello Crafty Friends!!
It's been a long month and I'm finally getting back to my normal crafting routine. So I decided to perk things up with a bright and cheerful card with lots of warm colors. We've had nasty weather off and on here in Texas and I wanted to make something "HAPPY"!!


For today's project, I decided to use a paper stack that always puts a smile on my face...

It is full with lots of bright colors, florals (not much flowers blooming around here lately), and lots of fun and whimsical patterns!

Other Supplies Used
Autumn Leaves Mini Stack (DCWV)
Stephanie Barnard's Drop-Ins Card Front Dies (Sizzix)
Die- Succulents (Stamps of Life)
Die- Succulents TWO (Stamps of Life)
Mega Runner (Xyron)
Color Pencils - 057, 059, & 101 (Spectrum Noir)
Odorless Mineral Spirits
Blending Stumps
3D Dots (EK Success)
Hemp Twine
Glossy Accents
2way Glue Pen

I started of by die cutting these adorable cacti out of green striped paper from DCWV's Autumn Leaves Mini Stack. I used the same striped paper for all three types of cacti. I die cut one each of the prickly cacti and two of the leafy.

Instead of inking my edges I used color pencils and a blending solution to add depth to my die-cuts. These papers are very high quality and didn't smudge, run, or warp while I did this technique.


I also shaded the die cut pots as well. outlining first with color pencil then going over and blending with the blending solution (aka- odorless mineral spirits). 

I added foam adhesive dots to make the lips of the pots pop. Then added foam adhesive to the back of the cacti as well to make them three dimensional.

Next, I worked on the card base.

I started with these premade A7 Black Cards.

Then I matted it using this colorful honeycomb paper from the Hello Darlin Stack. It was one of the sheets from this stack that immediately grabbed my attention. It is so bright and playful! If that doesn't just scream HAPPY I don't know what does!! In this same stack I also found this sunny yellow paper and a fresh green paper that went together beautifully!

I cut each piece at the following measurements...

Honeycomb: at 4-3/4" x 6-3/4"
Black mat: 4" x 6"
Yellow: 3-3/4"x 5-3/4"
Green: 1-1/2"x 5-3/4"

I shade the edges of the yellow and green papers. Then used my Xyron Mega Runner to layer the all together.

I thought this "Happy Everything" sentiment drop-ins die went perfectly with the HAPPY feel of my card. So I cut out two copies of this die cut, one in black and one in white. Then used a glue pen and attached them together, shifting it slightly to make the black look like a shadow. 

I attached all my die cuts to my card front and pulled my little leafy plant stem forward for added dimension.

Lastly, I attached little bows of twine to the front of each pot.


And here is my finished card...


Here is a close-up...


I really love how this card turned out! And it really does make me HAPPY just looking at it.

We need more BRIGHT and CHEERFUL in our everyday lives...
And this was an awesome start to what I know is going to be an awesome week!

Hope you all find your HAPPY. 
Mine was in my craft room!!