Hello, Crafty Friends!! I'm back again with Team Xyron today and we're teaming up with Derwent all week long!!
\Summer is in full-blown HEATWAVE mode down here in Texas. With temps easily reaching well over a hundred! GAH!! I am melting and dreaming of the beach in a far away tropical location... home! This island girl wants to get back to her island! But that doesn't look like it's gonna happen anytime soon. **SIGH**
Oh well, I can dream.
At last those dreams do stir up my imagination and creativity... Like for this Tropical Thank You card, I created for today's project using Derwent's Watercolour Pencils, Paper, and Brushes!! Keep on reading to see how I made it!
Supplies Used
Pam Bray
Pineapple Red Rubber Stamp (Blank Page Muse)
VersaFine Onyx Black Ink (Imagine Crafts)
White Cardstock (Recollection)
Chalkboard Cardstock (DCWV)
Tim Holtz Stamping Platform (Tonic)
PITT Artist Pen X (Faber-Castell)
3D Foam Dots
Glue
If you have never tried Derwent Academy Products before, you must give them a try!
The quality is absolutely amazing. I was super impressed with the thickness and quality of the paper. It holds up great to water and moisture with very minimal warping. So far I am loving it!!
And these watercolour pencils are HEAVEN!! When water is added the pigment practically pours from off the tips!! So creamy, so rich, so yummy!! I know, it sounds a lot like I'm talking about food! I think once you try them you'll want to gobble them up too!
Ok, back to creating...
I started by using my stamps in a stamp platform. I inked up the flamingo from the Flamingo Row set with Onyx Black ink and stamped the same image a couple times for a deep and dark impression. I found when watercoloring outlines tend to fade. Stamping a couple of times helps preserve the dark outlines.
Then I used my Derwent Watercolour Pencils to color in the image. I applied water with a brush from the Artist Brush Set and blended the color out.
For deeper richer pigment, I dipped the tip of my watercolour pencil directly into the water. Then applied the dampened tip onto the areas that I wanted concentrated color... it spread like BUTTER!! OMG... I'm in love!!!
After my image was fully dried, I hand cut out my flamingos and set them aside to work on my card base and background.
I took out a fresh sheet of textured watercolor paper and scribbled light green color pencil over half the surface. Then with the other half, I scribbled dark green.
Then with a wide brush applied water over top to create a two-toned watercolor wash.
For my card base, I used 110 lb white cardstock to create a top folding A2 sized card. I inserted the front flap into my Tropical Leaves 3D Embossing Folder to emboss just the front. For 3D folders, it's important to only us one cutting plate when running it through. Otherwise, you could severely damage your machine.
I cut down my colorwash sheet down to 4"x 5.25" piece centering the gradient of color. Then also embossed it with the Tropical Leaves embossing folder.
I applied Olive dye ink and Coral dye ink over the embossed areas to really make all the details pop.
Then used my Tim Holtz Stitched Oval Dies to cut an opening to create a frame.
I removed the center oval. Then inked all the edges with Black Bean dye ink.
I stamped out these pretty flowers from the Flamingo Row Stamp set. I used the leftover watercolour paper from my flamingos so I wouldn't be wasteful of this fabulous paper. I've noticed when I find awesome products I tend to treat them like gold... and nothing goes to waste.
I wasn't' going to use the stems and leaves so it didn't need to be stamped perfectly. As long as I had a great impression from the flowers, that's all that mattered.
I also stamped out some pineapples on more remnant watercolour paper, then colored my flower and pineapple images with my pencils and blended them out with water.
Once my images dried, I hand cut them all out.
See, I told you I treat awesome products like gold... I used this big leftover piece from my color wash to die cut stemmed leaves.
Then added tiny details and outlined the leaves using an XS PITT Artist Pen.
I ran my embossed frame through my Xyron and attached the frame to the embossed card front.
I attached foam adhesive dots to the backs of my flamingos and attached them to the card, tucked their lags behind the frame, and had their bodies peeking out the center opening.
Then I adhered the leaves, flowers, and pineapples around the opening of the frame.
I die cut the word "thanks" from plain white cardstock using a die from Lynda Kanase's Tropicool Leaves Card set. Then attached it to a black label I created using a die from Eileen Hull's Bookplate, Hinges, and Label set from Chalkboard cardstock.
I adhered the word to the label. Then ran the label through my Xyron Creative Station. I switched out my 5" cartridge for a smaller 3" refill to cut down on waste... this is another "GOLD" product... so I barely make waste.
For a final touch, I added glossy dots to all of the centers of my flowers.
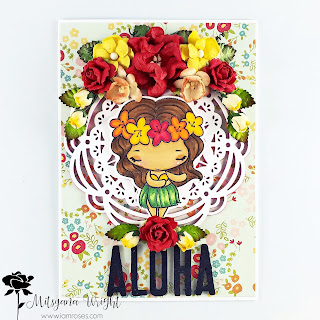
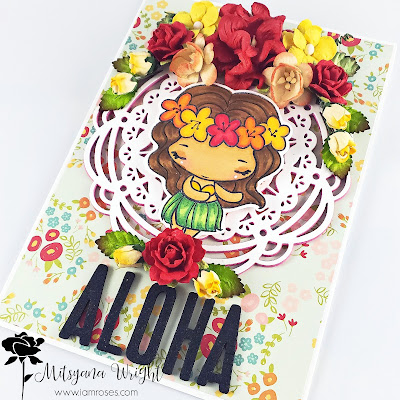
And here is my finished card...
I hope you all enjoyed today's tutorial!!
I really enjoyed using the Derwent products. The quality was just amazing!!
I hope you are inspired to give them a try!!
Thanks for stopping by!
Until next time...
HAPPY CRAFTING!!
~Mitsyana
DISCLAIMERS
This blog is compensated to provide opinion on products, services, websites and various other topics. Even though the owner(s) of this blog receives compensation for our posts or advertisements, I always give my honest opinions, findings, beliefs, or experiences on those topics or products.
The views and opinions expressed on this blog are purely my own. Any product claim, statistic, quote or other representation about a product or service should be verified with each manufacturer, provider, or party in question.
This blog contains affiliate links, clicking and shopping through these links helps to support and run the Up On Tippy Toes blog at no additional cost to you.