Sunday, February 23, 2014

Marshmallow Pops

I've been super busy lately... so busy that I hadn't had time to update my blog or even craft very much (oh, no!).So, I'm glad to say I've finally posting treats I made for my daughter's 1st grade class Valentine's Day.

I dipped HUGE marshmallows in chocolate then added sprinkles for a special homemade treat. These were the campfire sized marshmallows.. they are about 3 inches tall and about 2 inches wide. I found these humongous monsters at my local Walmart right next to the little ones. I've been wanting to buy them for a while just for the sheer novelty. I mean these are HUGE!! One marshmallow easily filled the palm of my hand!


I used Design on Cloud 9's Smarty Pants Bears (bear) and Scallops (heart) cutting files to make the toppers.

I made a total of 28. Lucky little girl! I wish I had a mama like me growing up!! LOL


Sorry for posting this one so late... but to make it up I have another project to share...

I haven't done one in a while so I decided to make a scrapbook layout. I used one of Designs on Cloud 9's (of course!) new cutting files called April Showers. I also used their Scallops file for the scalloped square background., The Short Borders 2 for the decorative border below the picture mat, And... for the ribbons for the title I used the ribbon from the Noel Wreath Card file.


Patterned paper is from DCWV's Sky's the Limit Stack. I love this stack! It's filled with glossy & glittery deliciousness!

I  LOVE LOVE LOVE this stack!


The font used is called Bubbleboddy

Embossing folder used is an old Quickutz (now Lifestyle Crafts) border embossing folder called Retro Diamonds.

That's all for now crafty friends... Until next time, CRAFT HAPPY!!!


Sunday, February 9, 2014

Valentine's Day Card - To the Moon

Hey Crafty Friends... Just making this quick. Well, it's the last week before Valentine's day!! Are you ready for it? Valentine's Day is this week Friday and I have another card to inspire you for that last minute push...

I used Designs on Cloud 9's Space Cadet file for the card front & the inside panel.

The font used is called Rockwell, which usually pre-installed into most computers. If you do not have it already installed into your computer you can download a free version here.


This card would be great for a boy or a girl. Not feminine enough for you? Try making the alien pink and adding a bow atop it's head... bows instantly turn almost any character girly.


Stay tuned for more last minute ideas. Which reminds me... I still have to make valentine goodies for my daughter's first grade class!

I should get to it! Craft Happy Everyone!!

Wednesday, February 5, 2014

Brown Sugar Scrubs

Hello Again Crafty Friends!! I'm sooooo excited!! Today's project is something I've been waning to make for quite some time now. And I am happy to say not only did I finally make it, I made an awesome tutorial to go along with it!! Yay!!

 First things first!! 

Ingredients & Supplies


You will need :
A large mixing bowl
4 cups of brown sugar
1/2 cup of olive oil
1/3 cup pure honey (not honey sauce)
2 used k-cups (dried)
1/2  teaspoon vanilla


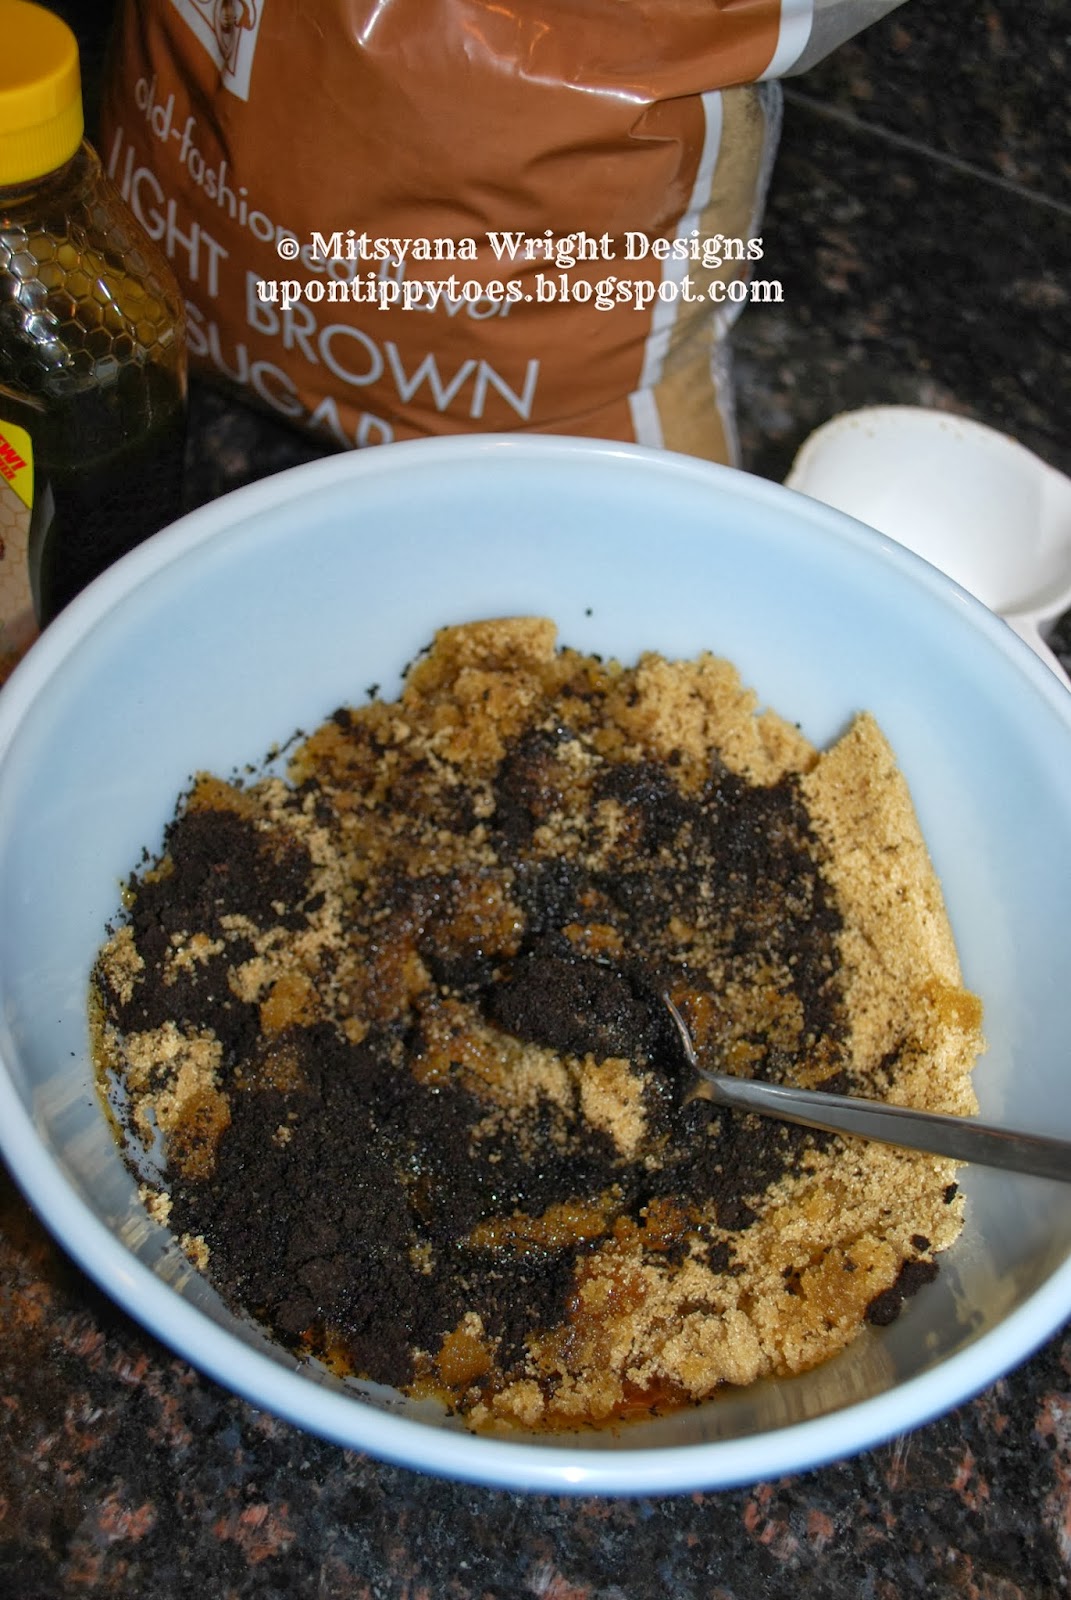
In a large mixing bowl combine all the ingredients.
The honey is an antimicrobial/ antibacterial and anti-inflammatory ...Which works wonders on acne.

Adding coffee will wake up tired skin, takes puffiness out from around you eyes and even helps ward off cellulite. Mix and stir until fully blended.... oops, almost forgot the vanilla! Mmmmmm, yummy vanilla!! It's purely for fragrance.


 You should have a mixture that resembles this. The oil should be fully incorporated and not pool at the bottom of the bowl or on top the sugar mixture.

This batch will make four (4) half-pint sized jars.


Next... Time to prettify your jar!


First, you'll need to make your label.
For this Label I cut assorted colored cardstock with my Sizzix Eclips Machine & Ecal software and made labels using Design on Cloud 9's cutting files.

Cutting files used:
Bottles (for label)
Floral Flourishes (for floral stem/leaf)

I also added tiny a tiny Prima flower and flatback pearl.

Then hot glue label to jar.

If you don not have a die cut machine you can also find self adhesive labels especially made for canning jars. They are usually found in the section as the glass jars. If you cannot find them in your store you can also purchase them online here


And, now the cover...


Supplies needed:
burlap
ribbon
scissors
hot glue gun & sticks

Cut your burlap at lease 4 inches bigger than your lid... leaving a 2 inch border completely around the lid when centered... you'll see why.

Apply hot glue to the top of the rim.

Turn over and apply hot glue directly onto the center of the burlap circle.

Apply hot glue along side of rim.

Quickly pull  burlap taunt before the hot glue sets...  be very careful not to burn yourself... the glue is extremely hot!

Burlap frays very easily... you'll need to trim off  the frayed edges. This is where that extra 2 inch  border around the rim is helpful... you'll still need enough burlap to overlap  the cover.

Apply hot glue atop your burlap and attach ribbon.

Make sure to leave about 1-2 inch gap unglued.

You need that gap to tie your bow.

And PRESTO!!

Another FABULOUS & HOMEMADE gift!!