Hello, Crafty Friends!
I'm so excited that summer is officially over. Don't get me wrong, I love my children but they do get to be a bit much during the summer break. I 'm ready to get back into a routine that doesn't include having to answer the calls of "mom, what can I eat" or "mom, (so and so) hit me", followed by the famous, "they started it". Yes, I'm ready for the calm and quiet.
It takes a lot to just discipline children throughout the day. Now, add trying to teach them something and keep them busy throughout the day and you have yourself a never-ending task. We as parents need be thankful to our school teachers and school administrators for what they accomplish every day throughout the week!
I try to show my gratitude each year by bringing cold bottles of water for the teachers who are in the car line every day. At the beginning of each school year, the temperatures can get brutal.We are still in summer weather and often temperatures reach well over 100 degrees. Usually, our principal and other teachers are standing in the hot sun and manning the car line to make sure that things run smoothly and that your children are picked up safely.
This year, I wanted to do something a little extra. So I, made my children's principal this Schoolhouse Card to let her know I appreciate all she does for us.

Supplies Used
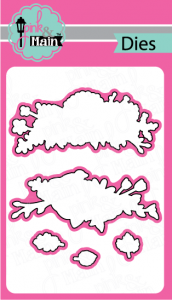
Eileen Hull House Pocket Die (Sizzix)
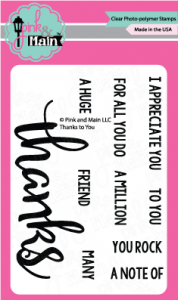
Thanks To You (Pink and Main)
Thanks Dies (Pink and Main)
Teresa Collins Alpha Embossing Folder (Craftwell)
3" Sticker Maker (Xyron)
Mega Runner (Xyron)
White, Red, Schoolbus Yellow, Black, & Kraft Cardstock
Tim Holtz Faded Jeans Oxide Ink
White Pigment Ink
Twine
Bell
Mixed Media Glue

I started by making the little schoolhouse. I used the house die from Eileen Hull's House pocket Die to die cut the base out of red cardstock.
Then, used the same die to trace an indent and peak into a 2"x3" piece of cardstock for the school tower. I used scissors to cut along these lines.
I used the roof die to die cut 4 pieces out of black cardstock.

Then I used my Xyron Mega Runner to attach the tower and rooftops.
Then trimmed the excess overhanging roof tops off the tower.

Then die cut windows from white (window frame) and light blue cardstock (window panes).
I used black cardstock for the door.
Then attached the pieces with my Xyron Mega Runner.

I embossed a piece of 4.75"x 6.75" kraft cardstock with the Teresa Collins Alpha Embossing Folder. Then inked over the top of the raised areas with Faded Jeans Oxide Ink and a mini blending tool.
Then attached it to a 5"x7" card base made from Schoolbus Yellow cardstock.

I die cut the word "thanks" for black and White cardstock. Then glued the pieces together offset so that the white was a shadow. Then onto the schoolhouse.
Then stamped the words "a huge" and "for all you do" in white pigment ink around the die cuts.

Then cut a 3"x3" and a 1"x2" piece of fun foam and ran them through my Xyron 3" Sticker Maker. I flipped them over and ran them through again so that I would have adhesive on both sides.
Then, adhered them onto the back of the schoolhouse. Then attached the schoolhouse onto the card front.
As a finishing touch, I added a twine bow with a little golden bell to the tower.
And here is my finished card...


I really hope our principal like it. She is such a wonderful educator and lady and I really want her to know that all her efforts are very much appreciated!
Happy NEW School Year, Everyone!!
~ Mitsy
***Disclaimer***
This blog is compensated to provide opinion on products, services, websites and various other topics. Even though the owner(s) of this blog receives compensation for our posts or advertisements, I always give my honest opinions, findings, beliefs, or experiences on those topics or products.
The views and opinions expressed on this blog are purely my own. Any product claim, statistic, quote or other representation about a product or service should be verified with each manufacturer, provider, or party in question.
This blog may contain affiliate links, making a purchase through these links helps fund this blog at no additional cost to you.