Monday, April 27, 2015

KaDoodle Bug Designs, Cutie KaToodles, and Virginia Turtle

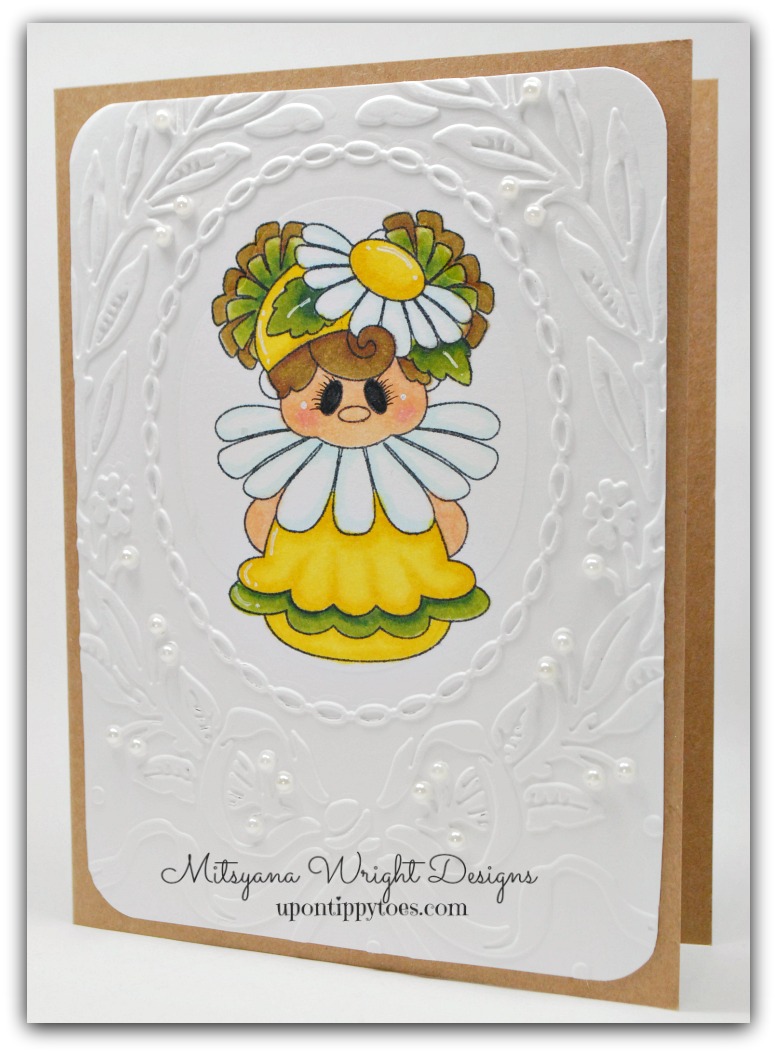
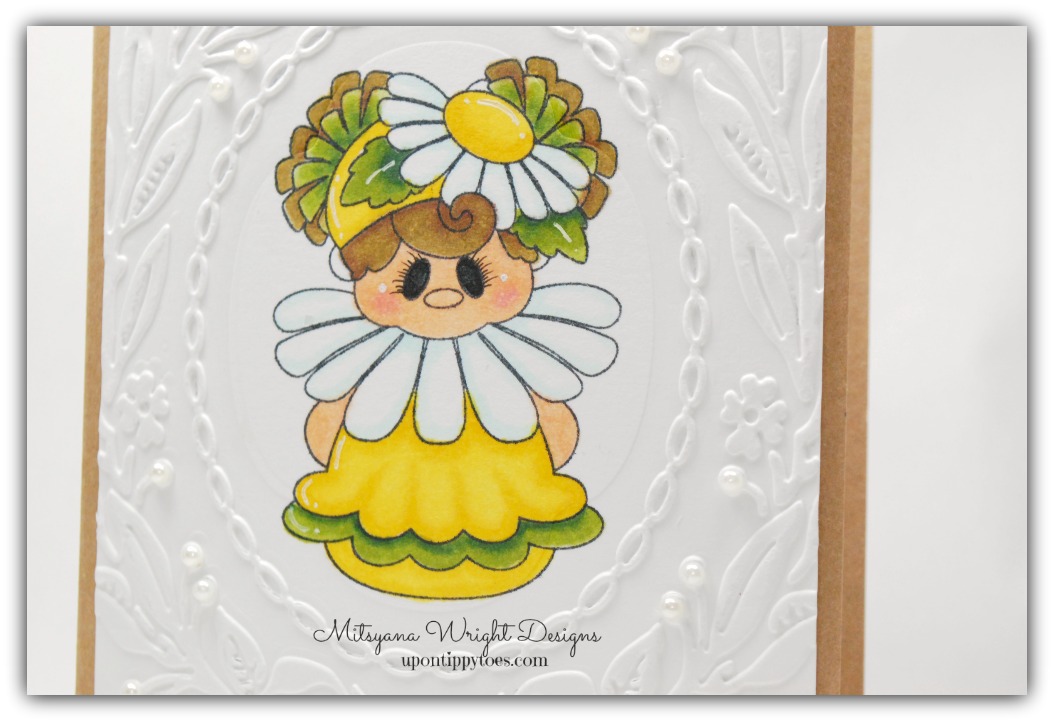
Hello Crafty Friends!! I made a few card last week for KaDoodle Bug Designs and Virginia Turtle and hadn't had the time to write up individual posts. So instead I'm writing one post for all of them and just going to list the KBD file and Virginia Turtle stamp that were used.


This card was made using the New Cutie KaToodle series that KaDoodle Bug Designs has put out. They are all the rage and become viral in the paper piecing community!!

This is the Cutie KaToodle Unicorn. I just LOVE unicorns!! And I just adore this sweetie!! My favorite out of the batch!


This one is the new Cutie KaToodle Foxy. She is so pretty and I love her sweet little bow!


This one is not a Cutie KaToodle, nor is it new... it is KaDoodle Bug's Salty Dogs file! And I paired it with Virginia Turtle's "Ruff Day" from their "Wild About Puns" set.


This cutie is from KBD's Cutie KaToodle Earth Day editions... Their Flower Skunk! I made the head slightly larger to make him look like a little bobblehead! This little guy went perfectly with Virginia Turtle's "That Stinks" stamp which is lso from their "Wild About Puns" set!


I love these Cutie KaToodles... and if you do too then you'll love this even more... 

                  
Cutie KaToodles - Rainy Day Duck

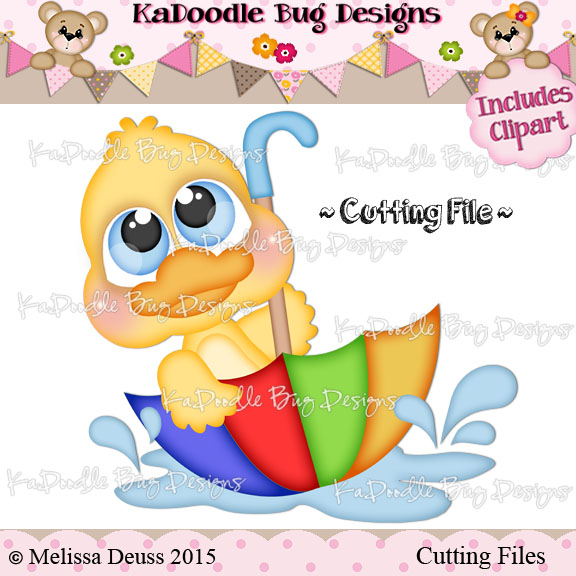
this cutie... Cutie KaToodle Rainy Day Ducky is FREE (for a limited time only) on the KBD website!  So scoop him up while you can! He won't be there for long!!

Happy Paper Piecing!!

~ Mitsy


Felt flowers are for mommies too!

Hello Crafty Friends! Mitsyana Wright here with my very first Cut'n'Boss Design Team post!!
And I wanted to let you all know that this fabulous machine and dies aren't just for paper and scrapbooking! This machine can cut and do so much more!

Today I'm going to show you how to make these gorgeous flower hair ties using your Cut'n'Boss machine and the new Teresa Collins' "Girls Best Friend" Pocket Die Collection.


Supplies and Tools Needed
Cut'n'Boss Machine by Craftwell
Teresa Collins Pocket Dies (Girls Best Friend Collection)
2 Sheets of Felt
Elastic Hair Tie/Bands
Hot Glue Gun
Glue Sticks
Rhinestone Buttons or Earrings
Button Shank Remover (if using earrings)


 Depending on the thickness of your felt you may need to add an additional "shim" to your platform "sandwich". For my thick felt I used the following "sandwich":

Stacked from bottom to top
"D" Plate
Medium Thickness Chipboard (my "shim")
"A" Plate
Magnetic Plate
Die
Felt
Metal Plate
"A" Plate again


You are going to need 5 of the large flowers and 4 of the small


Then take one flower and fold it in half and hot glue just just a small pea size of glue in the center. Fold again and glue. At this point your flower should be quartered. Make sure to glue between folds and hold till glue sets. Repeat these step for 3 more  flowers.

Glue your 4 flower quarters to remaining flower. This will be your base.

Glue one of your small flowers to center... repeat 2 more times, make sure to turn the flower while placing the next 2 so that the petals are alternating.

If you have chosen rhinestone earrings as your centers (like I have), remove the backing with a button shank remover. Then glue to center of your flower.


Apply a generous amount of glue to center of flower and attach elastic band, quickly place your last flower over hot glue concealing it. Hold upright till glue sets.


And there you have it... a GORGEOUS Felt Flower hair accessory!!


I had enough felt that I was able to make a smaller version of the flower above using the medium sized die and repeating the above steps. This is great in case one of my darling daughters want to match mommy for the day!!


~ Hope I inspired you to try new things with your Cut'n'Boss!

Happy Crafting!! 
~ Mitsy


Thursday, April 23, 2015

eBrushed Monogrammed Coasters

Hello Crafty Friends... DT Mitsy here with another eBrush project!! I'm on a monogramming kick. I've always loved the way monograms dress everything up! Who knew one simple letter can make all the difference?! I especially love stuff that not only looks good but can be used. Sorry, this gal like nice thing but I'm practical... everything has to have a purpose.

So, I decided to make the monogrammed tile coasters....


Supplies Needed
Tile Coasters
Stencils
Shelf liner
Metallic Sharpies (Gold & Silver)


I pre-cut my shelf liner into 2.25" cirlces. I used my electric die cutter for this, it cut all four out at the same time which cut down my crafting tome down quite considerably. Way better than tracing and hand cutting. 

I then peeled of the protective backing and adhered the liner to the center of each tile. This will serve as a mask. I want the centers to remain clean so my monograms can stand out.


 You can buy stencils from your local craft store or opt to make your own.  Mine were homemade. Again, I used my electric die cutter to pre-make these ahead of time.

I then place my chevron stencil over the circle. If you need help holding down your stencil or are afraid the stencil will shift during spraying, just go over the back of your stencil with some repositionable adhesive. I used some my glue pen ... when it dries it becomes a repositionable adhesive.


I then ebrushed my stencil with my GOLD Sharpie. Gold is still all the rage and I know it'll mke my coasters look ultra chic!!


The great thing about "eBrushing"... virtully NO wait time!! The ink practically dries instantly! I simply removed my stencil and peeled off my circle....

AWESOME!!

I simply repeated the last step with my "W" stencil in the center of the circle with my SILVER Sharpie.


Removed the stencil and VOILA ... Fabulous monogrammed tile coasters...


These are for me but will make an awesome easy housewarming gift or hostess gift!

Look, I'm already putting them to good use and reaping the benefits of my hard work!! Now it's time to relax and enjoy!!

CHEERS!!


Hope this project inspires you to make some of your own. Super quick, super easy, super affordable... and always SUPER FABULOUS!!

~  Mitsy

Wednesday, April 22, 2015

Pink and Main Birthday Owls


Hey Crafty Friends... back again with a bit of owl cuteness!
I make it a regular habit to always be stocked up on cards for every occasion. Especially when it comes to birthday cards.

At every opportunity possible I always try to give a handmade card or gift and at many times both!
I've decided to give this one to a very special little girl! She is a daughter of a dear friend of mine that will be having a birthday party the weekend.

For this card I used the "What a Hoot" stamp set from Pink and Main. 
I colored them with Spectrum Noir markers (HB1, HB2, HB3, BT3, BT4, BT7, PP2, PP5, CT2, CT3, CT4, GB5, CG2, DG3)


Additional Supplies Used

Patterned cardstock (DCWV-)
White cardstock
Double-sided Adhesive
Paper Gator (Around the Block-retired/discontinued)


Thursday, April 16, 2015

Pretty Monogrammed Tote


Hey there eBrushing fans... 
DT Mitsy here to bring you a quick way to transform a plain cooler bag  into a pretty prim insulated tote. 

 
I was inspired by a project that you may have seen on HSN during their live eBrush segment... It was a mini burlap tote made by my awesome DT sister Yolie Burke...

How stinkin' adorable is that??!! 

So I too made a tote... but not just a regular tote and not a mini one either!
But I did stick to her layout... Why mess with a good thing!!


Supplies Used
Cooler bag (Coleman)
Steel Rule Flower Die ( Tim Holtz's Tattered Flowers- Sizzix)
White Tulle
Pink Ruffled Trim
Sharpie Markers ( Pink, Light Pink, Metallic-Silver)
needle & thread
Rhinstone Button
Contact Paper/ Shelf Liner
Digital/ Electronic Cutter


I started off by cutting my tulle. You can buy this at the local super store  for about 1 or 2 dollars. They come on a little roll 6 inches wide and contain several yards. I used my Tattered Flowers die to cut out flowers rom my tulle and because it's a steel rule die I can cut 20 layers layers through all at once.  

Then I stitched them all together, literally just a couple stitches through the center of the flower, making sure to alternated the petal in between each other. Then I  fluffed the petals to make a poof.


I then eBrushed my tulle flower with 2 different pink  sharpies. I first sprayed down a layer of light pink then dark pink toward the center.


I then attached a rhinestone button in the center and sewed onto the strap. I also sewed the pink ruffled trim along the edge of the outer pocket. 

Next, I cut a stencil using my Sizzix eclips and shelf liner paper. Because of it's adhesive backing it makes awesome stenciling material. My stencil is less likely to move which is extremely awesome because my surface isn't flat.

The font used for the monogram is called Egregio Script. It's a FREE font you can download for personal use only from dafont.com. I love this script it is very elegant and looks great as a monogram!


I then eBrushed my stencil with a metallic silver Sharpie.
I removed my stencil.... 
and...
AWESOME!!

Oh, it turned out so pretty!!


I was going to give this to one of my daughters but I may have to keep this one. I have two daughters and I wouldn't want them to fight over it!! LOL

Hope this inspire you to eBrush and alter things you may already have at home. You'll be surprised at your results!

~ Mitsy


Tuesday, April 14, 2015

Daisy Garden Cutie

Hello Crafty Friends!! I am loving that Spring is here and that flowers are popping up everywhere!!  Speaking about popping up everywhere… they just popped into my crafting!! Check out this adorable card I made using Pink and Main’s Daisy stamps!!
daisy
 These stamps are so cute you it takes very little effort to make an amazing card!! This little cutie packs a huge punch!! The only additional element is the embossing!
daisy1
Fill your Spring with “FLOWERS”… collect all  8 Garden Cuties sets today TODAY!!

Hope you have a pretty and flower filled day!
~Mitsy

Monday, April 13, 2015

Flower Fairies


Good Morning Crafty Friends!!
Here's my latest card using the new KaDoodle Bug Designs file "Flower Fairies"!


Flower Fairies


 All paper pieces were airbrushed using my eBrush machine and Spectrum Noir markers CR3,  FS8, CR8, DR1, DR5, and DG2, DG3, and a green Sharpie marker.


Sorry, the eyes on this cutie are not included in the file. This is a personal file I created just for my pieces.

Additional Supplies Used
Sizzix Originals Jelly Frame (retired)
Ranger White Gel Pen
Faber-Castell XS Artist PITT Pen
EK Success Chalklets (pink)
Stickles (crystal)
Hero Arts Adhesive Pearls (pink)
Marvy Uchida Butterfly Clever Lever Craft Punch
Polka-daot Ribbon
Button


And we got an extra treat for you today....

There's a new KaDoodle Bug SURPRISE FREEBIE!! 
This cutie is called Ice Cream Penguin!!


*SURPRISE FREEBIE* Ice Cream Penguin

Hope you all have a HAPPY & CRAFTY day!

~ Mitsy