Friday, March 31, 2017

Woodland Themed Treat Boxes


Happy Fri-YAY Crafty Peeps!!
I'm back again as Guest Designer for Sizzix today! This time, here at my own blog!
And today's project is sure to give you the "warm fuzzies"... because I made these adorable Woodland Animals Themed Treat Boxes!!

Supplies Used
Sizzix Big Shot
Clear Liquid Adhesive
Blue Painter's Tape

I decided to make the foxes first.  So I started by die cutting the main panels for the box (both the fox and owl use the same box base) and the tail out of patterned paper. You will need two of each. I like to double up my paper before running it through my die cut machine to get both set of cuts at the same time.

Then, I die cut the mask and eyes for the fox. You will need two of these as well, but one of the pieces have to be "mirrored". You can achieved a mirror cut by folding it your paper first and laying your die slightly passed the cutting blade on the nose... Or by die cutting your usually way (blade faced down on the patterned side of the paper) then cut another piece out (blade side down on the white side of the paper). Whichever is easiest for you. 

You will also need to cut 2 each of the eye pieces, a nose (I used the largest circle of the eye for this part) and a tip for the tail. I set this aside to assemble the box.

This part was so super easy! I simply folded on all the crease lines, added strong clear glue to the tabs, and adhered them together. Tab should be joined to a "non-tab" side of the other panel.

Someone once asked me how I ran my smaller pieces through my sticker machines... well, here's my little secret... I attach them face down onto blue painter's tape first!

 I make a tab on one end (so the sticker machine has something to grip onto. A piece of paper will work too) and then pull a whole line of tiny pieces through at one time. Then I burnish the back to make sure I got good adhesion, peel off the protective film, and gently pull the blue tape off. Now I have adhesive backed sticker ready to go!


Because this little dude has side tufts sticking off the side of the box I used more liquid glue to attach these pieces. Then covered up the cut ends with his little nose.

I layered his eye pieces and popped them into the eye holes.

Then attached the mirror pieces of the tail together and layered the matching tips, then glued it to his backside. You don't need to make the tails double sided but it looks more finished from behind if you do.

Now, for the owl!!
The base of the box is the same as the one above. The only difference is their little faces and what's attached to it's back.

To make the OWL you will need... One mask, one beak, two of each eye piece (whites of the eyes and irises) , and four wing (2 mirrored sets).

I start my owls by first attaching the beak with some glue. Then I ran the mask through my sticker maker. I forgot to run the eyes in at the same time so I just used liquid adhesive to pop them in place.

The edges of your masks should line up from tip to tip and side to side perfectly.

Glue the mirroring wing together and attach to the back of the box in a slight angle. I like to use the eyes as a point of reference on where to place the ends of my wings so that they look even.

I love how mixing and matching different patterned papers can get you several different looks. Here several different one that I have made.

And here they are all playing in the woods... just like little woodland animal should!


These favor boxes are absolutely adorable. You can fill them with your favorite treats and set them as party favors or... with Easter coming up they'd make a darling alternative to Easter eggs. How cute would these be hidden along the bunny trail?

I hope you enjoyed these OWLS & FOXES BOXES! LOL
I know I had a fantastic time making them!

Special THANK YOU going out to Sizzix for inviting me to be a Guest Designer this month!!
I had such an AMAZING time!

Wednesday, March 29, 2017

Elphie Selfie Birthday Card & Tag


Hello Crafty Friends!! Happy Hump Day!!
I'm back again with Team Xyron today, and we have something special lined up for you!!
We will be partnering up with Lawn Fawn all week long to bring you tons of crafty fun and inspiration!!

And as an added bonus, both Lawn Fawn and Xyron are each giving away a $50 prize package which includes one $25 gift certificate and one Xyron Mega Runner.

All you need to do to be eligible to win is:

1) Visit BOTH the Xyron and Lawn Fawn on Facebook.

2) Leave a comment on one (or all) of the featured 
Xyron & Lawn Fawn collaborated projects during the entire week.

Easy Peasy Lemon Squeezy, right??!!


For my project I used Lawn Fawn's Elphie Selfie clear stamp set. I was lucky enough to play with set at the Xyron AND the Lawn Fawn Booth during Creativation and immediately fell in love. Not only are the characters adorable but ,with all the different sentiments included, this set is very versatile.

 I started by first stamping my images onto Strathmore Mixed Media Paper. This is a heavy duty, multi-purpose paper, that holds lots of moisture from different mediums with minimum bowing.

Then, I traced and shaded my images using Tim Holtz Distress Markers. 

I used a Aquash Water Brush pen filled with water to blend the colors out.

Next, I used a scissors to cut out the images. 

If fussy cutting isn't your thing, Lawn Fawn also make the coordinating dies for this set (HERE). I, on the other hand, don't mind hand cutting. I sometimes find it very relaxing. 

 For my card front/ back ground I cut out patterned paper from Lawn Fawn's 

White cardstock Card base- Standard A2 sized card- 5.5"x 8.5" (5.5"x 4.25" folded)
Rainbow plaid paper - 4.25" x 5.5"
White cardstock- 3.75" x 5"
Blue plaid paper- 3.5" x 4.75"
Green plaid- 1" x 4.75"

I ran the blue plaid and white cardstock through the Xyron Creative Station Lite and layered them onto each other, leaving a .25" white border around the blue.

Then I applied adhesive on the 1" x 4.75" strip by running it through the Xyron 1.5" Sticker Maker (aka "X") . I attached it to the bottom of the blue paper creating a blank landscape to place my critters.

 I did not attach my landscape to the rainbow plaid at this point.

I knew I wanted a little dimension to my card so I decided to rain the landscape piece with some home made foam adhesive sheets.

To make my own foam adhesive, I simply took craft foam sheets and cut them down into two smaller pieces, and inserted it into my Creative Station lite. Once through, I trimmed the excess protective film off the sides, flipped the foam faced down and ran it through my machine again. Make sure you burnish your foam for maximum adhesion. Now both sides of the foam have adhesive on them.

I peeled back the protective film off one side of one of the foam sheets and applied it onto my landscape piece.

At the same time I was making foam I also ran through my rainbow plaid paper. This will be for when I attach the entire card front onto my plain white A2 sized card base.

Then, once that part was done, I peeled the other backing off the foam and mounted my landscape piece onto the rainbow sheet.

Now, with the left over adhesive foam sheet, I cut it into .5" strips, then down to little square and rectangles. to fit the back of the stamped images, creating little pop dots for most of my cut-outs, and attaching them to the backs.

Finally sticking them onto their little landscape. All I needed to do was peel the protective film and attach images as desired.

I had a brain fart moment and realized I forgot to stamp my sentiment. Usually I'd do this part onto my paper before doing anything else to it, just to avoid any potential accidents. But I went through with stamping anyway and just my luck... no accidents

I stamped my 'Wish Big' using VersaFine Onyx Black Ink. I love how bold and crisp it stamps.

I found some really thick dark pink and white twine that went perfect with all the colors of the card. So I decided to wrap it a couple times and tie a multi-loped bow onto my card.
I decided to make a tag with the extra paper I trimmed off making my card. These were obviously too small to make another card but big enough to make a tag. I don't like wasting perfectly adorable paper.

Putting it together was a cinch!

The created the tag by snipping off a corner to a 2"x 3.5" rectangle, I flipped it over and laid it faced down and mirroring the other side. lined up the corner to make sure they were straight and even, then took my scissors and made an identical cut. 

Then I took a .5" x 2" strip of leftover green paper and mimicked my card with a landscape view.

Next I ran my tag through my Creative Station Lite ad mounted it on white cardstock and trimmed a .25" border around it.

I also had a little ellie and a pennant leftover from my colored stamped images, to decorate my tag with.

Then,  I punched a hole at the top  of the tag and tied a bow up on top.

And for the final touch, a little faux stitching on both the card and tag, by creating dash lines around the perimeter of both.


And here is my finished Card and Tag set...


Hope you all enjoyed this project!! Thanks for stopping by!!

~Mitsyana Wright

And, just a reminder,
don't forget to enter in our awesome GIVEAWAY by visiting the Xyron and Lawn Fawn pages on Facebook!


Supplies Used

Elphie Selfie (Lawn Fawn)
Lawn Fawn ELPHIE SELFIE Clear Stamps LF1328 Preview Image


Other Supplies Used
Mixed Media Paper (Strathmore)
VersaFine Onyx Black Ink (Tsukineko/ Imagine Crafts)
Tim Holtz Distress Markers (Ranger)
Aquash Water Brush Pen (Pentel)
PITT Artist Pen M (Faber-Castell)
Craft Foam Sheets
Deluxe Paper Trimmer (Martha Stewart)
Scoring Board (Martha Stewart)
Cutterbee Scissors (EK Success)
Pink and White Baker's Twine
Clear Liquid Adhesive
Buttons


Saturday, March 25, 2017

THANKS

Hi Crafty Friends!!

I have bad & good news... Well, the bad news is actually really good news... let me take that back it's actually GREAT NEWS! 

So let's get down to it... 

THE BAD NEWS:
There is no new tutorial on my blog today! AAAAGGGHH!!! SAY WHAT??!!

THE GOOD NEW:
The tutorial is over at the SIZZIX BLOG (SAY WHAT- AGAIN??!!)... Yup, I said SIZZIX BLOG... because I'm a Guest Designer on their blog today!! WOOT WOOT!!

And I made this GORGEOUS card (below ) with a variety of sizzix dies. This tutorial includes how I made those stunning flowers on the card.

For more details (tutorial and additional pictures) on this project, 
visit the Sizzix Blog HERE!!


Wednesday, March 22, 2017

Blooming in Spring


Hello Again Crafty Friends!! I'm back with Team Xyron. And I am so please to continue our week's projects collaborating with Teresa Collins!!

When I received these beautiful papers I automatically thought of bright sunny skies and spring. And it just so happened that I had SPRING pictures that desperately needed to be scrapped. When you have 4 kids, it's kind of hard to keep up to date on all the scrapbooking.

I live in Texas and these were taken during the Spring a few years ago when the bluebonnets and indian paintbrushes were in full bloom. I don't ever recall another spring as beautiful as this one. Every year since then we go for a ride to see if "our spot" has bloomed. Sadly it hasn't bloomed like that year since.

Fast forwarding to...now.  those 4 year old pics are now the focal point of my Spring layout!!

Supplies Used
Glam Factor Paper- Herringbone (Teresa Collins)
Glam Factor Paper- Triangles (Teresa Collins)
Nine & Co. Designer Paper Pad (Teresa Collins)
Nine & Co. Ephemera (Teresa Collins)
Teresa Collins Dies- Leaf - Thankful Holiday (Craftwell)
Teresa Collins Die- Best Day Ever- Remember This Project Die Set (Craftwell)
Wink of Stella- Clear
Glossy Accents (Ranger)

This layout came together pretty quickly.  I started with the 12"x12" Teresa Collins' Glam Factor Triangles paper. I used the reverse side which is not triangles but white with tiny black polka dots.

I cut the piece down to a 4.5" x12" strip. Then I ran that strip through the Xyron Creative Station Lite and applied it onto the 12"x12" Herringbone sheet.

I wanted to add some color and interest onto the polka dot strip, so I found these pretty patterned borders from Teresa Collins' Nine & Co. Designer Pad and cut out a few strips. And then die cut the phrase "Best Day Ever" from coral polka dot paper (also in the paper pad). 

Next, I ran the border strips and the phrase through the Xyron Creative Station Lite... Along with Flowers from the Nine & Co. Ephemera pack, and my photos (that I trimmed to 4"x 4"). 

The Creative Sation is a really huge time saver!
Then all I did was peel and stick! Super Easy Peasy!!

 I placed the patterned borders at the top and bottom of the the polka dot panel, adhering the best day ever onto one of the borders.

Then, I attached my photos, giving myself a 1/4" gap from the borders strips.

 I die cut 6 green leaves and 2 gold leaves using the large leaf die from Teresa Collins' Thankful Holiday set.

I applied clear liquid adhesive to just the bottom of the leaves and attached the leaves onto my layout.

 I layered the ephemera over the bottoms of my leaves and added the hearts between the photos. 

I added a little bit of sparkle by brushing the hearts and parts of the flowers with my Wink of Stella pen.

 I balance my page by adding more leaves, ephemera, and a journal tag onto the blank area of my page. 
Then I trimmed off the excess and again brushed my ephemera flowers with my Wink of Stella pen. I love how it add just a subtle shine. It's very pretty without being overpowering.

You can see a little bit of sparkle but these pictures just don't do it justice.


And here is my finished layout...


I am so happy that I finally got to scrap my beautiful daughters pictures. Her facial expressions really captured the moment and I'm so glad these Teresa Collins collections inspired me! And with Xyron's help it came together in a cinch!

I hope you enjoyed today's project! Don't forget to check in with Xyron and the rest of my crafty DT sisters to see what other amazing projects they have in store!!

Until next time...
Happy Crafting!!
~Mitsy


Tuesday, March 21, 2017

Faux Dori Elegance

Hello, Crafty Friends!
I'm back again with the Eileen Hull Inspiration Team to share with you another project made with another New Release from Eileen Hull's Heartfelt collection with Sizzix!


If you love Travel Journals, Midoris, Art Journals, or Mini Albums... this is the die for you!! Now you can make you own customized journals whenever you want!

Supplies Used
Eileen Hull's Journal Die (Sizzix)
Mat Board (Sizzix)
Metal Flowers (Prima, Momenta)
Tim Holtz- Word Bands (Advantus Corp)
Brads (Recollections)
Rhinestone Ribbon Slide
Elastic
Faux Dori Inserts
E6000
For this journal cut 2 pieces from Sizzix's Mat Board and patterned paper. I like to cut both pieces at the same time. When you cut both paper and mat board together it cuts the patterned paper along the crease lines and saves time from having to do that extra step. The paper I used to make this album is from DCWV's Mariposa Stack.

I like to lay the pieces in the order that they were laid out on the die. Then run it through my Xyron Creative Station machine. This makes sure that they are attached to my album in the correct order.

I cover both the sides of the album cover. Then attach at the spine using a strong liquid adhesive. I like to use clips to hold in place while the glue sets to prevent shifting and assure proper alignment.

This journal die has holes pre-made to attach your inserts. I inserted thin elastic strands through the holes and secured with a simple knot.

For the outside of my journal, I used a thicker elastic band (the type used for headbands) and simply wrapped it around the outside of my album. I did not use the premade hole but just laid it over the cover and beneath the strands for the inserts. I fastened a rhinestone slide onto my elastic before tying off my knot and trimming the ends into dovetails making it look like a bow.

Then used some E6000 to attach gorgeous metal flower embellishments to the front cover.

I also attached a Tim Holtz word band to the upper corner.

On the inside of the journal, if you inserted an elastic into each hole, you will have enough room to add up to 3 Midori/ faux dori inserts.

These inserts you can buy pre-made separately or you can make yourself. Because I wanted my inserts to coordinate with my cover I opted to make my inserts myself and just used more gorgeous paper from my Mariposa Stack. I absolutely love all the gold foil and glitter from this stack!! 

And here is my finished album...


At the very last minute, I decided to add these metal photo corners to onto my album cover. They really finished off the edges and gave it a more finished look.

I hope you were inspired by this project and try making your own travel journals!! Eileen's new Journal die will be available for purchase from Sizzix in April. 

Don't forget to check out the rest of her Heartfelt collection of dies.

Heartfelt


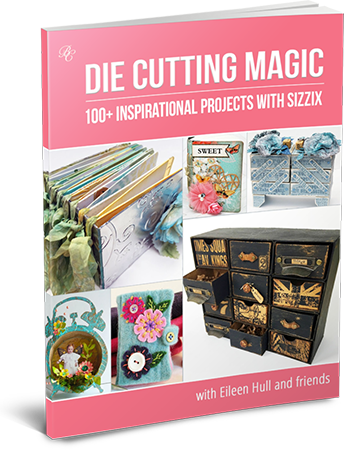
And for more inspiration using Eileen Hull Dies, check out her new book...


eileen hull die cut magic


Hope you all enjoyed this tutorial!
And as always...
Happy Crafting!
~Mitsy

**DISCLAIMER**
This site contains affiliate links. Making a purchase through these links help support this blog at no extra cost to you.

Monday, March 20, 2017

Scentsational Skunks AND Squirrels


Hello Crafty Friends!! I have a couple adorable projects to share with you along with a funny story. Both projects today were made using the Pink and Main's Scentsational Stamp and Dies sets and both are so stinking cute... hahaha, pun totally intended!

 For my first card (featured above), I also use the Pink and Main Stitched Circle Dies as well as the Lacy Border Dies sets. As well as the new Spring Flings paper pad.

Supplies Used

Scentsational (Pink and Main)
Scensational Dies (Pink and Main)

Stitched Circle Dies (Pink and Main)
Lacy Border Dies (Pink and Main)

Spring Flings (Pink and Main)

Other Supplies Used
Natural Corrugated (DCWV) 
Mega Runner (Xyron)
White Cardstock
Clean Color Real Brush Markers (Zig/ Kuretake)
VersaFine Onyx Black Ink (Tsukineko/ Imagine Crafts
Hemp Twine
Paper Flowers (Prima)
Flower Button
Fabri Tac (Beacon)
Tim Holtz

I started by first stamping my images with Versafine Onyx Black ink on 140 lb. Mixed Media Paper. 

Then I colored them using my Kuretake Clean Color Real Brush Markers with a waterbrush filled with water.

After I was done coloring I die cut the images out using the coordinating Scentsational Dies set.

I die-cut white paper using the Lacy Borders Dies to make to border strips. I also cut out a piece of corrugated paper to 4.25"x5.5" and a piece of pink & white gingham patterned paper to 3"x4" .


 I used a Xyron Mega Runner to add adhesive to the back of the pink and white gingham paper. Then added a border onto each of the long edges.

I added more adhesive onto the back side of the borders and attached to the corrugated piece.
I die cut stitched 3 circles (2- smaller, 1 larger), added foam adhesive to the back and also added foam adhesive to the back of the skunks.

I then added the a skunk to the front of each stitched circle.

I tied a multi-looped bow and used a small dot of liquid adhesive to attach to the front corner of my card. Then I decided my bow needed a cute little center. So I added a couple of tiny paper flowers and a acrylic flower bead.

I didn't use any of the sentiment stamps that came included with the stamp set, I didn't have much room to really add a sentiment because of the layout of my card. But... I did find this short and sweet phrase that says "enjoy today" from Tim Holtz's Small Talk sticker book. It was the perfect sentiment and importantly the perfect size and as an added bonus it looked super cute paired with this sweet little ladybug (which IS included with the Scentsational set).

I attached the finished card front onto a standard A2 (4.24"x 5.5" folded) sized card base made from white cardstock.

And here is the finished card...

Now, here is where the funny story comes in...

When I first got this stamp set I was so excited to use it I got my stamps out, stamped out a few images, got out my markers and water brush, and started going to town. Before I knew it I had colored my images with black ink running down the middle of their heads. I only realized after, what I had believed to be the third "skunk" image, it wasn't quite looking right. 

***FACE PALM***

My fingers totally ignored my brain and started coloring... it totally ignored the fact that skunks have WHITE stripes running down the middle of their ENTIRE BODY (including their heads)!!


I always believed that there are no mistakes in crafting... only opportunities! So I was quick to turn my frown upside-down by turning my botched SKUNKS into the perfect SQUIRRELS! Yup, Color the rest of the body and tail with a little bit of brown and presto adorable squirrels! LOL

Waste not, want not!

And now, I have a multi-functional stamp set that can make 2 cute critters for the price of 1!

For this second card, I die cut patterned paper from the Spring Flings and Shades of Spring paper pads and layered the pieces on to each other and attached them using my Xyron Mega Runner. 

The sentiment was a little hard to read so I die cut just that part out of black cardstock and layered it over right over the patterned paper piece using a glue pen.

I mounted the squirrels using foam adhesive dots. I also added a few enamel dots for a bit of sparkle.

Then I tied a bow using 3/8" black grosgrain ribbon.

At the last minute, I decide that it a little more texture so I carefully removed the card front and reattached it onto more corrugate cardstock then back onto the cardbase.

And here is my second card...


I think it turned  out pretty darn cute! Especially when it started out as an "Oopsie".

Additional Supplies Used
Spring Flings (Pink and Main)
Shades of Spring (Pink and Main
AND
Stephanie Barnard's Scallop w/ Flowers & Sentiments Drop-Ins (Sizzix)
Stephanie Barnard's Scallop w/ Greetings Drop-Ins (Sizzix)
Enamel Dots
Black Grosgrain Ribbon

I hope you all enjoyed my projects for today!

Remember to think outside of the box... you never know what you can come up with!

Happy Crafting!
~Mitsy

Disclaimer: This blog contains affiliate links. Clicking on these links help support this blog at no extra cost to you.