Tuesday, August 30, 2016

Trick-OR-Treat

Hello again, Crafty Friends!!

Did you know that the "holiday" season will officially start in just a few short weeks??!

EEEEEKKK!! I am beyond excited!
Especially because the seasons officially kicks off with my all time favorite holiday... Halloween!!
 I don't just love it because of the candy either! I love it because my birthday happens to land on the day before All Hallows Eve!! And, every year we have a masquerade birthday bash on Halloween night. 

Guest dress up in costumes, eat, and take a break from the party to take the children trick-or-treating. Then we come back and eat and continue partying and the kids rummage through their haul. It has become a annual tradition! So much fun and so many memories!!

So in the spirit of all things Halloween-y I made this super sweet card, for Team Pink and Main, that is sure to give you a tooth ache!


Supplies Used
Sweet Halloween (Pink and Main)
Sweet Halloween Dies (Pink and Main)
Planning Fall (Pink and Main)
Big Shot (Sizzix)
Die-namics Blueprints 29 (My Favorite Things)
Mixed Media Stack (DCWV Inc.)
White Embossed Stack (DCWV Inc.)
Solar White Cardstock (Neenah)
Mega Runner (Xyron)
Momento Tuxedo Black (Imagine Crafts/ Tsukineko)
Colored Pencils (Spectrum Noir) 
Alcohol Markers (Spectrum Noir)
White Opaque Marker (Recollections)
Chalklets (EK Success)
3D Dots (EK Success)
Glitter Gel Pen- Clear (Sakura)
PITT Artist Pen XS (Faber-Castell)

I start by stamping my images from the Sweet Halloween stamp set with Momento Tuxedo Black ink onto Neenah Solar White cardstock.

 To color my images I used Spectrum Noir Alcohol ink based markers. Then shaded with color pencils for more depth.

For the the images above, I used the following colors:

Cupcake- HB2, HB3, GB4, and OR1;
then shaded with 081 and 017.
Caramel Apple- DR2 and CR9; then shaded with 
Candy Corn- LY3, GB4, and OR1; then shaded with 017 and 013
Candies- HB2, HB3, BP1, GT3; then shaded with 081, 053, 054, and 029
Chocolate Bar- TN4,TN9, EB3, and EB4; then shaded with 090, 094, and 103

I rubbed hot pink chalk onto for cheeks on the cupcake. Then added highlights throughout using a white opaque marker.

I also colored the wrapper of the chocolate bar with a glitter pen to give it the look of foil.

When I was happy with all my coloring I die cut my images with coordinating Sweet Halloween Dies by running it through my Big Shot.


Then, I used my MFT Blueprints 29 dies to die cut a mat from DCWV's White Embossed Stack , and a frame from holographic paper from the Mixed Media Stack.

I used my Mega Runner to attach my frame to lime green cardstock (also from the Mixed Media Stack), then hand cut around the frame with scissors and attached it to my white embossed paper cut-out. Then, mounted it on purple shiny metallic cardstock (also in the Mixed Media Stack).

To make my cut-out pop off the card I mounted all my pieces with foam adhesive. Attaching them into the windows.


Then, I made a cardbase from more Neenah White Cardstock and mounted a  4.25"x 5.5" piece of gold glitter cardstock directly on top.

I stamped the phrase "trick or treat" from the Planning Fall stamp set and cut it out by hand forming a double ended fishtail banner.

Finally, I hand doodled around the inside perimeter of each window with a PITT Artist Pen in XS. with the same pen I also added tiny little eye lashes.


I think this batty cupcake is just too stinkin' sweet!!

I hope you enjoyed today's project!!

Until next time...
HAPPY CRAFTING!!
~Mitsy


Monday, August 29, 2016

Dream Tag


Happy Monday, Crafty Friends!!
I'm back starting off a new week with the Cut'n'boss Team. This week the team we will be featuring the Teresa Collins A6 Embossing Folders!! And for today's project I used the Teresa Collins Alpha Folder (from the Decor & Alpha Pack) to make this bright and cheerful tag.

I

Other Supplies Used
Cut'n'boss (Craftwell)
Autumn Leaves Mini Stack (DCWV)
Mega Runner (Xyron)
Distress Tool (Tonic)
Crop-a-dile (We R Memory Keepers)
Jumbo Java (Imagine Crafts)
Ink Sweeper (Imagine Crafts
Glue Pen (EK Success)
Glossy Accents (Ranger)
Paper Trimmer (Fiskars)
Scissors (EK Success)
Scuffers (Lasting Impressions)

 First, I started by creating a tag. I used paper from the Autumn Leaves Mini Stack. I wanted to make it a relatively large take but didn't have a tag die big enough. I thought of an easy solution... create my own. I measured a piece of cardstock to 4"x6". 

I snipped a corner of one side of the tag. Placed the cut off piece face down onto the opposite side. Then I used that piece as a guide and cut off the other corner. Doing this helps to make both sides even.

I used a distressing tool to rough up the edges. 

Then, inked the distressed edges with Jumbo Java and an Ink Sweeper.

Then, in coordinating paper, I cut a piece of cardstock measuring 3"x 3-1/8"; and another measuring 4"x 4-1/8".

I embossed the 3"x 3-1/8" using the Teresa Collins Alpha Embossing Folder and ran it through my Cut'n'boss machine.

To emboss with the Cut'n'boss, I used the following platform combination:

From Bottom to Top
D PLATE
A PLATE 
EMBOSSING FOLDER & PAPER
A PLATE


One my paper was embossed, I opened my folder and sanded the top layer off the raised impression to make the embossing stand out more. I leave my paper in place on the folder while doing this. This helps keep the raised image from being smashed down.


Then I used left over pieces of cardstock from my previous cuts to die cut leaves and flowers. The great thing about using my scraps is that the paper I used not only coordinates with each other but they also are double-sided. All I did was flip my paper over to give the appearance of different paper, without waste.


After die cutting my leaves and flowers I inked all the die-cuts with more Jumbo Java.


I stacked my flowers biggest to smallest. Then fastened them together with an eyelet.


I folded each flower petal in half and toward the center to make it more dimensional.

Using my Mega Runner, I matted my embossed cardstock onto the 4"x4-1/8" piece. Then attached that piece to the tag base.

I used a glue pen to attach my die-cut leaves.

Then, used glossy accents to attach my flower.


Next, I die cut just the word "DREAM" from the Teresa Collins Frame Die (Noteworthy Set) and trimmed off the ends of the word. 

Then, adhered it to the tag in an arch.

Finally, I punched a whole in the tag, tied hemp twine into a multi-loop bow and fastened it.

And, here is my finished tag...


I hope you enjoyed my project for today!!

Hope to see you next time!
~Mitsy


Wednesday, August 24, 2016

DIY Teacher's Survival Kit Gift

Hello, Craft Friends!! Summer is officially over and the kiddos are back in school!! WOO-HOO!! I'm one HAPPY mama!! Hey, my kids are more than a handful and I know how much work goes into just corralling my little tikes, let alone 20 or so more of them!! YIKES!!

 And to show my appreciation to the brave men and  women that brave it out and watch over my babies, I have made these Teacher's Survival Kits. Each is packed with the necessities to take on a herd of stampeding rugrats.

Supplies Used
Plastic Bucket or Container
Chalkboard Paper- DIY Project Stack Chalk Party (DCWV Inc.)
Mega Runner (Xyron)
Die-namics Blueprints 29(My Favorite Things)
Paper Flowers & Leaves
Hemp Twine
Hot Glue Gun & Glue Sticks
Paper Shreds
Scissors
Chalk
Travel Sized Toiletries/ Mini Nick-Knacks/ Treats (For Kit Contents)

Kit Contents
Antibacterial Hand Gel
Antibacterial Wipes
Antacid
Advil/ Ibuprofen
Band-aids
Cough Drops
Hand Lotion
Kleenex
Lip balm
Mints 
Post-It Notes
Pen
Bar of Chocolate

For my project I used this paper stack by DCWV. It has a unique texture on it that makes it able to draw and write on it's surface with chalk. It kind of looks like plastic but it cuts like paper. Either way it's awesome!!


 These are papers are double sided and include a combination of solid colors and patterned papers.


I used this chevron patterned paper to die cut a frame. I didn't have a frame die so I created a frame by die cutting a rectangle then die cutting again with a smaller rectangle, using blue painter's tape to hold it in place. Then removed the center cut-out(s).


Then used my Mega Runner to add adhesive to my frame. The 1/4" cartridge makes it a cinch to get around those narrow edges. I then attached it to piece of plain black chalkboard paper. 

Then used a scissor to cut out the framed chalkboard piece.

Once complete cut out, I ran it through my Xyron Creative Station Lite.

Because this paper has a plastic-like coating, I made sure to burnish with a bone folder. I just flipped over (protective plastic sheet up) and rubbed firmly.

I filled with paper shreds/ fillers. Then stacked my Kit Contents into my container. I stacked the taller items in the back and tiered down to the smaller item up front.

I detached the handle and wound hemp twine around it. This created a nice "grip" and made it easier too attach flowers to it.

I used hot glue to attach flowers to the handle as well as around my chalkboard label.


The best part... the surface works just like real chalkboard! If you make a mistake or want to change your sentiment or greeting, just grab a baby wipe and start over! How awesome is that??!!

And, with this paper paired with my fabulous Xyron Creative Station, I can create a chalkboard surface on almost ANYTHING!

So, after my child's awesome educator has finished his/her haul, they will still be able to reuse their container... over and over again!

Hope you enjoyed today's project!
Until next time...
HAPPY CRAFTING!!
~Mitsy

Sunday, August 21, 2016

DCWV Monthly Stack-a-holic Challenge


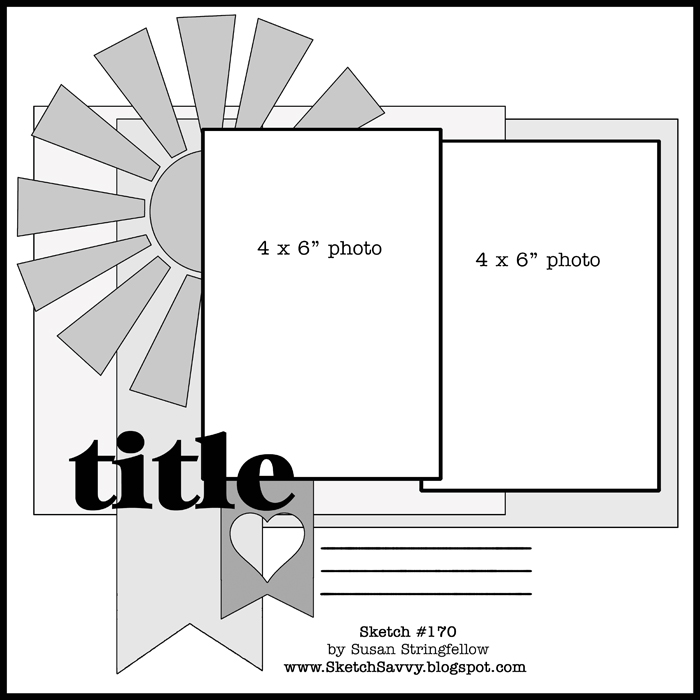
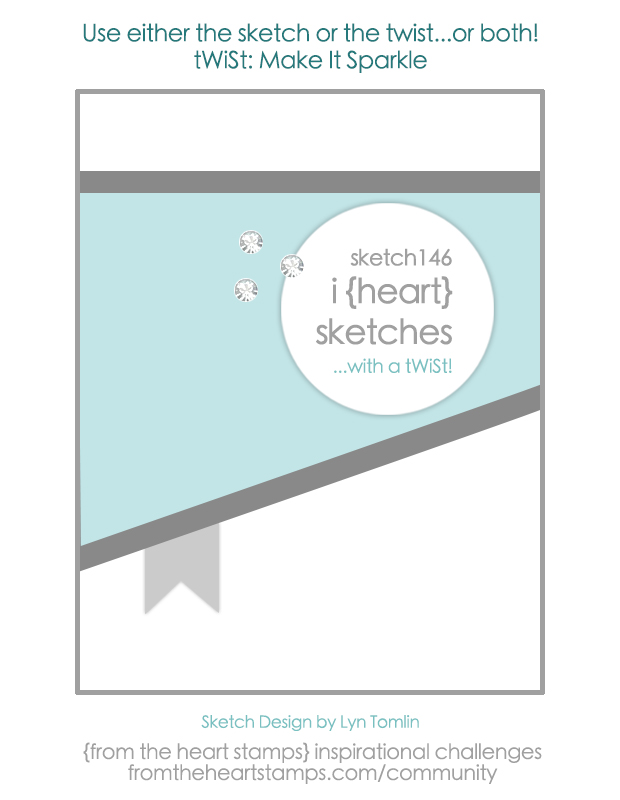
Hello again, Crafty Friends!! Have you all entered the DCWV Stack-a-holic Challenge yet?? Well, great news if you haven't, you still have lots of time to get crafting!! 

Just check out this month's awesome sketches...


Today, I'm sharing with you my take on this month's card sketch ...


with beautiful papers from the Ocean Breeze Stack.

Supplies Used
Ocean Breeze Stack (DCWV)
Mega Runner (Xyron)
Die-namics Blueprints 18 (My Favorite Things)
Big Shot (Sizzix)
Pearlescent Orchid (Tsukineko/ Imagine Crafts)
Finger Dauber (Tsukineko/ Imagine Crafts)
3D Dots (EK Success)
Scissors (EK Success)
Paper Trimmer (Martha Stewart Crafts)

First, I made a A2 sized (vertical flap) card base.
I cut a piece of cardstock to 4.25" x 11".
With a bone folder, scored at 5.5" and folded at 5.5".
Making it a 4.25"x 5.5" card with a vertical flap.

I die cut this pretty flower paper using a die from MFT's Blueprints 18 set. It was the perfect match for this month sketch!

Then, I matted the die-cut onto this bold blue and white paper... love the bold pattern in white!! I used my Xyron Mega Runner to attach and layer my die-cut to the paper. And then used my paper trimmer to create a 1/4" border all around the die-cut.

I found this beautiful sentiment also included in the stack. I fussy cut the oval and inked around the edges with a shimmery ink and finger dauber.

Then used the leftover paper from my die-cut and hand cut a few little flowers. I mounted them on foam adhesive and adhered them onto the flowers around the oval cutout. Then used my Wink of Srella pen to add a glitter over the mounted flowers.

Then I used my Mega Runner to assemble all my layers onto my card base and added more foam adhesive under my oval cut-out and mounted it onto my card.

Lastly, I hand cut a couple of fishtail flags from more leftover paper and tucked and adhered them under the diagonal layer.

And here is my fished card...


I hope you enjoyed today's tutorial and are inspired to join in on this month's Stack-a-holic Challenge!!

If you would like to learn more details about our challenges, please go here.

Good Luck & Happy Crafting!!
~ DT Mitsy

Wednesday, August 17, 2016

HUGS!!

Hey there, Crafty Friends!!
Today, I'll be sharing with you this unique card I made showcasing products from Xyron and Imagine Crafts. And, today I will show you how to do a shimmer resist technique on plain white cardstock. 


Supplies Used
Ink Sweeper (Imagine Crafts)
Brilliance - Twilight (Imagine Crafts)
Glaz On (Imagine Crafts)
Mega Runner (Xyron)
Kraft Cardstock, Black Cardstock (DCWV)
White Cardstock (Crafter's Companion)
Die'sires- Shining Star (Crafter's Companion)
Hugs Dies (Pink and Main)
Glue pen
Ribbon
Button

I started off by cutting the white cardstock into 4.25"x 5.25". Then die cut it with the Shining Star die. Then ran it back through to emboss. Just a heads up, this die does not have a outer cutting edge... and that was the reasoning behind pre-cutting.

I love all the raised details but I want to ink my cardstock.  So, to keep all that lovely detail I am going to add a resist to the raised areas.

I place the die-cut back into the die. Then I spray Goosebumps Shimmer Texture Spray onto an Ink Sweeper and dab and rub the same way I would onto my die as if it were an ink dauber (using my die  as a stencil).**

**Clean die and sweeper immediately after this step! This is a texture spray and dries fairly quickly. You do not want these to dry onto your tools.


Once the the goosebumps has dried, use a clean Ink Sweeper an apply the Brilliance Twilight ink, one color at a time, overlapping and blending between each color.

As you can see, all the raised images have resisted the ink.

I also die cut two more of these"card fronts" from Kraft paper. Then ran them all through my Xyron Creative Station Lite and adhered them on top of each other, placing the inked one on top. I then attache this piece to an 4.25"x 5.25" (Folded) card made from more Kraft cardstock.


I also die-cut the word "hugs" from black cardstock 5 times. I used a glue pen and layered the directly onto each other. Then adhered the stack onto the card front.


And for a bit more shine and even more dimension, and coated the HUGS with Glaz On. This gave my hug a really glossy finish.


Once the glaze dried, I outlined the edge of the card as well the cut-out areas. This really made the die-cut pop!!


Finally, I attached a bow made from ribbon with a cute star shaped button. I also matted the inside of my card with plain white cardstock using my Xyron Mega Runner. This gave me a place to write on the inside and added some stability to my card.

And here is my finished card...


I hope you enjoyed my project for today!!
Don't forget to stop by the Xyron and Imagine Crafts Facebook page to see even more awesome projects!!

Until next time...
HAPPY CRAFTING!!
~Mitsy