Sunday, September 25, 2016

Halloween Lantern Treat Boxes


Hi, Crafty Friends!! 
Halloween is drawing closer!! And I'm here with team DCWV with these super cute and easy to assemble lantern treat boxes!!

OK, OK... I'll admit they were not originally treat boxes! They are actually mini luminaries from
DCWV's DIY Project Stack Luminaries!! But I just love it when we can find multiple purposes for the same products don't you?!!

And this stack is just that!!


They are amazingly simple to put together too!! All sheets included in these DCWV stack come pre-perforated and scored. So, all you need to do is punch them out!! No measuring or scoring!! WooHoo!! What a great time saver!

  • Windows and holes are still intact to keep the integrity of the shapes. So punch those out. 
  • Then fold along the crease marks.
  •  For the the peak of the lantern fold inward. (Think reverse milk carton spout). 

  • Add clear glue along the side flaps and adhere to opposite edge to create a corner. 
  • Hold in place till the glue sets... or clip in place to save on time.
  • Once glue is set, string bakers twine through holes on top lanterns. Pull close and gather. Then tie a simple bow.
  • Leave bottom open to insert treats.

  • Use a tag punch to cut out mini tags from Chalkboard paper.
  • Write your message with a white opaque marker or pen.


You can fill these boxes with whatever treat you like, but I've found that these boxes fit bagged Oreos perfectly!! The shorter lanterns can fit 4, and the taller ones, fit 6!
I like tying my cellophane bags closed with fishing line so the strings remain unseen.

And here is the finished lantern treat boxes!!


As you can see, these little luminaries are perfect to house sweet treats for sweet friends...

Or use traditionally! Either way, it makes for a very inviting display!!

Supplies Used 
DIY Stack Luminaries (DCWV Inc.)
Chalkboard Stack (DCWV Inc.)
Tag Punch (Fiskars)
Halloween Fright- Twine (Blue Moon Beads)
White Opaque Marker (Recollections)
Glossy Accents (Ranger)
Orange Buttons
Oreos
Cellophane Bags
Fishing Line

I hope you enjoyed to today's project!!
Until next time...
HAPPY CRAFTING, FRIENDS!!

~Mitsy


Wednesday, September 21, 2016

Creepy Crawly Cupcakes


Hey there, Crafty Friends!! Halloween is creeping around the bend!! What kind of spooktacular plans do you have?? Me... I plan to have a little get together and serve a few of the creepy crawlies!  And decorating them is a cinch!! With these frightfully intoxicating cupcake wrappers from Lia Griffith and DCWV!!

You can find Lia Griffith's Cupcake Spider sets in Joann Stores or online HERE.

And the awesome thing about these sheets are that these come already perforated! There are 20 sheets, they all include 1 wrapper and 1 large and 2 small spiders each!!

You just punch them out and assemble!! I found it easiest and less time consuming, punching out 3-4 sheets out at a time. Just stack them onto one another a punch them out together!

The sheet included are gorgeous shimmery paper. They come white with almost a metallic iridescence to them. And are labeled food safe.

They do, however, take color like a dream! If you are going to color them to match a certain color scheme, use inks that are certified non-toxic. I only colored one side of my wrappers to be on the safe side. I used an ebrush airbrush with markers to lightly spray some color and customize my wrappers. 

Then glued the ends of the wrapper together.

I used mini clothes pins to hold them together till the glue dried (just a couple of minutes). I was doing several at one time so these little clip freed up my hands from having to hold it close while the glue set.

Once the glue dried, I inserted my cupcakes (that I made previously) into each wrapper. 
I bent the little legs on the  "Daddy Long Legs" and perched these creepy crawlies on top of each fluffy top of icing!


And here they are... 
My SCARY SWEET treats!!

These were remarkably easy to make! And if you skip coloring them all together assembly will come together in mere minutes (excluding drying time).

I hope you enjoyed this super quick how-to!!

See you all next time!!

~Mitsy


Friday, September 16, 2016

Halloween Planner Clips

Hello again, Crafty Friends!!!
I have another Pink and Main project for ya, and just in time for Halloween too!

These are so super simple to do...

I started by stamping  these adorable jack-o-lantern and bat cupcakes, from the Sweet Halloween set, onto white cardstock using Momento Tuxedo Black ink.


Then colored them in with Spectrum Noir alcohol markers and color pencils.

I used... 
LG3 & CG4 for the greens.
HB2 & HB3 for the purples.
And GB4 & OR1 for oranges.

Then dusted the cheeks with hot pink chalk, added freckles and highlights with a white gel pen, and added eylashes using an XS PITT Artist Pen.

I used the matching Sweet Halloween Dies to cut them out perfectly.

Then, ran the cut-outs through my Xyron Creative Station Lite loaded with double laminate cartridge.

Next, I trimmed off the excess laminate from around the cut-outs.

Using a hi-temp hot glue gun, I attached paper clips to the backsides of the images. Then cut-out pieces of felt to conceal the clips.

Then attached tiny coordinating bakers twine bows onto each clip.

And here are my finished Halloween planner clips!!

These turned out so stinking cute!! And, I can't wait to stick them onto planner pages!!
I hope you enjoyed my project for today!
Until next time... HAPPY STAMPING!!
~ Mitsy

Supplies Used
Sweet Halloween (Pink and Main)
Sweet Halloween Dies (Pink and Main) 
White Cardstock
Spectrum Noir Markers and Color Pencils
White Gel Pen (Sakura)
XS PITT Artist Pen (Faber-Castell)
Paper Clips
Hot Glue Gun
Bakers Twine
Felt


Wednesday, September 14, 2016

Thank You!

Hello again, my crafty friends!! I have an amazing card project for you all today featuring gorgeous stencils and color from our Xyron partner, Clearsnap.

Supplies Used 
Mega Runner (Xyron)
Cream Cardstock- Black, White, Cream Stack (DCWV Inc.)
Natural Corrugate (DCWV Inc.)
Patterned Paper- Maps, Textiles, & Ledgers Stack (DCWV Inc.)
Assorted Flowers, Stems, & Leaves (Prima, Petaloo)
Wooden Frame Ornament (Celebrate It)
Metal Sticker Embellishment (Momenta)
Crinkled Ribbon
Glossy Accents (Ranger)
Distressing Tool
Paper Trimmer

Today, I will show you how you too can make this gorgeous card!!

 I started by cutting a piece of cream colored cardstock to 4.25"x 5.5".
Then, placed it under the Cobblestone Art Screen.

Using a pouncing motion, I lightly applied the ink onto my cardstock. I stenciled the entire A2 (5.5"x 4.25") sized card front. The pouncing motion helps avoid harsh lines.

I cut a piece of patterned paper to 3.25" x 4.5". I also cut corrugated paper 3.5"x 4.75" to mat my patterned paper.

Then distressed and inked the edges using Peony and Eggplant Pigment inks.

Once dried, I ran both pieces through the Xyron Creative Station and set them aside.

Meanwhile, I took a wooden ornament and spritzed it down with Pinkolicious Spritzer spray. This color is usually a vibrant pink. But because I didn't prime my surface and left it it's natural wood color, it turn the pink into a deep magenta, almost maroon. GORGEOUS!!

I gave it a few spritzes and zapped it with my heat tool to speed up drying time.

With all my pieces prepped, I assembled my card. 

I made an A2 card by first cutting a piece of cardstock to 4.25"x 11". Then I folded it in half so to measure a  4.25"x 5.5" card. Then attached my matted card front (aka, patterned paper and corrugated mat).

Then with some liquid adhesive I attached and centered my wooden frame.
With more adhesive I attached the beaded stem.
Then attached the crinkled ribbon bow.
Then attached my flowers and metal embellishment and set aside to dry.


And here is my finished card...


 I have fallen in love with this card. The deep pinks and purple are so charming together... especially paired wit the mossy greens!! 
**SWOON**

I hope you enjoyed this project as much as I did!!

Until next time...

HAPPY CRAFTING!!
~ Mitsy


Monday, September 12, 2016

Good Morning Gorgeous!!

Hello,Crafty Friends!! 
Sometimes, after a good night of sleep, I wake up feeling refreshed!! Whenever I feel this good I just want to spread that energy and sunshine with everyone!! I made this card just for that very reason!! I'm one of those people who love doing for others and especially when they least expect it! So why not make cards just because?? Right?!

I used Pink and Main's NEW Wild About You stamp set for the stylish boho fox.

I stamped my image with Momento Tuxedo Black Ink onto Neenah Solar White Cardstock. Then colored with Spectrum Noir Color Pencils and blended with blending stumps and odorless mineral spirits.

Then cut this cutie out using the matching Wild About You Dies.


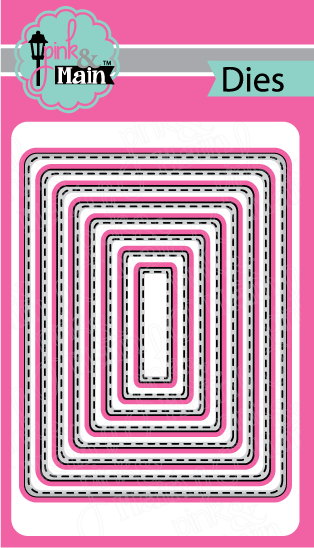
I used the Stitched Rounded Rectangles Dies to cut out rectangles from DCWV's Boho Style Stack.


 Stamped my sentiment from the Believe Script stamp set, in more Tuxedo Black ink onto the smaller rectangle. Then attached my mats onto my card front using my Xyron Mega Runner.


Finally, I used clear adhesive to attach a hemp twine bow and mulberry flowers. I used enamel dots, flatback pearls, and seed beads as different flower centers.


Supplies Used
 Wild About You (Pink and Main)
Wild About You Dies (Pink and Main)
Believe Script (Pink and Main)
Stitched Rounded Rectangles Dies (Pink and Main)
Big Shot (Sizzix)
Boho Style Stack (DCWV Inc.)
Mega Runner (Xyron)
Color Pencils(Spectrum Noir)
Odorless Mineral Spirits
Flowers (Prima Marketing)
3D Dots (EK Success)
Glossy Accents (Ranger)
Hemp Twine
Enamel Dots
Flatback Pearls
Seed Beads
Button

Hope you enjoy my quick card for today!
Have a super stampy day!!

~Mitsy


Thursday, September 8, 2016

Pocket Art Journal

Hello, Crafty Friends...

I am so excited that you have visited today!! I, as well as my teamies at Xyron, are continuing this week with more awesome projects featuring Maya Road and Xyron products! 
And, the amazing people at Maya Road are having a HUGE GIVEAWAY going on over on their blog too!

They are choosing One Lucky person to win all this... 
an entire Follow Your Bliss Kit!!

For more details on how to enter this GIVEAWAY, click HERE!!


Now, for today's project...
I got the pleasure of indulging in a few yummies from Maya Road to create this
POCKET ART JOURNAL

Featured Products
Geometric Heart DieTulle Mini Blooms - Ballet Pink
Geometric Heart Die (Maya Road)         Tulle Mini Booms - Ballet Pink (Maya Road)
Medium Vintage Paper Flowers - Pink
Creative Station Lite (Xyron)                1.5" Sticker Maker (Xyron)

Other Supplies Used
Big Shot (Sizzix)
Eileen Hull Passport Book (Sizzix)
Black Chipboard (Grafix)
The Coral Couture Stack (DCWV Inc.)
Natural Cork Stack (DCWV Inc.)
150 lb. Illustration Paper (Canson)
Glossy Accents (Ranger)
VersaMagic Jumbo Java (Tsukineko/ Imagine Crafts)
Sweeper (Tsukineko/ Imagine Crafts)
Cutterbee Non-Stick Scissors (EK Success)
Sanding block
Hemp Twine
Embroidery Needle
Cheese Cloth 


I started by cutting my 12"x12" sheet of black cardstock in half to measure 6"x12". Because my die to make the album is 13" long my cardstock will not be long enough to cover the whole die. So, I just cover the outlines for the Album Cover and Book Spine. Then run it through my die-cut machine.

I do the while cutting my Book Pages using illustration paper. Covered just the double page outline and run though my die-cut machine again. This is a heavy duty die so I was able to cut multiple layers at a time*. I am able to cut through 2-3 layers of  this 150 lb. paper with ease.

* Just a side note: Do not cut too many at a time. Added pressure may cut through your crease lines. It's always best to test your dies to see what is the best amount for the type of materials you are cutting.

Before I started assembling my book I covered it with pretty paper. I ran my chipboard pieces through my Xyron Creative Staion (faced down). You can tell which side is up by the roundness of the cut edge. The edge of the back side will be more jagged.

Once my pieces were ran through my adhesive, I gave the them a quick rub down to make sure the adhesive was secured and then removed the protective film.

At this point, I examined my paper to see what particular part of the patterned paper I wanted to show up on my panel. Then I attached the pieces ,adhesive side down, to the back of my patterned paper. Then trimmed around each piece using a scissor.

After trimming them, I took a little sanding block and sanded down the edges. Then I used a liquid adhesive to assemble  cover pieces to the spine. I added more patterned paper to cover the spine. Then, distressed the edges of my pieces with brown chalk ink and sponged inking tool.

Then, I hand stitched each page insert into the album using an embossing needle and hemp twine.
I did this in three separate segments. Each segment consisted of  4 double pages (8 pages); for a total of 24 pages.

Each segment was tied off. Then all the loose twine was gathered and tied together to make one knot.

 To decorate the front of my Art Journal, I used the Maya Road Geometric to create a heart out of cork. 

First, I ran a 4"x 4" sheet of cork through my Creative Station Lite. This is the easiest way to add adhesive to your die-cuts. And these dies cut like butter!! It not only cut through the cork but also the protective adhesive backer as well. 

Each cut popped out clean and crisp with pretty much no effort. It practically fell out of my die during removal. 

For  more embellishments, I cut out tiny images from coordinating paper in the same paper stack I used to decorate the covers. Then ran them through my Xyron X Sticker Maker.

I used more liquid adhesive to attach my Maya Road Vintage Paper Flower and Tulle Blooms to the front and tiny piece of cheese cloth; peeled and adhered my Geometric heart; then attached my flag embellishment and butterflies.

And here is my finished project...

Now I have a cute little art journal I can take with me on the go!!

 This journal is so very "SWEET"!! I love making pretty things!

Lots of thick paper to draw, doodle, or even paint on. 


Hope you enjoyed my project for today!!

Don't forget to check out the rest of my DT Sisters on  the Facebook Xyron Page for more Xyron/Maya Road projects....

And just a reminder... Head on over to the Maya Road Blog to see all  the MR Design Team projects AND to enter in their fabulous GIVEAWAY!!

Hope you all have a wonderfully crafty day!!
~Mitsy