Showing posts with label Lori Whitlock. Show all posts

Wednesday, February 26, 2020

St Patrick's Day Foiled Wooden Sign with the Xyron Glaminator

Hey, Crafty Friends!
I'm back again with Team Xyron today!
St. Patrick's Day is approaching and I have an easy home decor for you that will also make a great gift. 

In many ways, friends make our world a better place. And when you find a good or even great friend, you are very blessed beyond measure. Here's a simple gift idea to show them how much you appreciate them.


Supplies Used
Glaminator (Xyron)
Honey Dear Stack (DCWV)
Mix the Media  8x10 Wood Panel (Jillibean Soup)

Other Supplies Needed
St. Patrick Dingbats Font- Digital File (Lori Whitlock)
Ecal Software(Craft Edge)
PC or Laptop
Laser Printer


Before I could put my sign together I had to print out what I wanted to be foiled. I found a Lori Whitlock FONT FILE called St. Patrick Dingbats Font that contained dingbats in the form of adorable little images and word art that you can use instead of letters that I wanted to use. The problem is I don't have Microsoft Word downloaded onto my computer. But what a lot of people don't know is that, if you have a digital cutting software, you can use it to open those special characters.

Here is how I used my ECal software to do that...

Open the ECal software. Click on the LIBRARY button on the upper screen toolbar shaped like a STAR.


The library window will pop open. Click on the FONT tab. Scroll till you get to your desired font, in this case, LW StPatrickDingbats.

For this particular WordArt that says " A good friend is like a four leaf clover... ", I clicked on the very first option box. It will insert it onto your virtual mat.


I resized it by clicking on the 4-headed arrow in the right-hand toolbar section, pulling up the POSITION & SIZE window. Then adjusted the sized to 5.25" wide and made sure the KEEP PROPORTIONS box is checked.

After I sized it as desired, I clicked on FILE then EXPORT and saved it as a PNG.


Now you can INSERT your word art as an image into a blank document file without losing any resolution or distorting it.


Once you sized it appropriately, click PRINT. Make sure your the SAVER TONER checkbox or option on your LASER PRINTER is set to OFF. You need the toner to activate in the Glaminator to activate and grab the foil.


I used the crosshatch patterned paper from DCWV's Honey Dear Stack, it reminded me of burlap, and laser printed my design onto it.

I inserted the paper, pattern side up, into a Glaminator carrier sheet (included with the machine and works like a folder) and covered the entire word art design with Light Green foil (pretty/ shiny side up). 


Then, turn the Glaminator switch on, pushing the lever all the way to the STAR, and wait for the indicator light to turn green.

The green light lets you know that the machine is at the proper temperature for FOILING.

Insert your you carrier sheet loaded with your materials. Once you feel the folder start to pull, let go and let the Glaminator do the rest.

Once your material is cooled, remove it from the carrier sheet and run the materials through the Xyron Creative Station.

Attach foiled sheet onto the wooden sign and trim off any excess overhang. 


At this point, you can also take a nail buffing block or fine-grit sandpaper to the edges and smooth down and distress the edges. This part is totally optional and isn't necessary.

I added a big striped bow to the corner of my sign to give it a bit of farmhouse appeal.

And here is my finished sign...


Look how amazing that shine is!! It is even more vibrant in person!

Your friend will absolutely love this gift! Or... you might love it so much you might make another for yourself!

Hope you all enjoyed today's DIY project!

Thanks so much for stopping in!

Until next time...

HAPPY CRAFTING!!
~Mitsyana


Wednesday, July 17, 2019

Sending You Prayers Card

Hi, Crafty Friends!
I'm back... This time with Team Xyron!!

Every now and then life has a way of reminding you how precious it really is. It's not all about the happy moments and joyous occasions. Sometimes we face hard times and loss.  Financial hardships, break-ups, or even death can bear down on us and plunge us into despair. And sometimes just we need gentle words to tell us we are not alone. Whether spoken out loud in person or silently and privately, a prayer can go a long way.

Today, I'll show you how I created this beautiful card. Some days you just got to let someone know... hey, I'm praying for ya!


Supplies Used
Mega Runner (Xyron)
Eileen Hull Flower & Leaf Stitchlits (Sizzix)
Eileen Hull ColorBox Blends- Leaf, Frog, Berry, Bay, Beach (Clearsnap)
Sunshine Stamp Set (Pink and Main)
White Cardstock (Recollections)
Cardstock- Pink, Green, Black (DCWV)
Big Shot (Sizzix)

I started with a standard A2 size (4.25"x 5.5"- folded) card base. 
I made the card using papers from the Lori Whitlock "I'd Rather Be Crafting" Collection. 

Measurements
Orange Paper - 4.25"x 5.5"
Geometric Diamond Paper- 4" x 5.25"

I layered at attached them to my card base using my Xyron Mega Runner.


Then, using my Big Shot and Eileen Hull Heart Journaling card die, I die cut yellow striped paper by using the heart insert with the outer rectangle die. Next, I backed the heart cut out with pink polka dot paper by just using the outer rectangle die.

Again, attaching the pieces using my Xyron Mega Runner.


Next, I die cut stemmed leaves from light green paper using the Eileen Hull Flowers & Leaves Journaling Card and the Spring Leaves die.

I  added depth by inking the edges with Leaf, Frog, & Nutmeg Blends inks.

Then added tiny vein details with a fine-tipped pen.


I die cut flowers from using the Flower & Leaf stitchlits.

I misted the flower slightly with water, then crushed the petals upward. 

Once dried, I inked the edges of the flower petals using Berry ink.


While the ink was drying, I die cut the word prayer from white & black cardstock. 

I gave it a variegated look using Bay and Beach ink.

Then paired the die-cut with a "sending you" stamp from Pink & Main's Sunshine stamps set. I stamped the phrase onto plain white cardstock using Coal dye ink. 


I attached my leaves then my flowers onto my card. I wanted it to hang over like a swag over a doorway. I set down and attached the leaves first then added the flowers over the leaves.

Then added my sentiment below my floral arch.

And here is my finished card...


It's not always easy finding the right words...
 But we can hope words of encouragement, faith, and understanding will help lighten a hard load on a heavy heart.

I hope you all enjoyed today's card and I hope you are inspired to send your own paper prayers.

Until next time...
Happy Crafting!
~Mitsyana


Thursday, April 12, 2018

Pineapple Picking (Paper Edition)

Hi, Crafty Friends! I'm baaaaack!! Back again with Team Xyron and lots of crafty fun!!
This week we'll be partnering up with Paper House and sharing with you all cool creations made with their awesome paper collections and Xyron adhesive.

Today, I'm feeling tropical! I took one look at these foiled sheets and just knew exactly what I was going to make!

I've always been an island girl. In fact, I was born on an island then raised on another island. In fact, if it weren't for meeting my husband, I'd probably still be there now. Growing up, when we would have P.E. class, we would do these exercises called "Picking Pineapples". It consisted of us standing with our feet spread apart, then bending over touching the ground 3 times with both hands, once in front, below, and slightly behind you. We called them "Picking Pineapple", the rest of the US probably knows them better as "Cherry Pickers"! LOL

So, after taking a trip down memory lane, I bring you my version of Picking Pineapples- Paper Edition!! No bending or sweating involved!! HAHAHA! Don't tell anyone but I sat on my butt the whole time!

I used papers from Paper House's Sun Drenched Paper Pad to create today's fun project.


Supplies Used
Sun Drenched Paper Pad (Paper House)
Tape Runner (Xyron)
Eclips 2 (Sizzix)
Pineapple Box SVG File (Lori Whitlock)
ColorBox Premium Dye Inkpad- Olive (Clearsnap)

I knew right away that I wanted to use Pineapple Box SVG file I had by Lori Whitlock.

 I loaded it into my software. and it looked like the picture of the left. I wanted at least cut two boxes from one 12"x 12" piece of paper. So, I resized it to 8.5" wide (with the keep proportions box checked). 

 I like to cut each like-colored shapes together. To do this, I right clicked and selected "ungroup". then removed the pineapple crown.

Then, I right clicked, clicked "copy" then clicked "paste". I rotated my second image so that both could fit the cutting mat. 

 I saw yellow and gold patterned paper in the pack and immediately it screamed PINEAPPLES at me!! The color and pattern were absolutely PERFECT!

I inserted it on my cutting mat into my machine and hit "cut".

I folded and creased all the crease lines and used my Xyron Tape Runner on all the tabs to adhere. This little guy packs some serious adhesive punch!!

Each pineapple needs 2 crowns. 1 regular and one mirrored. Just highlight what you want to be mirrored, right click, click "transform", then "flip horizontal (mirror)". Then multiplied as needed.

And as luck would have it, on the very next pages to my yellow and gold paper, this palm tree leaf/frond paper. I took each mirrored frond pair and attached them together with mire tape runner. Making sure to lay one regular cut and one mirrored cut back to back. Again, PERFECT!! Well, sort of. 

First, it needed a tad bit more color. So, I inked it with ColorBox Olive dye ink smoothed and evened out the color using my stylus tool. Now, look how gorgeous these crowns are!! And the fronds pattern gives them the look of textured leaves too!

Each box contains a slit on top. To add the crown to the box simply insert into the slit, fold back the crease line and adhere to the under side of the box lid.

And tah-dah... here are my awesomely funky pineaaple treat boxes...


I filled each of these with yummy chocolated but you can put whatever you like.


And these would totally be a hit at a Luau themed event or party!!!


I hope you enjoyed today's project! Who knows, maybe they will inspire you to do your own paper pineapple pickin'!!
Whoa, that's a mouthful! Hahaha!!

Till next time...
HAPPY CRAFTING, EVERYONE!!
~Mitsyana


Monday, February 12, 2018

Lori Whitlock Creative Team Blog Hop- Valentines Day Treat Boxes


Hello, Crafty Friends!! It's that time again...

Time for another Lori Whitlock Creative Team BLOG HOP!! 
WOOT WOOT!! And we have tons of inspiration for you today! If you are coming from Brigit's Scraps you are in the right place!

As you know, tomorrow is Valentine's Day and We have tons of LOVE to share...
We have amazing line-up filled with tons of inspiration, an awesome freebie, a special coupon code, and a chance to WIN $20  to use in Lori Whitlock's Shop! How cool is that?!!

If you are in need of a great last-minute Valentine's Day Treats ... I have these quick and easy Heart Boxes for you!!


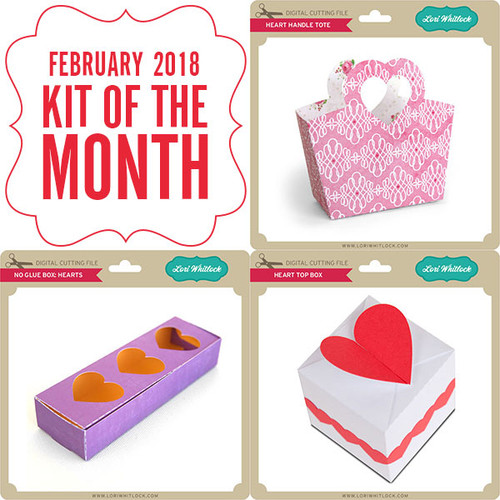
I used Lori's Heart Top Box File from her 2018 February  Kit Of The Month to make all these Valentine Treat Boxes for my hubby's co-workers.  We live in a small town and everyone pretty much know everyone... they know he has a crafty wife that likes to make stuff! LOL

Image 1

This Kit of The Month can be yours for FREE with any $20 purchase during the month of February 2018. Simply add this item to your cart along with your purchase and enter coupon code: FEB18KOTM. This kit will then be FREE at checkout.

Here's more LOVE...
This Happy Valentine's Day SVG Cutting File!


Want more "LOVE"? Well, how about 30% off your purchases from now until the 17th? Just use coupon code FEB2018 during CHECKOUT when shopping at shop.loriwhitlock.com!


And don't forget to enter to WIN a $20 Gift Card to Lori Whitlock's SVG Shop!!


LET"S KEEP THAT LOVE GOING!!
Don't forget to visit my Design Team Sisters for more Lori Whitlock inspiration...

Traci Matthews Penrod
Mitsyana Wright (YOU ARE HERE)

Tuesday, December 12, 2017

Mistletoe Card and Box


Hello, Crafty Friends!! If you just came from  Brigit Mann's Blog, you are in the right place!! Thanks for stopping in and joining me on the December edition of the Lori Whitlock Creative Team Blog Hop!! We have tons of inspiration from Our Creative Team Members, a new FREE FILE, a Special Sale, and of course... an awesome GIVEAWAY!! WOOHOO!!

LET'S GET THIS PARTY STARTED!

Christmas is just around the bend... so, I decided to make this awesomely festive matching Mistletoe Card & Bag set!
For these matching projects, I used

Lori Whitlock Files Used


Other Supplies Used
Lori Whitlock's Be Merry Embossing Folder (Echo Park)
Pattern Paper/ Cardstock  (DCWV)
Creative Station Lite (Xyron)
Distress Oxide Ink- (Ranger)
Jeweled Brads (Michael's)
White Gel Pen (Sakura)

This cad is a standard A2 (4.25" x 5.5 ") size and I sized the mistletoe to 3.75" wide. I made sure to have the "Keep Proportions" box checked so that the height automatically adjusts.


To create this box, I sized it to the widest I could on a single 12-inch piece of paper. 

Then, sized my mistletoe file to 3" wide, again setting it to "Keep Proportions" to automatically adjust the height.


If you loved the files I used today, you can purchase these and other files at an amazing 30% off using code DEC2017 during checkout!! This code is good from now until December 18th.


Don't forget to snatch up the NEW FREEBIE!! This file is completely FREE but only for TODAY!!


Let's not forget about our GIVEAWAY!! 
Enter below for your chance to WIN $20 to use in the Lori Whitlock SVG Shop!!


Don't forget to visit my other Creative Team Sisters!!
If at any time you lose your way, just come back here and check out the entire line-up!

Creative Team Blog Hop Contributors
Mitsyana Wright (YOU ARE HERE)

Next up on our Blog Hop is Michelle Zerull!! 
Hop on over and give her some LOVE!!