
Hey, Crafty Friends!!
I'm back with another gorgeous card I created for the I Am Roses Design Team. This card is packed full of color and I am ecstatic!

A rainbow color scheme that was inspired by the very flowers themselves. Well, actually, these specific flowers...

They instantly made me giddy with joy! I was just blissfully in awe. How did they get so many beautiful colors on such a small surface without turning those petals to mud?
And with the color code name "UNICORN", these babies quickly became my new obsession! I just had to create something with them and I am so glad I did too. Let me show you how I made this dreamy creation...
Supplies Used
UNICORN Colored Sweet Moon Roses (I Am Roses)
UNICORN Small May Roses (I Am Roses)
Mini Round Roses (I Am Roses)
Small Rounded Roses (I Am Roses)
Spring Cottage Flowers (I Am Roses)
Pink Edge on Soft Green Rose Leaves (I Am Roses)
Big Shot (Sizzix)
Standard Magnetic Platform (Sizzix)
Big Shot Glitter Cutting Pads (Sizzix)
Tim Holtz Mixed Media #2 (Sizzix)
Stitched Oval Dies (Pink & Main)
Creative Station (Xyron)
Life Changing Blending Brushes (Picket Fence Studios)
Tim Holtz Life's Possibilities Clear Stamps (Stampers Anonymous)
VersaFine Onyx Black (Tsukineko/ Imagine Crafts)
140 lb White Cardstock (Accent)
Pastels Cardstock Stack (DCWV)
Vellum (Grafix)
MISTI (My Pink Petunia)
If you've been following for a while, you know that I have a love for #10 (I create mine to be 9 1/2" x 4"- slightly smaller than the #10 envelope) cards. I love the tall sleek stature. It's different from that of the A2 (5 1/2" x 4 1/4") sized card that has become the standardized go-to for most crafters.
I made my card base (9 1/2"x 4"- when folded) from lavender cardstock from the DCWV Pastel Cardstock Stack. The white cardstock mat was cut to 9 1/4" x 3 7/8". And the pastel blue cardstock (also from DCWV's Pastel Stack) was cut to 9 1/8" x 3 5/8".
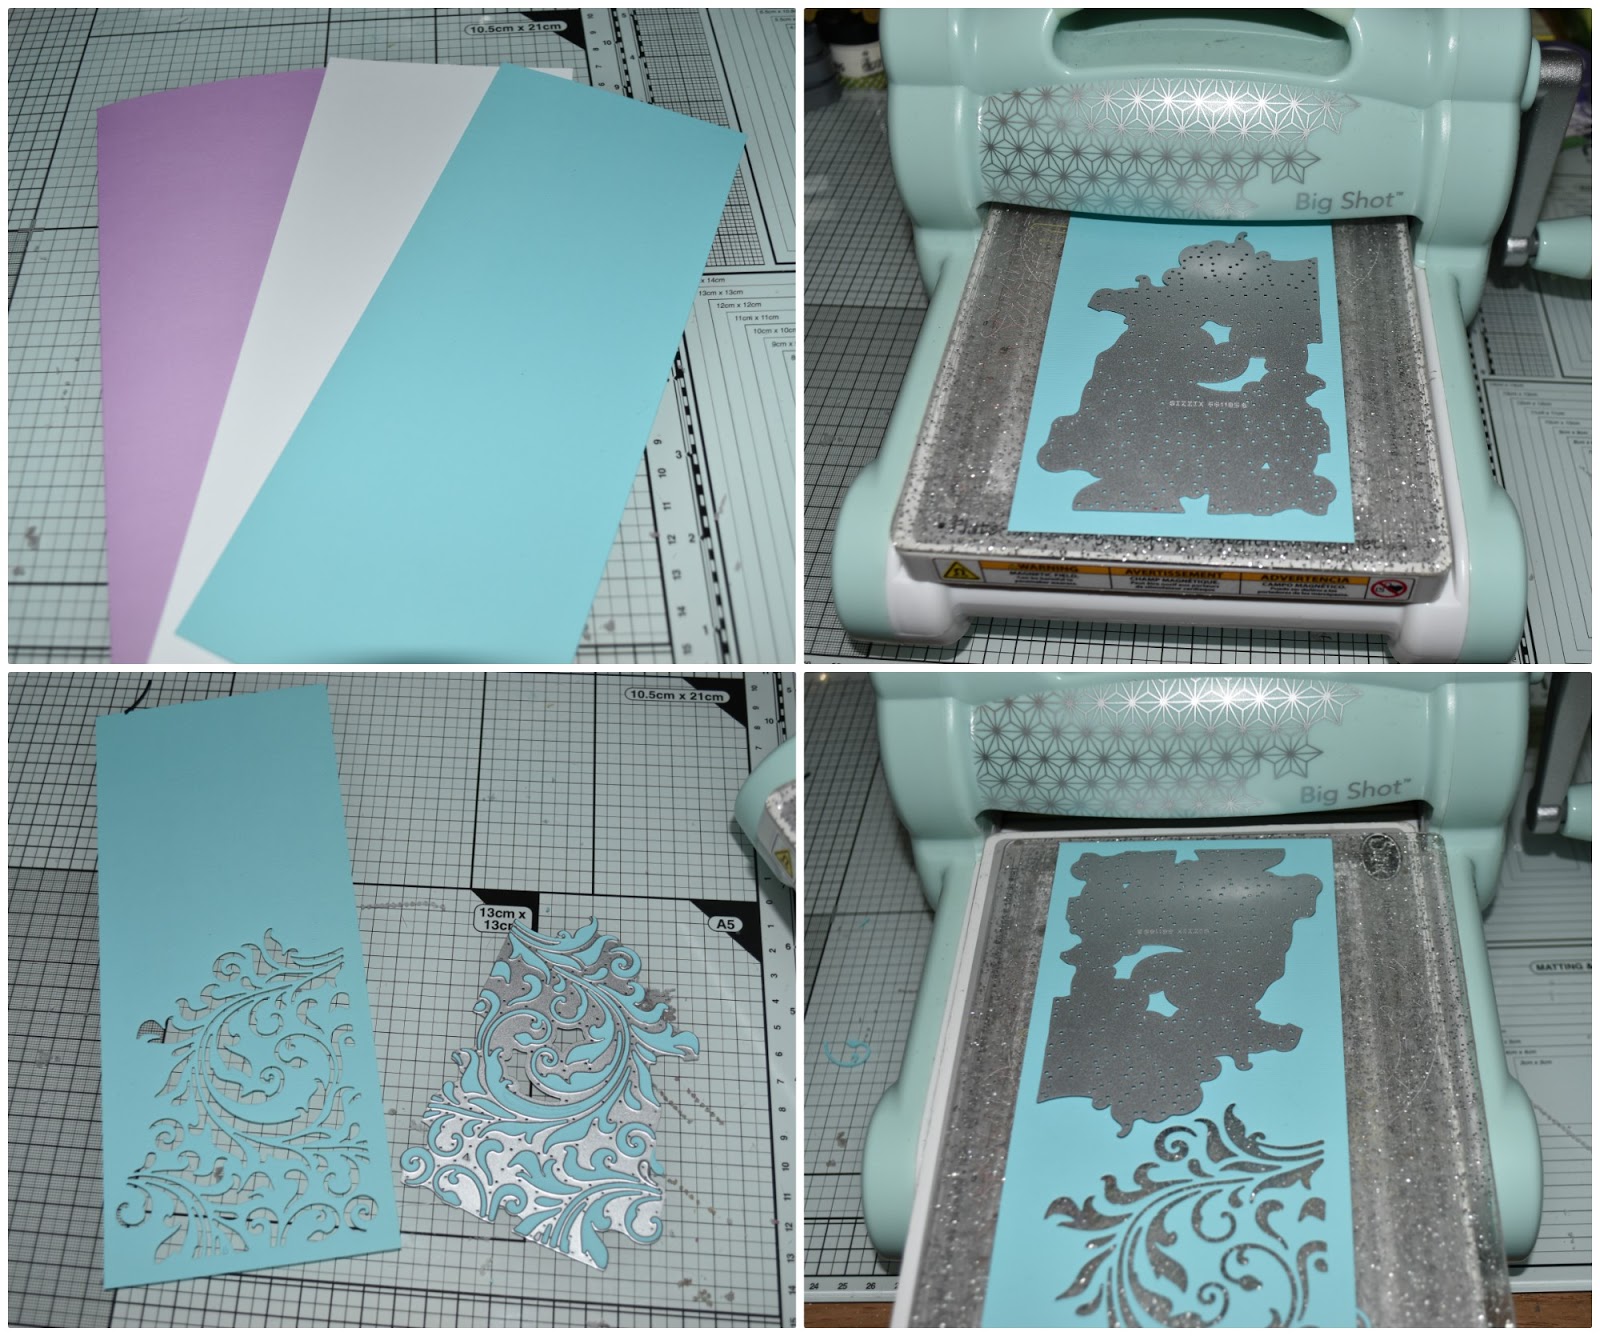
I used the large flourish die from the Tim Holtz Mixed Media #2 set to die an ornate window on one end of the pastel blue cardstock using my Sizzix Big Shot. Then I flipped it to the other end and repeated the process on the other side.

On the panel of white cardstock, using my Picket Fence Studio's Life Changing brushes, I blened on patches of Distress Oxide Inks in Mustard Seed, Carved Pumpkin, Picked Raspberry,
Then, I splattered drops of water using a water brush.

After I put the cut-out panel over my colorful background, I realized that the background was waaaaaay too bright. So I cut a piece of vellum the same size as the cut-out panel an ran it through my Xyron Creative Station and applied it right over top my color background. This instantly toned down the vibrancy.
Then I layered and adhered it to the cut-out over top. and attached it to the card base.

Then I die cut a narrow oval using the Pink & Main's Stitched Oval Dies and stamped it with an inspiring quote stamp from Tim Holtz's Life's possibilities set with VersaFine Onyx Black in my MISTI. Then added foam adhesive tot he back and attached it onto my card front.

I prepped my flowers by wrapping the wired stems of my UNICORN Colored Sweet Moon Roses and UNICORN Small May Roses around a wooden dowel to create spiraled vines.
Then I attached them to my card front, anchoring them to one side but left gaps between each unicorn rose.
I twisted my Rose Leaves stems together and arched and attached them towards the top and bottom of the oval creating a swag. I filled in any tiny gaps with Mini Round Roses, Small Rounded Roses, and Spring Cottage Flowers.

Then finally scattered glittered jewels throughout the card front for a bit of sparkle and shine.
And here is my finished card...


Even with the vellum, the rainbow colors pop!! They are so eye-catching. The positively pierce through those cut-outs!!


I thought this sentiment about DREAMS was absolutely perfect paired with my unicorn flowers and rainbows...

This card turned out more gorgeous than I anticipated. And with such an inspirational quote it is sure to lift spirits of those who wish to push and dream.
I really hope you enjoyed today's tutorial. Thanks so much for stopping by!
Until next time, HAPPY CRAFTING!!
~Mitsyana
No comments:
Post a Comment