Showing posts with label fox. Show all posts

Friday, July 13, 2018

Roller Coaster Card with Xyron & Lawn Fawn

Hello, Crafty Friends!! 
It's FRIDAY-FUNDAY here with Team Xyron and we are winding down our week-long partnership with our awesome friends at Lawn Fawn.


And today's project pretty much summarizes my past couple months of CRAZY! LIFE, what can you do? Am I right?? Well, let me tell you that more times than not life throws you for a loop and slaps you with the unexpected. But if you have a great support system your temporary obstacles become more maneuverable. 

We all could use some sunshine and rainbows on our cloudy days... and sometimes it take a friend holding an umbrella can help us get out of the rain. 

... And that is why I made this today's adorable card

I have a dear friend going through a rough patch. I created this card to remind her that I am always here for her and she doesn't have to go through it alone.


Supplies Used
Coaster Critters (Lawn Fawn)
Rainbow Plaid Paper Pad (Lawn Fawn)
Mega Runner (Xyron)
Big Shot (Sizzix)
Mixed Media Paper (Strathmore)
Chalkboard Cardstock (DCWV)
Black Archival Ink
Clean Color Real Brush Markers (Zig Kuretake)
Procolour Pencils (Derwent)
ColorBox Petal Point- Enchantment (Clearsnap)
White Gel Pen (Sakura)
Craft Foam
MISTI (My Sweet Petunia)
Acrylic Blocks
Paper Trimmer
Makeup Brush

First, I stamped my images from the Coaster Critters onto Strathmore Mixed Media Paper using a black archival ink. Then, I colored my images in with Zig Clean Color Real Brush Markers. To add more detail and depth, I added shadows with Derwent Procolor Pencils.

I used my Sizzix Big Shot with a magnetic platform to die cut the images out using the matching Coaster Critters Die cuts.

I like to spread all my pieces out and play with the arrangement before committing and gluing anything down.


 I knew I wanted a soft background that looked like the evening sky. So, I used a makeup brush to lightly blend the Heliotrope(purple)  onto plain white cardstock.

I applied color heavier at the top and worked my way down and softening the color as I go down,

I trimmed my background piece down to 3 7/8" x 5 1/8".  I trimmed a 1" x 3 7/8" piece of green plaid cardstock. Then I used my Mega Runner to attached it to the bottom for grass.

Then, I adhered that piece onto a 4 1/4" x 5.5" piece of rainbow plaid.

I mounted that card front onto an A2 sized card base made from plain white cardstock.

I love how Lawn Fawn included options to personalize my booth. I chose to stamp the word tickets onto mine. 


I wanted to make all my little pieces pop off the card but couldn't find my foam dots...

No problem!! I had tons of crafts foam laying around. I simply ran a sheet through my Creative Station, flipped it over, and ran through again. And presto, instant handmade foam adhesive sheet!!

I cut the foam sheet into tiny pieces and applied them to the back of all my little images to give them tons of dimension and assembled the pieces onto my card according to how I had laid them out earlier.


My card still needed a sentiment. I used the sentiment that reads " Life is full of ups and downs". I placed the stamp into my stamping tool to stamp my sentiment with clear embossing ink onto black chalkboard cardstock. Then, sprinkled white embossing powder over the top, heat emboss it, then cut it down to about a 3/8" strip.

I added some of my homemade adhesive foam to the back and attached it towards the top of my card.


Then, I stamped "Let's roll with it together" in black ink onto the inside of the card.


And here is my finished card...


I totally love all these little critters!!  I have this little guy manning my booth selling tickets.


And this cutie has her ears and balloon flying backward because the roller coaster is going so fast.


And what carnival is complete without cotton candy?!! YUM!!


As you can see there is just so much you can do with these little cuties... there are so many possibilities!!


I hope you all enjoyed my project for today!!

I can't wait for my friend to see it!! She could use something bright and cheerful! I'm pretty sure this is just enough happy to put a smile on her face.

Thanks for stopping by!

Until next time...
HAPPY CRAFTING!!
~Mitsyana

DISCLAIMERS
This blog is compensated to provide opinion on products, services, websites and various other topics. Even though the owner(s) of this blog receives compensation for our posts or advertisements, I always give my honest opinions, findings, beliefs, or experiences on those topics or products.
The views and opinions expressed on this blog are purely my own. Any product claim, statistic, quote or other representation about a product or service should be verified with each manufacturer, provider, or party in question.

This blog contains affiliate links, clicking and shopping through these links helps to support and run the Up On Tippy Toes blog at no additional cost to you.


Friday, March 31, 2017

Woodland Themed Treat Boxes


Happy Fri-YAY Crafty Peeps!!
I'm back again as Guest Designer for Sizzix today! This time, here at my own blog!
And today's project is sure to give you the "warm fuzzies"... because I made these adorable Woodland Animals Themed Treat Boxes!!

Supplies Used
Sizzix Big Shot
Clear Liquid Adhesive
Blue Painter's Tape

I decided to make the foxes first.  So I started by die cutting the main panels for the box (both the fox and owl use the same box base) and the tail out of patterned paper. You will need two of each. I like to double up my paper before running it through my die cut machine to get both set of cuts at the same time.

Then, I die cut the mask and eyes for the fox. You will need two of these as well, but one of the pieces have to be "mirrored". You can achieved a mirror cut by folding it your paper first and laying your die slightly passed the cutting blade on the nose... Or by die cutting your usually way (blade faced down on the patterned side of the paper) then cut another piece out (blade side down on the white side of the paper). Whichever is easiest for you. 

You will also need to cut 2 each of the eye pieces, a nose (I used the largest circle of the eye for this part) and a tip for the tail. I set this aside to assemble the box.

This part was so super easy! I simply folded on all the crease lines, added strong clear glue to the tabs, and adhered them together. Tab should be joined to a "non-tab" side of the other panel.

Someone once asked me how I ran my smaller pieces through my sticker machines... well, here's my little secret... I attach them face down onto blue painter's tape first!

 I make a tab on one end (so the sticker machine has something to grip onto. A piece of paper will work too) and then pull a whole line of tiny pieces through at one time. Then I burnish the back to make sure I got good adhesion, peel off the protective film, and gently pull the blue tape off. Now I have adhesive backed sticker ready to go!


Because this little dude has side tufts sticking off the side of the box I used more liquid glue to attach these pieces. Then covered up the cut ends with his little nose.

I layered his eye pieces and popped them into the eye holes.

Then attached the mirror pieces of the tail together and layered the matching tips, then glued it to his backside. You don't need to make the tails double sided but it looks more finished from behind if you do.

Now, for the owl!!
The base of the box is the same as the one above. The only difference is their little faces and what's attached to it's back.

To make the OWL you will need... One mask, one beak, two of each eye piece (whites of the eyes and irises) , and four wing (2 mirrored sets).

I start my owls by first attaching the beak with some glue. Then I ran the mask through my sticker maker. I forgot to run the eyes in at the same time so I just used liquid adhesive to pop them in place.

The edges of your masks should line up from tip to tip and side to side perfectly.

Glue the mirroring wing together and attach to the back of the box in a slight angle. I like to use the eyes as a point of reference on where to place the ends of my wings so that they look even.

I love how mixing and matching different patterned papers can get you several different looks. Here several different one that I have made.

And here they are all playing in the woods... just like little woodland animal should!


These favor boxes are absolutely adorable. You can fill them with your favorite treats and set them as party favors or... with Easter coming up they'd make a darling alternative to Easter eggs. How cute would these be hidden along the bunny trail?

I hope you enjoyed these OWLS & FOXES BOXES! LOL
I know I had a fantastic time making them!

Special THANK YOU going out to Sizzix for inviting me to be a Guest Designer this month!!
I had such an AMAZING time!

Monday, April 27, 2015

KaDoodle Bug Designs, Cutie KaToodles, and Virginia Turtle

Hello Crafty Friends!! I made a few card last week for KaDoodle Bug Designs and Virginia Turtle and hadn't had the time to write up individual posts. So instead I'm writing one post for all of them and just going to list the KBD file and Virginia Turtle stamp that were used.


This card was made using the New Cutie KaToodle series that KaDoodle Bug Designs has put out. They are all the rage and become viral in the paper piecing community!!

This is the Cutie KaToodle Unicorn. I just LOVE unicorns!! And I just adore this sweetie!! My favorite out of the batch!


This one is the new Cutie KaToodle Foxy. She is so pretty and I love her sweet little bow!


This one is not a Cutie KaToodle, nor is it new... it is KaDoodle Bug's Salty Dogs file! And I paired it with Virginia Turtle's "Ruff Day" from their "Wild About Puns" set.


This cutie is from KBD's Cutie KaToodle Earth Day editions... Their Flower Skunk! I made the head slightly larger to make him look like a little bobblehead! This little guy went perfectly with Virginia Turtle's "That Stinks" stamp which is lso from their "Wild About Puns" set!


I love these Cutie KaToodles... and if you do too then you'll love this even more... 

                  
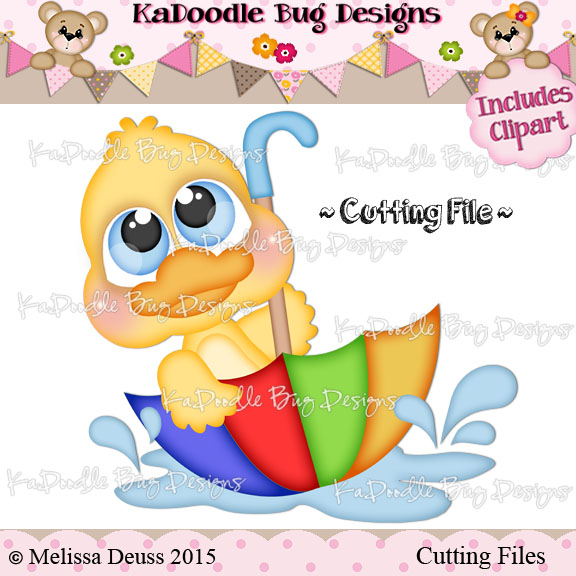
Cutie KaToodles - Rainy Day Duck

this cutie... Cutie KaToodle Rainy Day Ducky is FREE (for a limited time only) on the KBD website!  So scoop him up while you can! He won't be there for long!!

Happy Paper Piecing!!

~ Mitsy


Friday, January 17, 2014

Foxy Card - What's Up?

Hello Again Crafty Friends!! I thought that with the major holiday past us and out of the way everything would turn back to normal... I was wrong... I'm still as busy as ever!! I guess that is to be expected with four children, right? 

I was able to squeeze another card out but this time I opted for an everday card and took a break from Valentine's Day. But don't worry with my oldest in school I have to make more valentine's crafts for my princess to share with her class. As a crafty mom it's my obligation!! At least that's what I tell the hubby to validate my very expensive hobby.

My newest card is called "What's Up?".
And here it is:


All cutting files are from Designs on Cloud 9.
 I used the  Foxy file for the fox &  balloons. 
And, the My Sunshine Title file for the sun & clouds. 

I also used an old Hero Arts stamp from their  Birds and Branches Set. I thought the sentiment fit perfectly with the little foxy floating through the air, clutching a bunch of balloons. Too, too cute!! And super simple!

This makes for a great "just because" card.

I LOVE IT!
I love that it was simple but still soooo cute too!

Oooooohhh, Let's not forget today's FREEBIE FRIDAY!!

Here is DC9's free file of the week:
This one is called Whale You Be Mine.  


Hurry and get it before it's gone!! 

And,
 HAPPY CRAFTING FRIENDS!!!