Showing posts with label Virginia Turtle. Show all posts

Tuesday, September 22, 2015

Hello Sunshine Card & Die-Namites Challenge

Hey Crafty Friends... Today is my first official post as a new member of the Die-Namites Design Team!! Woohoo!! I'm am so excited to get to work with such a talented group of ladies. Today I am sharing my project for September's Photo Inspiration Challenge.

Come on and join in on the fun! Use any die or group of dies from Die~Namites and let it be the STAR of your design. You can use these combined with colors, shapes, patrons, pattern papers, stamps, paints, stencils, etc. The sky's the limit!

Here's September inspirational photo...

Isn't it just gorgeous??

This monthly challenge will run until September 29, 2015 (8:55pm Eastern Time) and there will be a SPOTLIGHT feature of our Top 3 Favorites on October 15. Any style and all levels are welcome! Among the Top 3 favorites, there will be a random draw for a lucky and talented winner who will then receive the top prize. In order to qualify for the top prize, your project has to be NEW, that means not linked back to a previously made project. You are welcome to combine other challenges, but please limit your total number of challenges to no more than 5. 

The randomly selected winner will be awarded a $25 gift voucher to the Die-Namites online store! How AWESOME is that?!! 

Make sure to link up your projects onto the original CHALLENGE post 


 I love all the details in the photo... all the flowers, the arrangement, and all the gorgeous colors. I tried to incorporate all those elements into my card.


I shaded my flowers and leaves by airbrushing them with Sharpie markers. For the White flowers I cut the blooms separately from the flowers, using the Flowers and Leaves die, and layered them onto another flower, then adhered it to a coordinating color patterned cardstock so the would be solid flowers and leaves. I did the same with my purple flower cut from Flower Vase die, this time snipping off just the flower and stem and discarding the vase. 


To finish off my card, I added leaves I cut form Die-Namites' Small Ivy die and arranged them behind all my flowers and added paper stamens, Prima Flowers, rhinestones, and glitter enamel dots.


Card base and band were embossed with folders by Anna Griffin . Scalloped oval and oval punches by Marvy Uchida. and Stamped Sentiment by Virginia Turtle.


Need another reason to purchase the fabulous dies??
How about 15% off your next purchase? That's right, if you use this special coupon: mitsyana15 during checkout you will receive 15% off your entire next purchase online!!


Die-Namites Dies Used

Other Supplies Used
eBrush (Craftwell)
Hello Sunshine (Virginia Turtle)
Sharpie Markers - Orange, Yellow, Lime Green, Moss Green
Scalloped Oval Punch (Marvy Uchida)
Oval Punch (Marvy Uchida)
Embossing Folders (Anna Griffin)
Paper Stamens (Wilton)
Flower Rhinestones
Glittered Enamel Dots- Royalty  (Virginia Turtle)
Paper Flower (Prima Marketing)
3D Dots (EK Success)


I hope you enjoyed this inspirational project and are encouraged to join in with us on our challenge!!

Until next time...
HAPPY CRAFTING FRIENDS!!

~ Mitsy


Monday, July 20, 2015

Encouragement card

Hello Crafty Friends... I have a lovely project for those of you who know someone who could use a few words of encouragement. Sometimes just taking the time out to tell someone that everything will be ok makes a world of a difference. Remind them to stand tall and keep their head up, and that they can make it through anything with the right attitude.

Supplies Used
Teresa Collins Pocket Dies (Doily- Lover's Lane, Leaf- Thankful, Flowers- Girls Best Friend))
Spectrum Noir Markers (FS8, CR3)
Sharpie Markers (lt. green, green, orange)
Leaf die (My Favorite Things- Blueprints 14)
Sheet Music
Cardstock (white, green, aqua)
Patterned Paper (My Minds Eye)
Hot Glue Gun and glue sticks
stamens
Double-sided Adhesive
Ek Success 2 way Glue Pen
8mm and 12mm stylus
First  I ran my Teresa Collins pocket dies through my Cut'n'boss machine. Because it has an extra large platform I can cut several dies at once.

For metal dies I use the following platform combo(from bottom to top):
D Plate
B Plate
A Plate 
Die
Paper
A Plate

To make my card I cut out 1 doily, 4 large flowers, 2 medium flowers, 2 small flowers, and 2 leaves from my Teresa Collins Pocket dies. Pictured is 3 leaves but later I changed my mind and only used 2. I also cut out 7 stemmed leaves with my MFT things die (not shown).

Next I airbrushed the edges of my flowers using my ebrush and Spectrum Noir Markers in FS8 and CR3.

Using a rubber/foam mouse pad and a stylus I added dimension to my flowers by rubbing my stylus in a circular motion around the edges of each petal. For less strain on your hand , try rubbing you paper with waxed paper. This allows the stylus to glide across the paper easier.

I then hot glued each bowl of flowers together, gluing the smaller ones inside the larger ones. I also hot gued some stamens inside the smallest flower.

I then airbrushed my leaves using my ebrush and sharpie markers first in light green, the regulat green, and then lastly orange.

Here is what the leaves looked like after adding each color. First leaf is just the light green. The second leaf is light green with regular green around the edges. And the third is with all three colors.

I then glued my leaves onto some olive green cardstock and cut them out.

For my stemmed leaves I ebrushed them with the same colors as the leaves above except I added brown onto the stems.


I then stamped my sentiment onto my doily using a stamp from Virginia Turtle's beYou stamp set and Versafine Onyx Black inkpad.

Finally I assembled and adhered my pieces onto my card front. I adhered the doily using double-side adhesive. All the rest of my elements were adhered in place with hot glue.

And here is my finished card!

And a close up of my flower...
I hope you enjoyed today's tutorial! 

For more amazing projects please visit my personal blog at:
upontippytoes.com

~ Mitsy


Sunday, July 12, 2015

Sparkle and Shine

Hey Crafty Friends!!

Every now and then I feel the need to GLAM it up!! Something with lots of SPARKLE and SHINE!! 
And everyone know that DIAMONDS are a girl's best friend!!

So today's card pays homage to those things... 

Supplies Used
beYOU Stamp Set (Virginia Turtle)
Hot Glam Girl Sequins (Virginia Turtle)
Cut'n'Boss (Craftwell)
Diamond die from the Teresa Collins Girls Best Friend Collection (Craftwell)
Teresa Collins Love Triangles Embossing Folder (Craftwell)
Patterned Paper (Bella Blvd- Color Chaos Collection)
Black Cardstock 
Metallic Gold Cardstock (Graffix)
Versafine- Onyx Black (Tsukineko)
Diamond Glaze
Foam Adhesive

First, I cut 2 diamonds out metallic cardstock using my Cut'n'boss and Teresa Collins pocket dies.
I used my Diamond Glaze to glue one diamond on top of the other. This makes it an extra thick die cut, similar in thickness to chipboard. 

I also used the diamond glaze to attach my sequins to my cardstock. The patterned paper pictured here is 3 1/8"x 4 3/8".
I cut my foam adhesive down thin enough to hide behind my diamond die cut to really make it look dimensional.
I used The Sparkle and Shine sentiment in my beYOU stamp set to pair with my diamond die cut.

Ran my assembled card front through my Xyron Sticker Maker and adhered it to a 3 3/8"x 4 5/8" piece of black cardstock.

I then cut a3 3/4"x 5 1/8" piece of gold cardstock and embossed it using
my Teresa Collins Love Triangles embossing folders.
I just love the way metallic cardstock looks embossed. You can pretty much embossing any design into metallic cardstock and it will look A-MAZ-ING!!!

Then I ran my gold panel through my Xyron Create-a-Sticker. I adhered it to a 4"x 5 2/8" piece of white cardstock and then on to a standard A2 (4 1/4"x 5 1/2") sized black card base.

And here is my SUPER SHINY & ULTRA GLAM card!!
Hope you enjoyed today's project!!

And, don't forget to experiment with metallic cardstock it makes everything FABULOUS!!

~ Mitsy


Thursday, May 14, 2015

EBrushing Layers

Hello eBrush fans... Today's post I will show you how layering colors can take your airbrushing further and add more depth and dimension to your projects.

For this example I use a beautiful die cut with embossing. These types of dies are very intricate and very beautiful all on it's own. But, I will show you how you take that beauty to a whole new dimension.

Supplies Used
eBrush with Sharpie(SP) Adapter

Sharpie Markers
Anna Griffin 's Flower Vine Die 
Craft cardstock
Patterned cardstock 
( DCWV- Endless Summer stack & Basic Grey- Serenade paper pad)
Virginia Turtle's Tree of Life Stamp set
VersaFine Inkpad in Onyx Black
Organza Ribbon
Rhinestone Button
EK Success  3D Dots (adhesive foam dots)

Here I will show you how to transform your die cuts and make them more realistic just by layering colors .

 You will need to cut out your die with either plain white cardstock or plain craft cardstock. I find that using craft cardstock adds a more earthy appearance to my final result. Where as using white will brighten the results.

When layering my shading I like to use at least 2 tones of each color to add additional depth (ei. light green and green, lavender and purple, light pink and hot pink, orange and brown) having a light and dark version of each color. 

FIRST THE LEAVES
Here I layered my greens and orange and browns for the leaves. Working from lightest to darkest.
1. Ebrushed a layer of  green to all the leaves and stems.
2. Added a layer of dark green to just the stems and the thinner leaves.
3. Lightly ebrushed orange over the light green leaves.
4. Added brown just around the edges and the tips of the leaves.

NEXT ONTO THE FLOWERS

Starting with my purples and ending with my pinks for brightness.

5. Ebrush a even layer of lavender over all the flowers and buds.
6. Adding purple to the centers, edges, and de-bossed areas of the flower only.
7. Add an even layer of light pink over all the flowers.
8. Finish off by adding a layer of hot pink around the edges and de-bossed areas of the flowers.


Here's is the finished flower die cut. What a huge difference from the plain cut out version!!

Then I simply layered my patterned paper creating a card base. Added adhesive foam dots to the backside of the flower die cut and adhered it to my card. I stamped my sentiment from  Virginia Turtle's Tree of Life stamp set and tied a bow with some organza ribbon. Finally I  adding a rhinestone button in the center of the bow for some BLING...

And tah-dah...

Here is my FINISHED card...


Simply GORGEOUS!!

I hope you enjoyed this tutorial on how to layer colors with your eBrush!!

See you all next time!!

~  Mitsy


Wednesday, May 13, 2015

Cutie KaToodles are CUTIE PATOOTIES!!

Hey Crafty Friends... I  have a couple projects for you today!! Sorry, no tutorial today...only a quick run down.

I just wanted to share with you all these darling critters and tell everyone how much I LOOOOOVE KaDoodle Bug Designs' Cutie KaToodles Collection!!! Every single one is SUPER ADORABLE!!! 


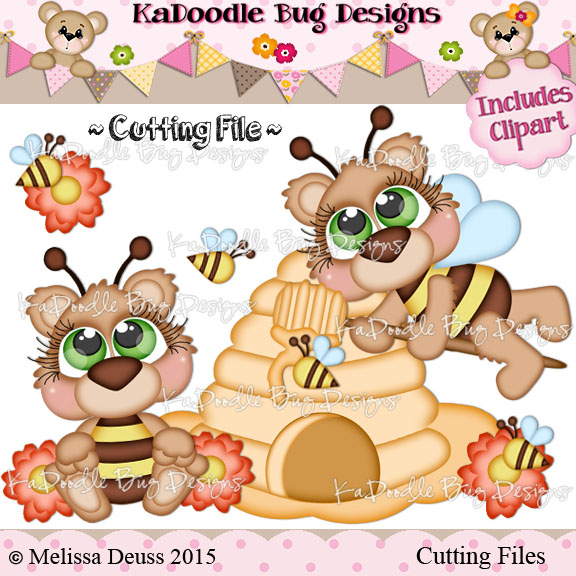
This cute Bee/ Bear is from KaDoodle Bug Designs' Cutie KaToodles Bumble Bears file. 

 Cutie KaToodles - Bumble Bears
It is KBD's first official Cutie KaToodle Set. All the other KaToodles before these were sold as individuals. 

I decided to make this little guy into an easel card... mixing it up from my usual A2 or A7 card.


Sentiment stamp on this card is from Virginia Turtle's "Punny Business" set and this set is HUGE!!! It includes 22 different puns on a 8"x12" sheet!! WOWEE!!! Giganto, I know... but AWESOME!!

Here is a closer view of my little bumble bear...


Additional tools and supplies used
 Wild Flower Border Punch (Martha Stewart)
Stitched Frame die (Sizzix- retired)
GooseBumpz ZigZag Embossing folder (Lifestyle Crafts)
Patterned Paper( Craft Smith- Sweet Soiree Collection)
Cardstock (brown, white, yellow, coral, black, craft)
Chipboard
eBrush
Spectrum Noir Markers ( CG4,FS4, FS3,TN4, GB3, GB4, CR3, FS8)
XS PITT Artist pen (Faber-Castell)
Signature Snow Opaque Marker (Recollections)
 White opaque Pen (Ranger)
 Premiere white color pencil (Prismacolor)
Le PlumeII No.4 Green Marker ( Marvy)
Blender pen (Stampin Up)
VersaFine Onyx Ink Pad (Tsukeniko/ Imagine Crafts)
2-Way Glue Pen (EK Success)
3D Dots (EK Success)
rhinestone flowers


Here is another Cutie KaToodle...
I decide to make this one a regular 6"x6" card.


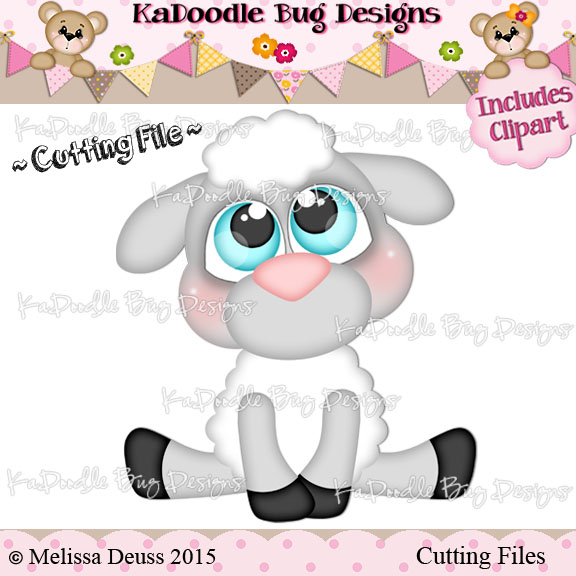
This cutie patootie is the Cutie KaToodles Sheep! Sorry the oversized 3D bow not included... :(
The stamped sentiment on this card was also by Virginia Turtle... from their "Wild About Puns" set! Can you tell I love my puns??!!


Cutie KaToodles - Sheep

AH-STINKIN-DORABLE!!

Here's a side view of this card... can see from this angle how much dimension this card has... I don't know why but I just LOVE 3D cards!! 


And here is a list of additional tools and supplies used for this card...

Teresa Collins Bow Pocket Die from the " Girls Best Friend Collection (Craftwell)
Teresa Collins Framed Ticket Pocket Die from the "Thankful" collection (Craftwell)
Floral Vine Border Punch(Martha Stewart)
Patterned Paper (Craft Smith- Tea Part and Sweet Soiree Collection)
Cardstock (white, black, gray, coral, brown)
eBrush
Sharpie Markers ( gray, blue)
Spectrum Noir Markers ( CR5, CR6, FS4)
VersaFine Onyx Ink Pad (Tsukeniko/ Imagine Crafts)
Signature Snow Opaque Marker (Recollections)
 White opaque Pen (Ranger)
Hot Pink Chalklets chalk (EK Success)
3D Dots ( EK Success)
 2-Way Glue Pen (EK Success)
XS PITT Artist Pen ( Faber-Castell)

Even though I don't go through the whole tutorial break down... I know a lot of people still ask what different tools and supplies I used for each project. I've just been too busy to make tutorial for every single card or project I make....so I try to at least supply everyone with a supply list.

At the very least it can serve as inspiration!! 

Happy Crafting!!
~Mitsy


Thursday, April 9, 2015

Be Joyful...

Just stopping in to share a quick "Inspirational" card! The sentiment is from Virginia Turtle's "Tree of Life" set. Thought the sentiment was beautiful and needed something equally as beautiful to compliment it... cue Anna Griffin... she makes such gorgeous and elegant craft tools and supplies!

Embossing folder is from Anna Griffin's Mix & Match series and is called "Calligraphy Scroll"

I embossed regular white cardstock and ebrushed it with Spectrum Noir Markers in HB1, LV1, PL2. The center rectangle was ebrushed with Spectrum Noir TB1. 


Super Simple but has a huge impact!! Simply gorgeous!!

Additional Supplies Used
Organza Ribbon
Adhesive Pearls ( Hero Arts)
Momento Ink Pad (Tuxedo Black)
Butterfly ribbon (brand unknown)
Double-sided Adhesive
Foam Adhesive

Stay tuned for more "inspirational" projects coming soon!!
Happy Crafting!!

~ Mitsy