Showing posts with label cutnboss. Show all posts

Monday, July 27, 2015

Hello...

Hi Crafty Friends... or should I say "hello"?! 

I've got an awesome card today that says just that! It's part 3 dimensional and part see-through, and all over fun!!


Supplies Used
Cut'n'boss (Craftwell)
Teresa Collins Pocket Dies (Butterfly-Memory Collection, Flower- Thankful Collection)
Teresa Collins Woodgrain Cottage Embossing Folder (Craftwell)
eBrush (Craftwell)
Spectrum Noir FS8
Sharpie Markers- light green, orange, brown
Leaf - Flowers, Branches, & Leaves Sizzlit (Sizzix)
Flower rhinestones (Hero Arts- Sparkle Gems)
Patterned paper (My Minds Eye- Happy Day)
Cardstock- Lt green and Lt brown (Bazzill Basics- Monochromatics Browns and Greens)
Acetate (Graffix)


I started my dimensional journey by embossing a piece of light brown cardstock through my Cut'n'boss machine using my Teresa Collins Woodgrain Cottage embossing folder. Then I cut my embossed cardstock down to a 4"x4" and 1"x4" pieces and set aside.

To emboss I used the following plate combo...

From bottom to top:
D PLATE
A PLATE
EMBOSSING FOLDER WITH PAPER
A PLATE

I then cut my Teresa Collins Pocket dies also using my Cut'n'boss machine.

This time I used the following plate combo to cut my dies:

D PLATE
B PLATE
A PLATE
DIE
PAPER
A PLATE

Did you know the Cut'n'boss also cuts other brand dies?? I used my Cut'n'boss to cut sizzlits using the same combo as the embossing folder combo... but instead of a embossing folder I put the sizzlit die and paper in it's place.

Here is the combo to cut sizzlits:

D PLATE
A PLATE
SIZZLIT
PAPER
A PLATE


With a paper trimmer I cut a  4" x 6" piece of  patterned paper  and a 4" x 12" piece of Acetate. I folded my acetate in half to create a 4" x 6" card base. 

I ran my 1" x 4" embossed panel , one butterfly , and 4" x 6" panel all through my Xyron Creative Station with my 9" refill. I sure can fit lots of material on here at once!! 


I still had a small 4"x4" embossed piece that needed some strong adhesive...

So I took out the 9" cartridge, flip up the green divider, and inserted my 5" Permanent Adhesive Cartridge...

and ran my last panel through... 

Peeled and stick time!! I attached the 1" wide strip along the bottom of my card. Then did the same to my 4" piece. This leaves a 1" gap ad a window between the two pieces.
I wanted my embossing to look a little more rustic so I distressed it with brown chalk in and dauber and I taped off the window with painter's tape to keep it clean.
Then I ebrushed my leaves to add more depth to my leaves. I used my sharpies first in green, then lightly with orange, and along the stems in brown.
Then attached my leaves with Diamond Glaze. I then peeled and attached my butterfly to my card front. I also attached my patterned paper onto the inside of my card.

For my second butterfly, I folded the wings back and added diamond glaze to just the body.

 I attached the two butterflies together just at the bodies and flipped the wings up to make it dimensional.

I shaped my flowers using a stylus and rubbed the backs of my flowers gently in a circular motion. I couldn't find my trusty mouse pad I usually use so I found a quick solution... fun foam!! LOL Worked like a charm!


Glued my flowers down with more Diamond Glaze and added my bling in the center of my flowers. And lasty I ebrushed the bottom of my "hello" using Spectrum Noir in FS8. Then I attached it onto my acetate.


And here is my finished card!!


I hope you enjoyed today's project...

I loved being able to stop and say HELLO but now it's time for me to say GOODBYE...
See you all next time!!

~ Mitsy


Thursday, July 16, 2015

Getting a little more with your stamps


Hey Crafty Friends... We are coming to the end of of our sponsorship with Latina Crafter and the past 2 months were so much fun!! 

Today I wanted to show how you can easily transform this adorable birthday stamp into a so cute and lovable everyday stamp. 

Supplies Used
Ebrush (Craftwell)
Birthday Girl (Latina Crafter)
Spectrum Noir Markers - GB1, TN3, TN4, TN5, TN6, TN9, GB9, FS5, CR5, CR6, DR1, DR5, PP2
Cut'n'Boss (Craftwell)
Teresa Collins Twill Herringbone Embossing Folder (Craftwell)
Blueprints 14 ( My Favorite Things)
Paper Doily (Wilton)
Cardstock- Red, Black, white
Patterned Paper (Bella Blvd.)
150lb Illustration Paper (Canson)
Momento Tuxedo Black Ink Pad (Tsukineko)
Black Sharpie
Paper Roses
Gesso (Liquitex)
White Opaque Marker- Snow (Recollections)
Diamond Glaze (Judikins)


First I started off by stamping my image onto illustration paper with Momento Tuxedo Black ink. I didn't stamp the whole image. I left out part of her balloons and hat. I won't be using those is this project.

Next, I colored her face using Spectrum Noir markers in FS5, and TN3. Then added some pink in her cheeks with PP2. Then I used colors GB1, TN3, TN4, TN5, TN6, TN9, and GB9 to color her hair.
Most times I'm careful in staying inside the lines... this time not too much. I was going to cut out my image anyway so going a little outside the lines really didn't matter. I trimmed away the balloon and her little party hat.. and presto an everyday girl stamp!
I used a drop of Diamond Glaze to adhere a little rhinestone bow. It fills in the space where the birthday hat once sat, turning this birthday stamp into a stamp you can use for any occasion!
I used my Cut'n'boss machine and cut out my card mats using the 2 biggest dies from the my Blueprints 14 set... easy peasy with the cut'n'boss' extra large platform... both dies go trough at the same time! 
Then I ebrushed my edges with my Spectrum Noir Markers. The rounded edged square I ebrushed in PP2 and for the edges of the doily I used DR1 and DR5. Notice I didn't ebrush the whole thing. I left  a blank space because I wasn't going to use the entire doily. I then adhered my doily to my mat and trimmed off the end of the doily that wasn't ebrushed.
Then I quickly ran my panels through Xyron Creative Station for quick end to end adhesive. 
I also ran my smaller pieces through my 3" Xyron Sticker Maker. 
I then embossed my 5"x5" piece of  red cardstock using my Twill Herringbone embossing folder.
And, I ebrushed the edges with a black Sharpie.
I didn't have flowers to match my color scheme so I gessoed the paper roses I did have and ebrushed them with the same pink and red markers that I previously used. 

After adhering my card panels and image in place I glued my roses down with more diamond glaze and added my sentiment.

This sentiment is also included with the Birthday Girl stamp set. I stamped it then cut it out using one of the smaller dies in my Blueprint 14 set.

Here's a close up
Hope you loved the way I used my stamps today and that you won't be afraid of using your stamps a little differently!!

Happy Crafting!!

~Mitsy


Sunday, July 12, 2015

Sparkle and Shine

Hey Crafty Friends!!

Every now and then I feel the need to GLAM it up!! Something with lots of SPARKLE and SHINE!! 
And everyone know that DIAMONDS are a girl's best friend!!

So today's card pays homage to those things... 

Supplies Used
beYOU Stamp Set (Virginia Turtle)
Hot Glam Girl Sequins (Virginia Turtle)
Cut'n'Boss (Craftwell)
Diamond die from the Teresa Collins Girls Best Friend Collection (Craftwell)
Teresa Collins Love Triangles Embossing Folder (Craftwell)
Patterned Paper (Bella Blvd- Color Chaos Collection)
Black Cardstock 
Metallic Gold Cardstock (Graffix)
Versafine- Onyx Black (Tsukineko)
Diamond Glaze
Foam Adhesive

First, I cut 2 diamonds out metallic cardstock using my Cut'n'boss and Teresa Collins pocket dies.
I used my Diamond Glaze to glue one diamond on top of the other. This makes it an extra thick die cut, similar in thickness to chipboard. 

I also used the diamond glaze to attach my sequins to my cardstock. The patterned paper pictured here is 3 1/8"x 4 3/8".
I cut my foam adhesive down thin enough to hide behind my diamond die cut to really make it look dimensional.
I used The Sparkle and Shine sentiment in my beYOU stamp set to pair with my diamond die cut.

Ran my assembled card front through my Xyron Sticker Maker and adhered it to a 3 3/8"x 4 5/8" piece of black cardstock.

I then cut a3 3/4"x 5 1/8" piece of gold cardstock and embossed it using
my Teresa Collins Love Triangles embossing folders.
I just love the way metallic cardstock looks embossed. You can pretty much embossing any design into metallic cardstock and it will look A-MAZ-ING!!!

Then I ran my gold panel through my Xyron Create-a-Sticker. I adhered it to a 4"x 5 2/8" piece of white cardstock and then on to a standard A2 (4 1/4"x 5 1/2") sized black card base.

And here is my SUPER SHINY & ULTRA GLAM card!!
Hope you enjoyed today's project!!

And, don't forget to experiment with metallic cardstock it makes everything FABULOUS!!

~ Mitsy


Saturday, July 11, 2015

Sweet On You- Donut Shaker Card

Hey Crafty Friends... I'm here to share with you all a project I posted a few days ago on Facebook. I had a few requests on when I was going to post the tutorial onto my blog so here it is.

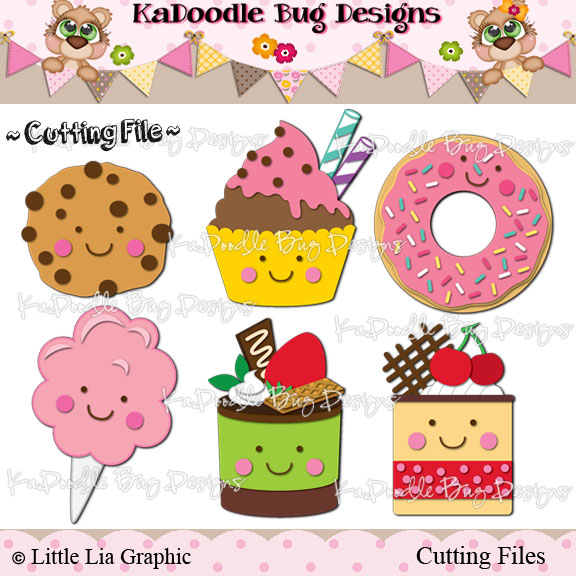
I made this super sweet shaker card using an ADORABLE cut file from KaDoodle Bug Designs called Treatful Cuties. All the treats are just soooooooo stinkin' cute but I ultimately decided on using the donut... because, well, I love donuts!!!

Treatful Cuties - Click Image to Close

Supplies Used
Treatful Cuties Cut File (KaDoodle Bug Designs)
eBrush (Craftwell)
Sweet on You Stamp Set (Pink and Main)
Blueprints 14 (My Favorite Things- Die-Namics)
Spectrum Noir Markers (GB3, PP2, PP4, TN3, IB2)
Cardstock (white, black, yellow, peach, pink)
Assorted patterned paper
EK Success 2way Glue Pen
Double-sided Foam Adhesive or Mounting Tape
Rhinestone bow
Sequins
Star Shaped Glitter
Seed Beads
Acetate 

I resized it in my ecal software and cut it out using my Sizzix Eclips 2. The whole assembled donut is about 3 1/4" big.

There are 3 layers that make up the donut. 2 icing layers and the donut base... oops and over course the sprinkle... but I don't count that as an actual layer. I cut my top icing out of light pink cardstock and ebrushed it with my Spectrum Noir in PP2 and PP4. My second layer of icing I cut out of a sunny yellow cardstock and ebrushed it in GB3... and my base layer I I cut out of a flesh colored cardstock and ebrushed it in TN3. I cut my sprinkles out of plain white cardstock and left them in place stuck on my mat. Then I had colored them in PP2, GB3, IB2, and left a few white.

I then quickly ran my icing layers and donut base through my Xyron 3" Sticker Maker.
Then I stuck my icing onto my donut... It's already looking stinking cute!
I used the cut out of my sprinkles as a map/ template... placed it over my donut for exact placement of my sprinkles. you could this freehand but I liked the how the sprinkles looked when I colored them and wanted them to be laid out the same way. I just rubbed my glue pen into each cut out hole and placed the matching sprinkle into each hole... it was easy to match because when I colored each sprinkle I went outside of the edges overlapping onto the surrounding paper.
Then I used my glue pen to glut on the face and cheeks and my diamond glaze to glue on a rhinestone bow.
I used my My Favorite Things Blueprints 14 for a super quick and easy card front. I love the Blue prints dies... no need for measuring! Just cut out each die in coordinating papers and you have an instant card in no time! And as a bonus these sets have embellishment dies included in each set! If you own several sets you can easily mix and match dies from all your sets for different card combos!! AAAACKK!! Mind blown!! Talk about getting more value!!
After ebrushing the edges of my panels of my card I ran them through my Xyron machines. The smaller panel I ran through my 2.5" Create-a-Sticker.

And the 2 larger panels I ran through my Xyron Creative Station. I love my Xyrons!! Not only is sticker making super convenient but the quality of the adhesive is just AMAZING and I know that of I use it on my projects it's not gonna go anywhere.  Which is an absolute must since I'll be adding extra weight to make my card into a shaker card. 
Speaking of shakers... 
I added acetate to the back of my donut hole and added foam adhesive/ foam tape to the back of that. This props up my donut so I have room for all the little goodies to shake around behind my donut.
I cut out a 2 inch circle out of patterned paper to use as a backing to my donut hole. I adhered it to the center of my card base. I also stamped my sentiment from my Sweet On You stamp set by Pink and Main. 
I placed tiny scoopfuls of sequins,glitter, and seed beads toward the center of my circle. 

Then I peel my adhesive's backer and placed over my circle making sure the foam adhesive was pressed down securely... and done!!

Here are some close ups of my shaker...


And here is my finished card!!
I hope you liked today's project!! 

Hope you all give shaker making a try they are just so much fun not just to play with but to make also!!

~ Mitsy