Showing posts with label eclips. Show all posts

Saturday, July 22, 2017

With You - Lori Whitlock Flower Card

Hello, Crafty Friends! Mitsyan Wright here, back again and now officially part of the New Lori Whitlock Creative Team! Woohoo!!

I have this wonderful Flower Card to share with you all using one of the flower files from Lori's Bird Tree Flower Bundle Set.

Full Tutorial and details can be found on the Lori Whitlock Blog.
This card is perfect to give to your significant other or your bestie. And makes a great 'feel good' or 'just because' type card, because you don't need a special holiday to let someone know you're thinking of them.
I really love the detailed layers on these flowers!!! These were so much fun to make! I'm sure these flowers will bring a smile to anyone's face!!

Hope you all enjoyed this tutorial and give these pretties a go!

HAVE FUN CREATING!
~Mitsyana Wright

Supplies Used
Bird Tree Flower Bundle (Lori Whitlock)
Sizzix eclips w/ ecal software
Cardstock- Brwon, White (Recollections)
Patterned Paper (Lawn Fawn)
Sentiment- Hummingbirds Stamp Set (Pink and Main)
Mega Runner (Xyron)
Color Box Ink- Marigold, Orange, Moss green, brown (Clearsnap)
VersaFine Onyx Black Ink (Imagine Crafts/ Tsukineko)
2Way Glue Pen (EK Sucess)
3/8" Double Stitched Grosgrain Ribbon

***Disclaimer***
This blog is compensated to provide opinion on products, services, websites and various other topics. Even though the owner(s) of this blog receives compensation for our posts or advertisements, I always give my honest opinions, findings, beliefs, or experiences on those topics or products.
The views and opinions expressed on this blog are purely my own. Any product claim, statistic, quote or other representation about a product or service should be verified with each manufacturer, provider, or party in question.

This blog may contain affiliate links, making a purchase through these links helps fund this blog at no additional cost to you.


Thursday, January 12, 2017

Winter Care Kit

Hello Crafty Friends!! 
It's been a while but I'm back! This will be my last project of the term for Team Xyron. What an amazing ride!! It has been an absolute pleasure working with so many talented and creative ladies and many more amazing companies!! Hopefully I'll be back again for next term to do it all over again! I love my Xyron Family!!

Well, as you all know, it's still winter (aka , cold and flu season). And my household has been going through a bout of the sniffles lately. Partially due to allergies and the other  part because of the weather. 

Our Texas weather is inconsistent and highly erratic. We recently had all of winter poured into one weekend. One day we had 70-80 degree weather and then the next day it dropped to 19... what the heck?!! And that is why we get sick so easily. Warm, cold, warm, cold, wet dry wet, dry. Why can't the weather just make up it's mind already!! AAHHH!!!

My family isn't the only ones affected. Lots of peeps have been getting sick. So I decided to make Winter Care Kits for friends and family who get hijacked by coughs and sniffles!


Supplies Used
Eclips 2 (Sizzix)
eCAL 2 Software (Craft Edge)
Blazing Poppy Die (Heartfelt Creations)
Get Well (Pink and Main)
VersaMagic Midnight Black (Imagine Crafts/ Tsukineko)
Brads
Glossy Accents (Ranger)


The boxes I used to make these kits are a FREE SVG download from SVG Cuts. It is their Cozy Socks Gift Box . I downloaded it onto my computer, extracted the files, then opened them using my electronic cutting software.

One panel is too big to fit on one page, so I opened each piece onto their own page.


Then loaded my paper onto the cutting mat and into my cutter, then let the machine do all the work! It was done cutting in no time!


I loaded a different, yet coordinating, paper for each panel. All paper is from DCWV's Elegant Holiday Stack.
Once my panels were done cutting, I folded them on their perforated crease lines. Next, I used my Xyron Mega Runner on the bottom and side flaps (basically all the narrow flap), leaving the top open flaps adhesive free. 
I used my bone folder to burnish my flaps down securely for maximum adhesion.

 Then, I inserted my "Care Kit" items. Nice warm socks for cold days. Facial tissue for running noses, Cough drops for sore throats. And there still a little more room for packets of tea or pain reliever if I wanted to add those. It's a pretty nice sized box!

 I decided that this box was too plain even with all the pretty paper. So I made a belly band for it.
I cut a strip of paper measuring 1.5" x 12". Then scored it at 2-1/4", 4", 8", and 9-7/8". Folded on the score lines, slightly overlapped the ends and adhered with my Xyron Mega Runner.

I found a tag in my Elegant Holidays stack that went perfect with my box, I cut it out and stamped it with "get well soon" just under the For You.

Then I die cut flower petals and made a couple blooms (one large, one small). And also attached to the belly band.

And here is my finished Winter Care Kit...


Hope you enjoyed this project...

And maybe even make your own Winter Care Kits of your own!

Thanks for stopping by!

~Mitsy

Friday, January 29, 2016

DIY Chore Chart with Free SVG file


Hello Crafty Friends!!! 
I have a bit of a confession... I am an addict. And sadly I cannot stop myself, help myself, or want to either. I am addicted to Pinterest!!

Pinterest, that magical land where you can find anything about everything!! And, in most cases with complete how-tos!!

Which brings me to today's project. I've seen several posts on how to make chore charts for your children.  I didn't want anything that was bulky or took up a lot of space. So I decided at having a hand at creating an SVG file that can simply be downloaded and cut with my electronic die-cutting machine.


This has to be one of the easiest and quickest projects I ever did!! And you can make one too!!! Because...
I will be linking the file in this post!!

Supplies Used
Electric Die Cutting Machine (I used a Sizzix eclips with ecal software)
Xyron 9" Magnet Cartridge
Core'dinations Cardstock- Fade to Black
Basic Grey Paper- Dear Heart Collection Pack

(Optional)
Ebrush & Sharpie Markers 
Disc Magnets
Hot glue and Glue Gun
Prima Marketing Flowers and Buttons


After uploading the chore chart file into my software, I loaded my mat with a full 12" x 12" sheet of paper. This color will be for my grid lines. I cut the file at 9 "x 11.5".


I think it came out pretty darn awesome. I wanted to make it simple because my children are all pretty young still. And a huge overly detailed one might be confusing to them. I was able to divide the chart and include a "to do" and "done" section... so all your child has to do is move their marker. I also added a little "note" area. This if great for reminders or shopping list. You can find that version of the chart file HERE.

And for those of you who would like the option of customizing your own, I also have a blank chart as well. You can find that file HERE.

This part is totally optional! But you know me... I have to eBrush EVERYTHING!!! I think it adds so much depth and really makes the words POP! I first taped off the word with blue painters tape and airbrushed the words using a teal and a turquoise sharpies.


Once I was done ebrushing I flipped it over and applied 2 way glue onto the entire backside. I applied different patterned papers from Basic Grey's Dear Heart Collection as panel pieces. I think these paper are gorgeous and just perfect add as my chart backer.

If a solid panel look is not for you, and you would like the option of adding different panels to the back of your chart I also have a panel file for you! I sized these panels to slightly overlap each other so be aware that they are slightly bigger than their designated spaces.


After combing the background papers to my liking I gave my entire chart a run through my Xyron Creative Station with the Magnet Laminate cartridge loaded.

And here is my finished chart! 

Now I  can slap it up on my fridge because I just made a Magnetic Chore Chart!! And because the Xyron Magnet cartridge also laminates... guess, what??!! It is also now a dry erase board!!


I used some fridge magnets I had previous made as chart markers. I simply hot glue disc magnets to the backs of buttons. And for a little added decoration I added more discs to the back of paper flowers too... OMG, how stinkin' cute is that??


Here is a closer view of my chore chart...


And here are all the links to download links:

I hope you enjoyed this project!! My children loved it!! And they are the weirdest children EVER!! the very next day, after seeing the chart on the fridge and reading it, my daughter scurried to see what chore they could do on the list so they could move their markers... Weird, right??!! I mean what child actually wants to do housework and chores?? LOL Apparently, mine!! I'm gonna just let that ride because I don't want to break the spell!!

We'll see you next time!!

HAPPY CRAFTING!!
~Mitsy


Monday, December 14, 2015

Christmas tags


Hello, Crafty Friends!! I'm sure everyone is up to their eyeballs in Christmas shopping by now! But let's not forget to make those packages extra pretty!

It's not as hard as it looks! You can start small and simple. And today I have a project that can be a good starting point... CHRISTMAS TAGS!!

I don't have many tag type dies. So I figure I could cheat a little and use my electric die cutting machine. And, just as luck would have it, I was able to find some in my library section of my ecal software. I sized them to 5 inches and let the machine cut multiples out at one time.

Then I used my Teresa Collins Christmas tree pocket die to cut out a window in my tags. I'm not going to be using the trees right now so I'll set them aside. Don't discard them!! We can always use them for another project later!

Then I took my tag and embossed it with my TC embossing folder. Since I used Coordinations papers I lightly sanded off the top layer exposing a lighter core below.

Then I ran all my tags through my Xyron Creative Station.

I peeled the protective film and attached my tags onto plain white cardstock (leaving some space between each). I trimmed each tag with a white border going around the entire tag.


I used my Teresa Collins Bow die from the Girl's Best Friend set to cut white cardstock. From one 8.5"x11" sheet I was able to get 9 bows and middles.

I used a stylus to help curve my loops and folded my sides in toward the center and hot glued in place. I finished the centers with the little rectangles that came included with the bow die and fastened with more hot glue.


Then I attached the bows onto the tags with more hot glue.

I cut out my Love script out of black cardstock. This die is from the Teresa Collins Memory Collection. I used a glue pen to attach to my tag and trimmed the overlapping ends with scissors.

I finished my tags with button centers for my bows and attached stitched ribbon through the hole on top.

And there ya have it... festive gift tags!!


These will be great on gift boxes and bags and would look super cute on favors! 

They are also great for those gifts that are just too big to wrap or an awkward shape... forget the wrapping completely and just slap a gift tag on it.. presto, it's instantly dressed up!!


Supplies Used
Cut'n'boss (Craftwell)
Teresa Collins Pocket Dies- Memory Collection, Thankful, Girl's Best Friend(Craftwell)
Teresa Collins Decor Circles Embossing folder (Craftwell)
Eclips machine and ecal software.
Red Cardstock (Core'dinations)
White & Black Cardstock (Bazill Basics)
Hot glue gun and glue sticks
Red Buttons- Assorted sizes
2way Glue Pen (EK Success)
Stitched Grosgrain Ribbon (Paper Mart)


Hope you enjoyed this tutorial!

Hurry and make something pretty & festive!!

HAPPY CRAFTING!!
~ Mitsy


Thursday, August 6, 2015

You Mean the World to Me!


Hi Crafty Friends... I am so excited about this weeks sponsorship for team ebrush!! Why? Because it involves two of my favorite crafting pastimes... eBrushing and Paper Piecing!! And I am head over heals in love with with all the digital files from our August sponsor, KaDoodle Bug Designs!!

Supplies Used
eBrush (Craftwell)
Cutie KaToodles Earth Squirrel (KaDoodle Bug Designs)
Sizzix eclips and ecal software
Owl Nerds stamp set (Pink and Main)
Book Shaped Nesting Dies (Darice)
Mega Runner(Xyron)
Sharpie Markers (light green, green, orange, brown, light blue, blue, dark blue)
Spectrum Noir Marker GB1
Cardstock(light blue, light green, craft, black, white)
Foam adhesive squares
2 way Glue (EK Success)
white opaque marker -snow (Recollections)
PITT Artist Pen XS, M
Chalklets chalk (EK Success)
VersaFine Onyx Black Ink Pad (Tsukineko)
Paper Trimmer
Scissors

I used my Sizzix eclips machine and ecal software to cut out my file. I used the default sizes and just separated the shapes by color to make cutting faster and easier.

I started off by ebrushing  my globe land pieces in light green, green, and brown sharpies.

for the main planet piece I ebruhed it in light blue, blue, and dark blue.

Then I glued my land pieces on my planet using a glue pen.


I also ebrushed my irises in light green, green, and a small bit of brown.
For the highlights of the eyes I made little circles on the blacks of the eyes using a white opaque marker. I line the eyes with an fine tip black pen. I love Faber-Castell's PITT Artist Pens for this. They dry permanent so even if I go oever them with another color it will not bleed or smear.

For the body of the squirrel I cut it out of craft paper and ebrushed it with my brown sharpie and then lightly went over the edges with orange.

One thing I super love about the KADoodle Bug files is that most of them come with a shadow to glue the pieces onto. This helps to guide you on what pieces go where and how far apart they should go. I glue all my pieces down with a glue pen and start with the ears first.  


I ebrushed the inner ears, muzzle, tummy and foot bottoms using Spectrum Noir in GB1.


I added foam adhesive to the back of my piece to give it more dimension.


I used my Darice scalloped die andcut polka dot patterned paper and  a 2"x 4" strip of patterned paper to make a card front. I adhered my pieces to my card using my Xyron Mega Runner.


I stamped out my sentiment and used my scissors to cut out each word separately and adhered to my card. 

At the last moment I decided I wanted a a bow on my card. So I used some brown and white bakers twine and wrapped it a few times around my card front panels. I made a quintuple loop bow and glued it down with diamond glaze and topped it with a flower button.

And here is my finished card... 


I hope you enjoyed my paper piecing... I really do love making them! I always find joy just staring at the finished product! I hope you did too!!

Head over to the KaDoodle Bug Designs or Craftwell fanpage to see how you could win a $25 Gift Certificate to KaDoodle Bug Designs!!

Good Luck & Happy Crafting!!

~ Mitsy


Saturday, July 11, 2015

Sweet On You- Donut Shaker Card

Hey Crafty Friends... I'm here to share with you all a project I posted a few days ago on Facebook. I had a few requests on when I was going to post the tutorial onto my blog so here it is.

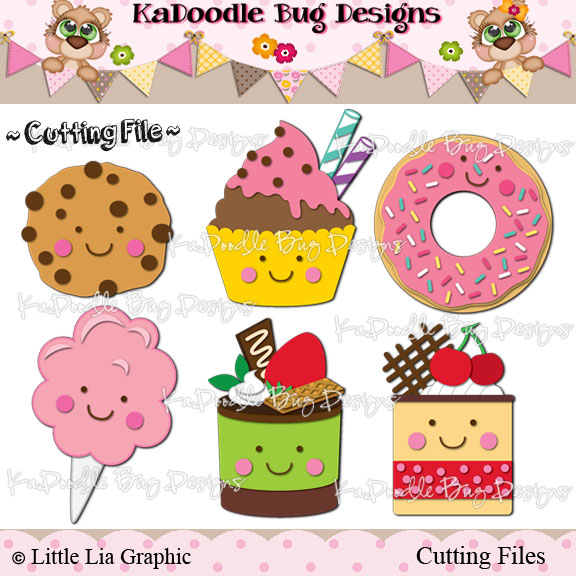
I made this super sweet shaker card using an ADORABLE cut file from KaDoodle Bug Designs called Treatful Cuties. All the treats are just soooooooo stinkin' cute but I ultimately decided on using the donut... because, well, I love donuts!!!

Treatful Cuties - Click Image to Close

Supplies Used
Treatful Cuties Cut File (KaDoodle Bug Designs)
eBrush (Craftwell)
Sweet on You Stamp Set (Pink and Main)
Blueprints 14 (My Favorite Things- Die-Namics)
Spectrum Noir Markers (GB3, PP2, PP4, TN3, IB2)
Cardstock (white, black, yellow, peach, pink)
Assorted patterned paper
EK Success 2way Glue Pen
Double-sided Foam Adhesive or Mounting Tape
Rhinestone bow
Sequins
Star Shaped Glitter
Seed Beads
Acetate 

I resized it in my ecal software and cut it out using my Sizzix Eclips 2. The whole assembled donut is about 3 1/4" big.

There are 3 layers that make up the donut. 2 icing layers and the donut base... oops and over course the sprinkle... but I don't count that as an actual layer. I cut my top icing out of light pink cardstock and ebrushed it with my Spectrum Noir in PP2 and PP4. My second layer of icing I cut out of a sunny yellow cardstock and ebrushed it in GB3... and my base layer I I cut out of a flesh colored cardstock and ebrushed it in TN3. I cut my sprinkles out of plain white cardstock and left them in place stuck on my mat. Then I had colored them in PP2, GB3, IB2, and left a few white.

I then quickly ran my icing layers and donut base through my Xyron 3" Sticker Maker.
Then I stuck my icing onto my donut... It's already looking stinking cute!
I used the cut out of my sprinkles as a map/ template... placed it over my donut for exact placement of my sprinkles. you could this freehand but I liked the how the sprinkles looked when I colored them and wanted them to be laid out the same way. I just rubbed my glue pen into each cut out hole and placed the matching sprinkle into each hole... it was easy to match because when I colored each sprinkle I went outside of the edges overlapping onto the surrounding paper.
Then I used my glue pen to glut on the face and cheeks and my diamond glaze to glue on a rhinestone bow.
I used my My Favorite Things Blueprints 14 for a super quick and easy card front. I love the Blue prints dies... no need for measuring! Just cut out each die in coordinating papers and you have an instant card in no time! And as a bonus these sets have embellishment dies included in each set! If you own several sets you can easily mix and match dies from all your sets for different card combos!! AAAACKK!! Mind blown!! Talk about getting more value!!
After ebrushing the edges of my panels of my card I ran them through my Xyron machines. The smaller panel I ran through my 2.5" Create-a-Sticker.

And the 2 larger panels I ran through my Xyron Creative Station. I love my Xyrons!! Not only is sticker making super convenient but the quality of the adhesive is just AMAZING and I know that of I use it on my projects it's not gonna go anywhere.  Which is an absolute must since I'll be adding extra weight to make my card into a shaker card. 
Speaking of shakers... 
I added acetate to the back of my donut hole and added foam adhesive/ foam tape to the back of that. This props up my donut so I have room for all the little goodies to shake around behind my donut.
I cut out a 2 inch circle out of patterned paper to use as a backing to my donut hole. I adhered it to the center of my card base. I also stamped my sentiment from my Sweet On You stamp set by Pink and Main. 
I placed tiny scoopfuls of sequins,glitter, and seed beads toward the center of my circle. 

Then I peel my adhesive's backer and placed over my circle making sure the foam adhesive was pressed down securely... and done!!

Here are some close ups of my shaker...


And here is my finished card!!
I hope you liked today's project!! 

Hope you all give shaker making a try they are just so much fun not just to play with but to make also!!

~ Mitsy